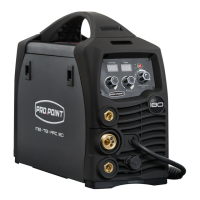
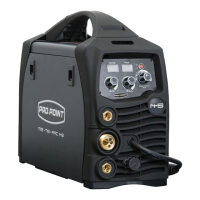
V1.0 145A MULTI-PROCESS MIG-ARC-TIG WELDER 8619470
Visit www.princessauto.com for more information 31
MIG WELDING
Spatter
1. Wire feed speed set too high.
2. Voltage too high.
3. Wrong polarity set.
4. Stick out too long.
5. Contaminated base metal.
6. Contaminated MIG wire.
7. Inadequate gas flow or too
much gas flow.
1. Select lower wire feed speed.
2. Select a lower voltage setting.
3. Select the correct polarity for the wire used - see
Installation & Operation For MIG With Gas or Installation
& Operation For Gasless MIG.
4. Bring the torch closer to the work.
5. Remove materials like paint, grease, oil and dirt, including
mill scale from base metal.
6. Use clean dry rust free wire. Do not lubricate the wire
with oil, grease etc.
7. Check the gas is connected; check hoses, gas valve and
torch are not restricted. Set the gas flow between 21 to
30 CFH flow rate. Check hoses and fittings for holes,
leaks, etc. Protect the welding zone from wind and
drafts.
cavities or holes
resulting from
gas pockets in
weld metal.
2. Inadequate gas flow or too
much gas flow.
3. Moisture on the base metal.
4. Contaminated base metal.
5. Contaminated MIG wire.
6. Gas nozzle clogged with
spatter, worn or out of shape.
7. Missing or damaged gas
diffuser.
8. MIG torch euro connect
o-ring missing or damaged.
1. Check that the correct gas is being used.
2. Check the gas is connected, check hoses, gas valve and
torch are not restricted. Set the gas flow between 21 to
30 CFH flow rate. Check hoses and fittings for holes,
leaks etc. Protect the welding zone from wind and drafts.
3. Remove all moisture from base metal before welding.
4. Remove materials like paint, grease, oil and dirt, including
mill scale from base metal.
5. Use clean dry rust free wire. Do not lubricate the wire
with oil, grease etc.
6. Clean or replace the gas nozzle.
7. Replace the gas diffuser.
8. Check and replace the o-ring..
Wire stubbing
during welding
1. Holding the torch too far
away.
2. Welding voltage set too low.
3. Wire Speed set too high.
1. Bring the torch closer to the work and maintain stick out
of 5 to 10 mm.
2. Increase the voltage.
3. Decrease the wire feed speed.
− failure of weld
metal to fuse
completely with
base metal or a
proceeding
weld bead
1. Contaminated base metal.
2. Not enough heat input.
3. Improper welding technique.
1. Remove materials like paint, grease, oil and dirt, including
mill scale from base metal.
2. Select a higher voltage range and /or adjust the wire
speed to suit.
3. Keep the arc at the leading edge of the weld pool. Gun
angle to work should be between 5 and 15°. Direct the
arc at the weld joint Adjust work angle or widen groove
to access bottom during welding. Momentarily hold arc
on side walls if using weaving technique.
Excessive
Penetration −
weld metal
melting through
Too much heat. Select a lower voltage range and/or adjust the wire
speed to suit Increase travel speed.
Penetration −
shallow fusion
between weld
metal and base
metal
1. Poor in incorrect joint
preparation.
2. Not enough heat input.
3. Contaminated base metal.
1. Material too thick. Joint preparation and design needs to
allow access to bottom of groove while maintaining
proper welding wire extension and arc characteristics.
Keep the arc at the leading edge of the weld pool and
maintain the gun angle at 5 and 15° keeping the stick out
between 1/8 to 1/4 in.
2. Select a higher voltage range and /or adjust the wire
speed to suit Reduce travel speed.
3. Remove materials like paint, grease, oil and dirt, including
mill scale from base metal.