©2022 Pro-Vision Solutions, LLC. Page 13 of 56
Analog HD Mini-Dome Camera Installation
The AHD Mini-Dome Camera (Kit P/N: DVR-921, Camera P/N: PC-1921) is designed to be
mounted inside a vehicle. The camera is used most often mounted in the interior of the vehicle
covering the driver, passengers, or cargo. It has a built-in microphone for audio recording as well
as built-in night vision LED’s with an automatic sensor for capturing video in low-light conditions. Its
small form factor and high adjustability allow this camera to be mounted in a multitude of interior
locations. The camera lens has a wide 170° horizontal and 90° vertical coverage.
Mounting Location:
The ball and socket dome design allows 360° rotation around the base, 180° adjustment
perpendicular to the base, and 360° rotation to level the image. The camera typically is
installed with the cable going through a panel directly underneath the mounting location to hide
the cable, but it can also be installed where the cable exits the side of the base if there is no
room to route the cable behind the camera’s mounting location.
Installation:
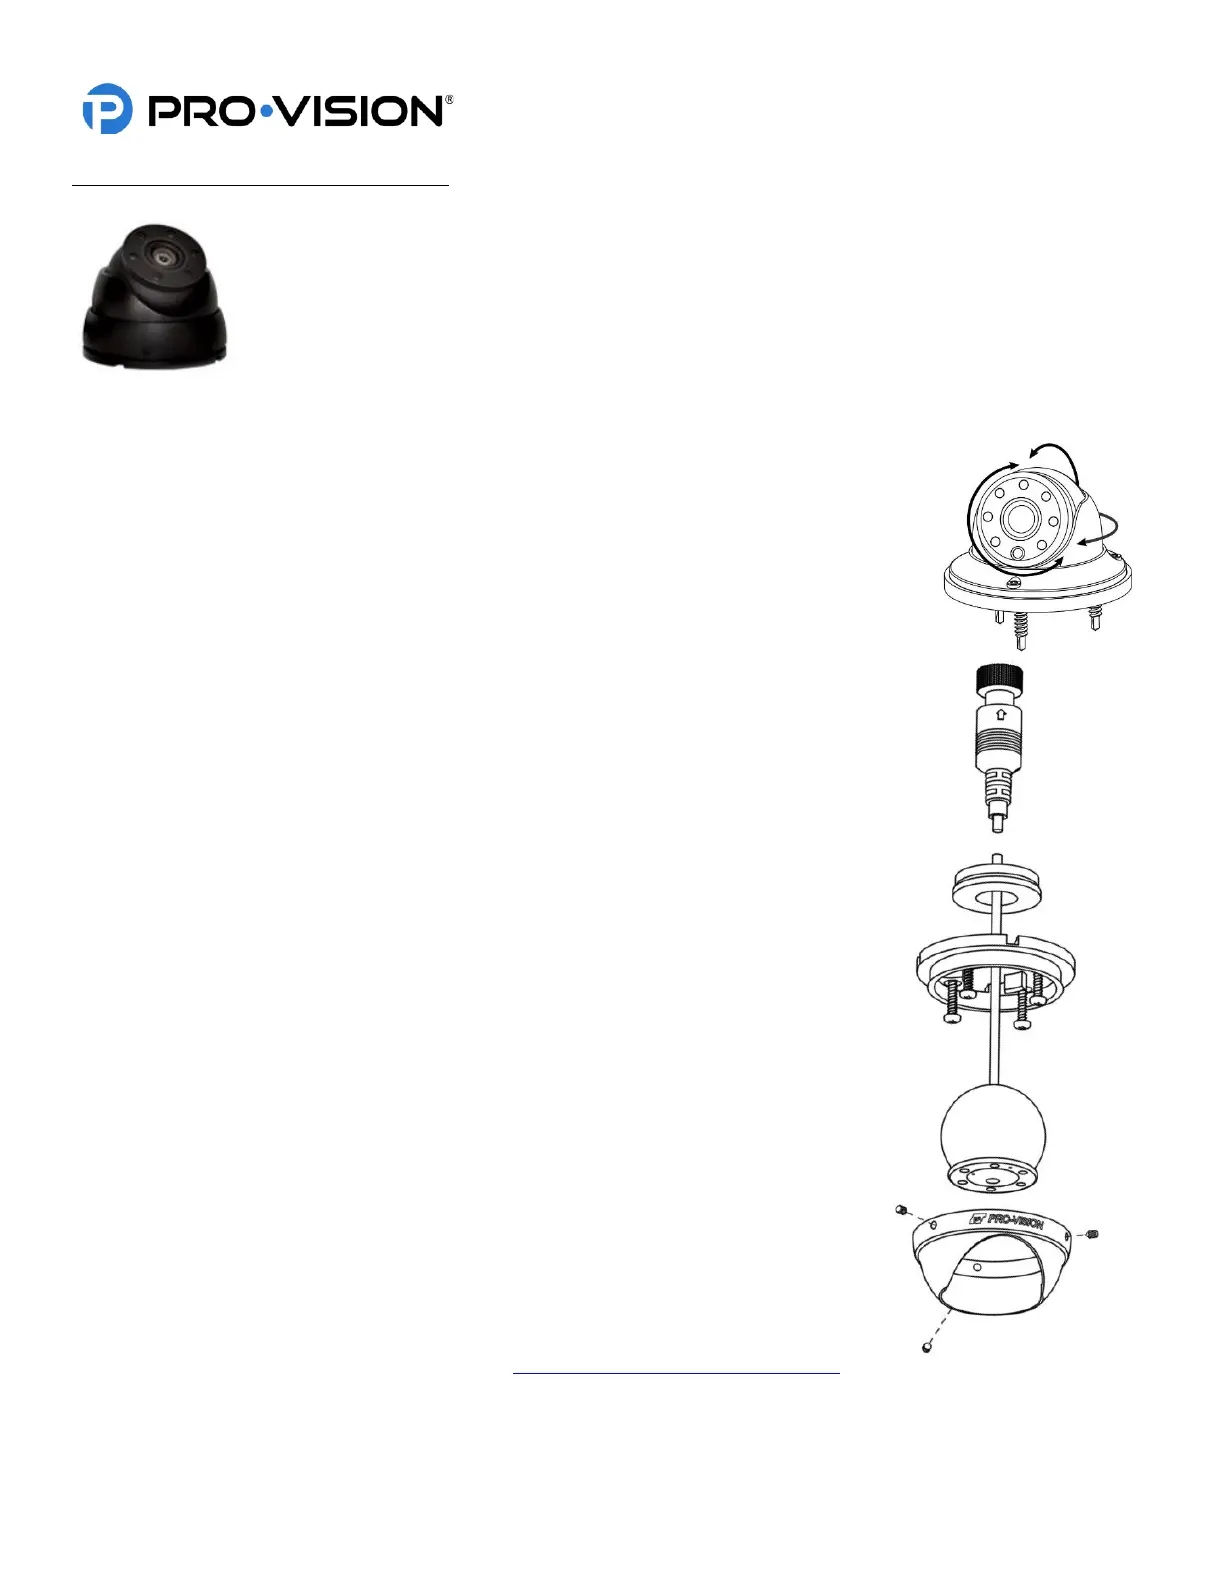
1. Disassemble the camera by loosening the three (3) hex head set screws located on
the locking ring. Lift up on the locking cover and remove it from the camera assembly.
Remove the camera ball and pull the cable through the mounting base.
2. Find the desired camera mounting location and hold the mounting base up in
position.
3. Mark the four (4) mounting holes using a marker or pencil.
4. If the cable is going to be routed through the center cable hole and into a panel,
mark the center cable hole as well.
5. If applicable, drill out the marked center hole using a 3/4” drill bit. Clean up any
sharp edges to prevent damage to the cable.
6. If the camera cable will exit through the cable grove in the mounting base
instead of through the mounting surface, the cable must be routed through the
cable grove before attaching the mounting the base to the mounting surface.
7. Align the camera base over the marked screw holes and then using a drill with a
Phillips bit, install the four (4) self-tapping mounting screws.
8. Connect the camera connector to the cable running to the DVR unit, if it is not
yet installed, install the cable at this time and then continue to step 9.
9. Hold the camera ball and feed any excess cable through the hole or cable grove
in the mounted base until the camera ball is resting on the center of the
mounting base.
10. Place the camera locking cover over the camera ball. Loosely tighten the three
(3) set screws holes using a 1.5mm Allen wrench, allowing the camera ball to
freely move until the desired camera aim is set.
11. Power on the DVR unit and connect to the Wi-Fi to view the live camera image
to properly aim it on the view page. (See Viewing Cameras on a Smart Device
for connection details)
12. When finished aiming, fully tighten the three (3) set screws.
 Loading...