©2022 Pro-Vision Solutions, LLC. Page 17 of 56
Analog HD Flush Mount Camera Installation
The AHD Flush Mount Camera (Kit P/N: DVR-918, Camera P/N: PC-1918) is designed to be
mounted in a body panel or bumper of the vehicle, flush with the surface. The camera is used most
often inside the rear bumper of vehicles, but it also works well mounted in an enclosure above the
engine compartment or rear window on rear engine busses. It has a built-in night vision LEDs with
an automatic sensor for capturing video in low-light conditions. Its small form factor and low-profile
mounting are its biggest advantage. The camera lens has a wide 130° horizontal and 65° vertical
coverage.
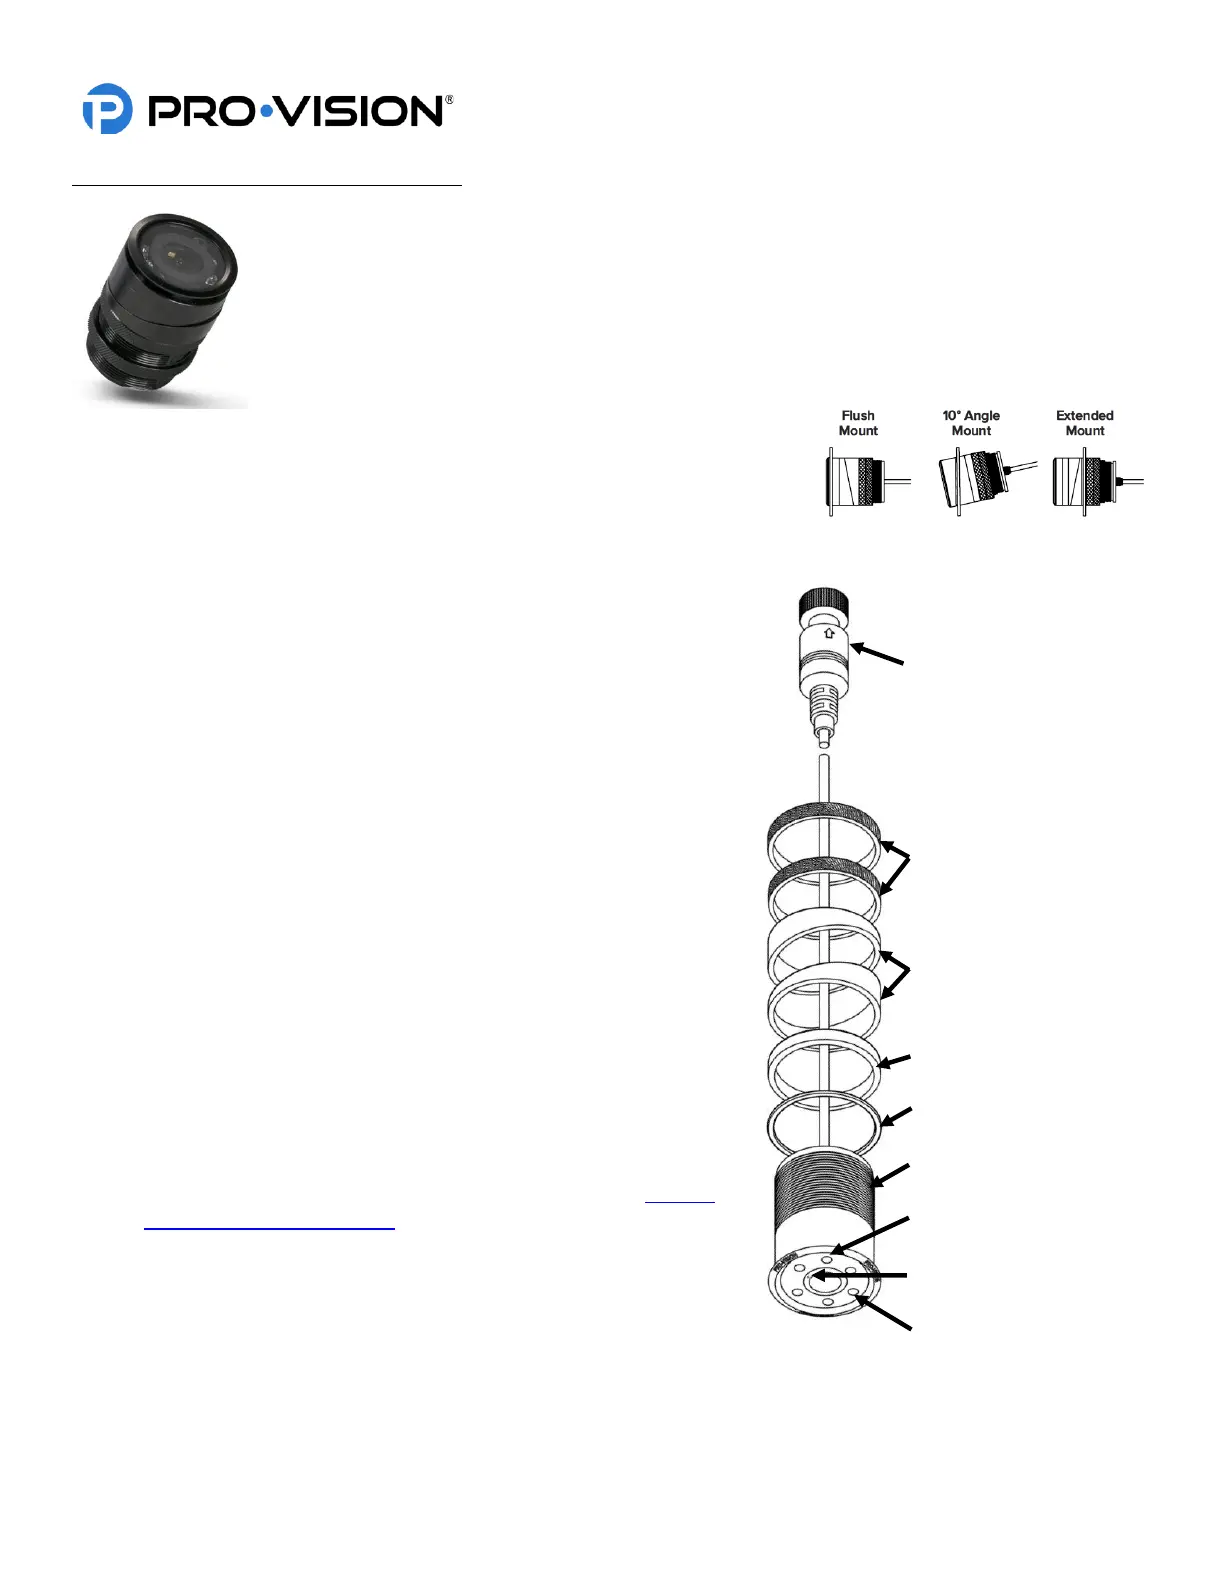
Mounting Location:
The camera mounts in a 1.25” hole and can be rotated 360° for proper aim; the
camera can also be tilted at a 10° angle by installing the angle rings on either side
of the mounting surface.
Installation:
1. Locate the desired mounting location, check for proper
clearance behind the surface for the camera body, then mark
and drill a 1.25” hole.
2. Disassemble the camera by loosening the two (2) threaded lock
rings, removing them, and sliding them off the cable and
connector. Then removing all the spacer rings.
3. Determine the order of the spacers as needed based on the
desired mounting as shown in the images above right.
4. Slide the outer spacers over the cable and onto the camera,
then slide the camera, cable first, through the mounting hole.
5. Slide the inner spacers over the cable and onto the camera.
6. Install the mounting gasket between the outer mounting surface
and the camera body or the first spacer.
7. Slide the two (2) threaded locking rings over the cable and then
thread them one at a time onto the camera body.
8. Connect the camera connector to the cable running to the DVR
unit, if it is not yet installed, install the cable at this time and then
continue to step 9.
9. Power on the DVR unit and connect to the Wi-Fi to view the live
camera image to properly aim it on the view page. (See Viewing
Cameras on a Smart Device for connection details)
10. When finished aiming, fully tighten the first locking ring and then
the second locking ring.
 Loading...