©2022 Pro-Vision Solutions, LLC. Page 18 of 56
Analog HD Marker Light Camera Installation
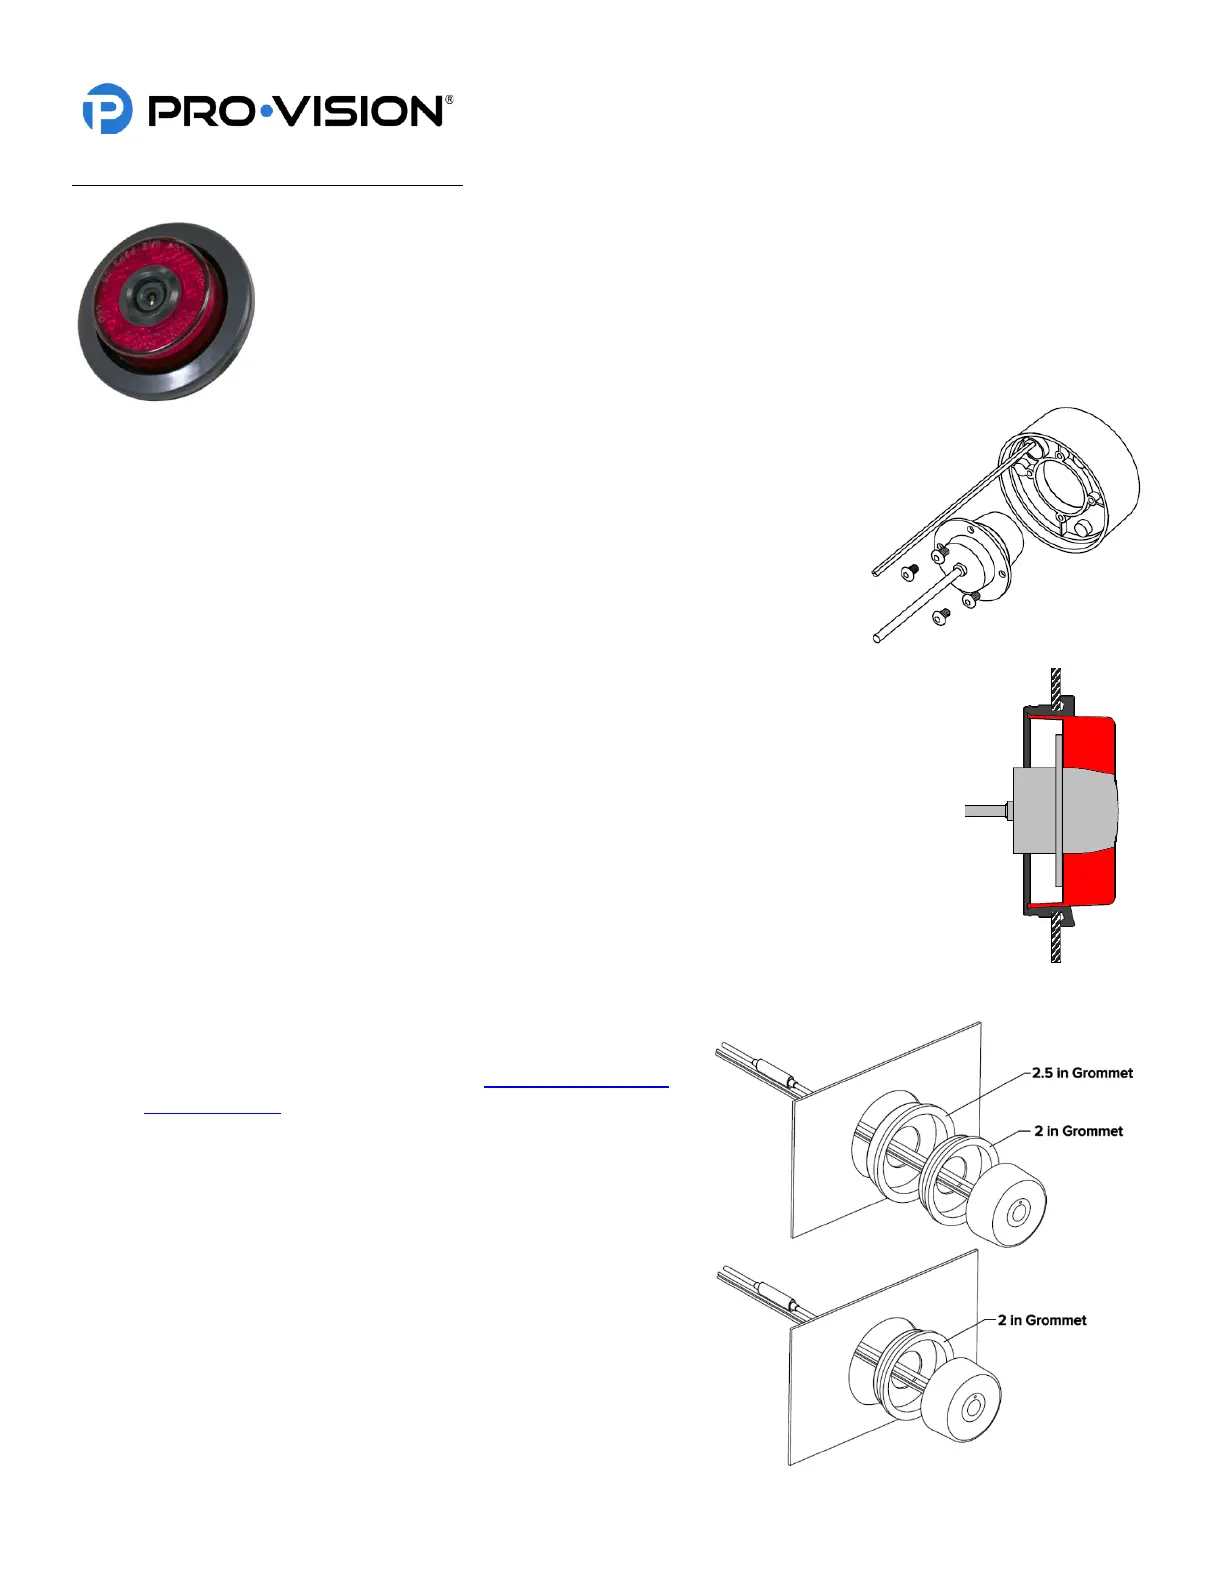
The AHD Flush Mount Camera (Kit P/N: DVR-910, Camera P/N: PC-1910) is designed to be
mounted in an existing 2” or 2.5” marker light hole in the rear body of the vehicle to replace a
standard 2” or 2.5” marker light. The camera is used most often as a backup camera and replaces
a marker light in the rear bumper. This camera is primarily used because it does not require any
holes to be drilled in the vehicle body and is typically very durable because the marker lights are
typically mounted in a protected area on the rear of the vehicle. The camera lens has a wide 145°
horizontal and 80° vertical coverage.
Mounting Location:
The camera mounts in an existing marker light hole. The camera can be rotated 360°
for proper aim but cannot be tilted at an angle. If possible, the camera should replace
the center most marker light to provide the driver with the most natural view.
Installation:
1. Locate the desired mounting location, remove the existing light to check for
proper clearance for the camera body.
2. Disconnect the wiring from the original light, then remove it and the grommet.
3. Assemble the camera to the light assembly using the 4 mounting screws.
4. Install the new grommet into the hole. For 2.5” light applications, first install the larger
grommet into the hole, then install the smaller grommet. (As shown below right)
5. Connect the red 12V LED power wire and black ground wire from the light assembly to
the existing wiring through the grommet.
6. Slide the camera cable into the hole in the back of the grommet.
7. Connect the camera connector to the cable running to the DVR unit, if it is not yet
installed, install the cable at this time.
8. Press the camera light assembly into the grommet and rotate the camera until the white
dot is at the top.
9. Power on the DVR unit and connect to the Wi-Fi to view the
live camera image so it can be properly adjusted to level by
rotating the light in the grommet. (See Viewing Cameras on
a Smart Device for connection details)
 Loading...