©2022 Pro-Vision Solutions, LLC. Page 23 of 56
Cable Routing:
After the locations of DVR and cameras have been determined, cables for the camera(s) can be routed. Determine the
approximate cable routing to the locations of each of the cameras. Remove all panels along the route that cables will take
to ensure accessibility. After the panels are removed and the path is accessible install the cables.
Installation Tips:
1. For multi-camera installations it is recommended to mark both ends of the camera cable with the camera number
using a marker with text (1, 2, 3, 4, etc.) or tick marks (I, II, III, IIII, etc.) on both ends of each cable. This will easily
identify which cable is at each location when final connections are made to the DVR.
2. Carefully open all video cables and lay them out to full length. This will make it easy to pull the cable and make
sure there are not snags or knots in the cable while it is unraveling.
3. When making holes for cables in panels drill a ¾” hole with a drill bit or step drill bit.
4. Leave at least 4” of slack near the camera connection points to allow future servicing of cameras.
5. If excess cable is present, this can be doubled over or wound up. After running cables, you may want to use cable
ties to secure them in place. If you do this, do not overtighten the cable ties. It is possible to damage the shielding
inside the cables by overtightening; make the cable ties snug or slightly loose. Do not use a cable tie guns as
these will overtighten the cable ties.
IMPORTANT! Read and understand the installation instructions below for the camera(s) to be installed BEFORE drilling
any holes in the vehicle. Some of the cameras have specialized mounting designs that are not apparent
without reading the instructions.
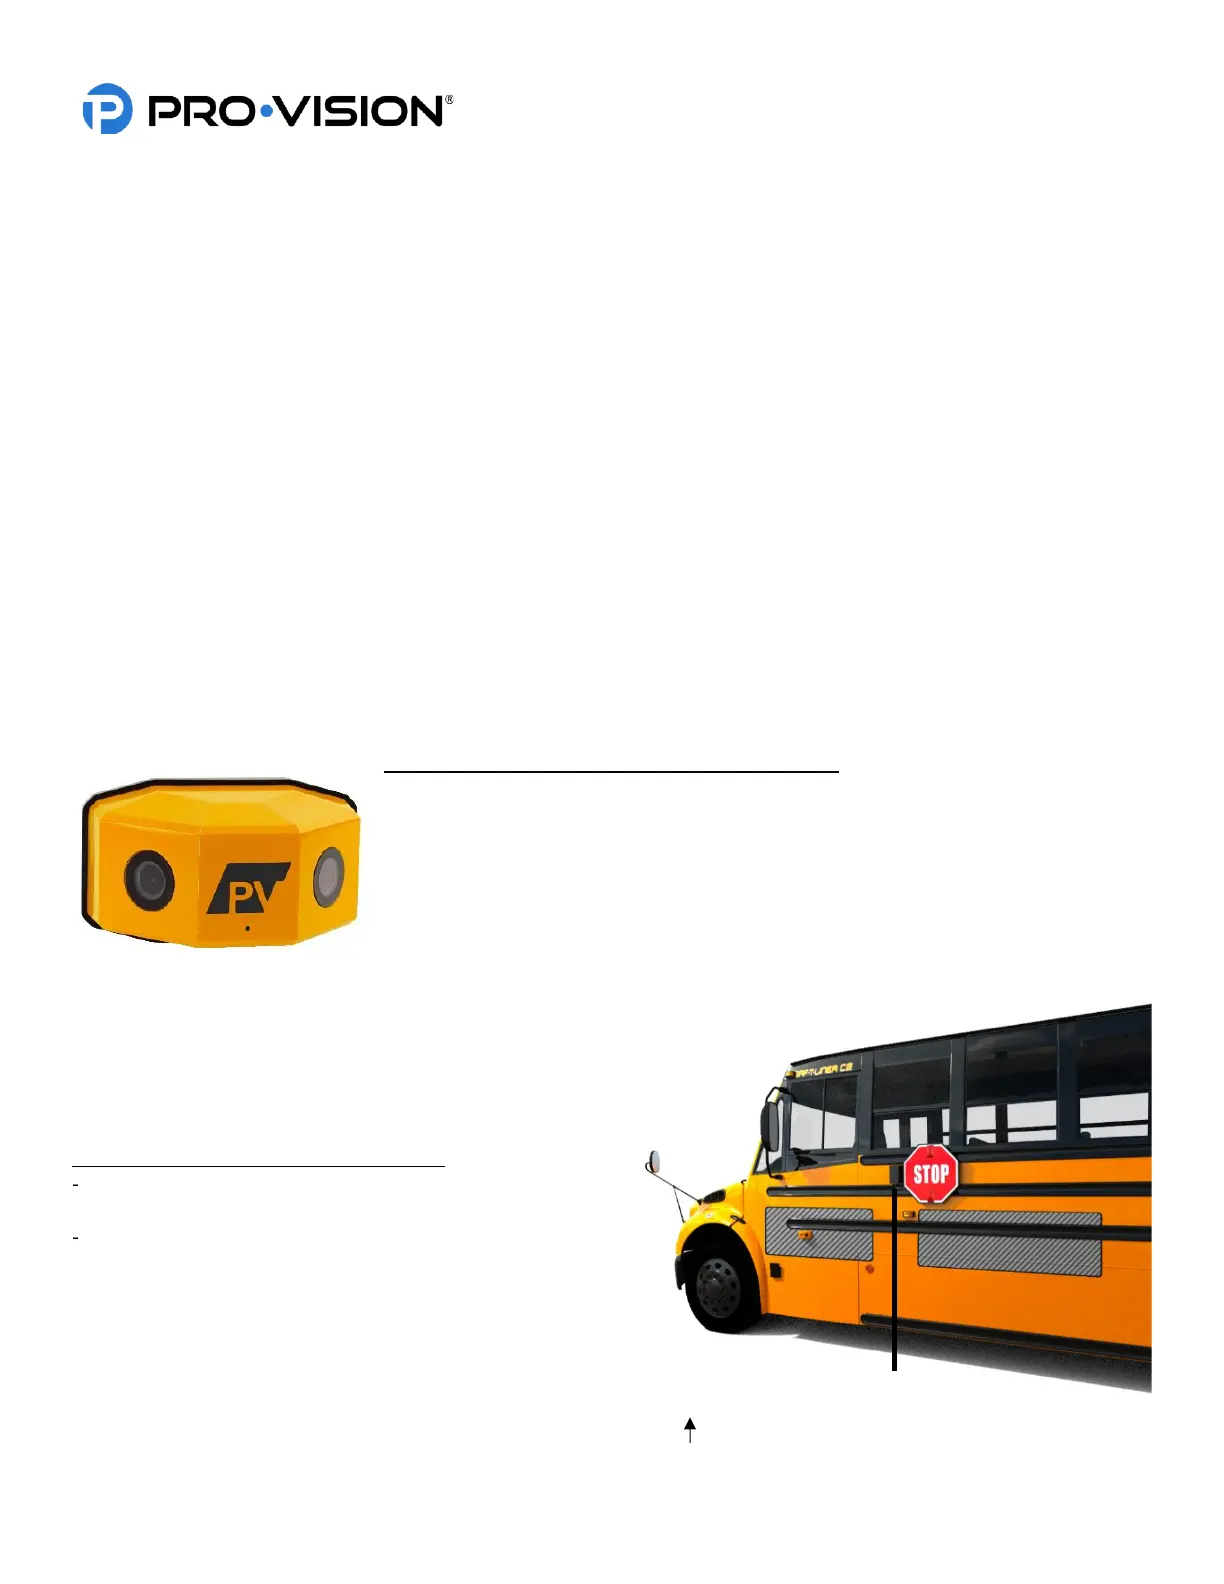
Digital HD Dual-Lens Stop-Arm Camera Installation
The HD Dual-Lens Stop-Arm Camera (Kit P/N: DVR-824 Camera P/N: PC-1824) is
designed to capture license plates and faces of drivers that pass a school bus while
the bus is stopped and has its flashing red lights and stop-arm open. The camera is
waterproof (IP-67 rated) and has two (2) lenses with low-light image sensors set at 45°
angles to the side of the bus that can provide 180° of coverage on the road side of the
bus. The camera is designed to be mounted directly to the bus, parallel to the road
with four (4) self-drilling Phillips head screws. The camera also has a waterproof
microphone for audio capture.
Mounting Locations:
The camera must be mounted parallel to the road surface on
the driver’s side of the bus. The open stop-arm should be
partially visible in the camera field-of-view, but not so much as
to obstruct vehicle license plate capture.
Recommended mounting (shown at right):
6”-18” below the bottom of the stop sign on the stop-arm
itself
12”-60” from the center of the open stop arm forward or
rearward
On most bus models, mounting in the area forward of the stop
arm provides faster and easier wire routing to the DVR.
The camera must be orientated such that the two (2) 4 mm
socket head bolts screw in from the bottom and the “PV” logo
is upright, facing toward the center of the road. The proper
orientation of the mounting bracket and camera are marked with “UP“.
 Loading...