©2022 Pro-Vision Solutions, LLC. Page 39 of 56
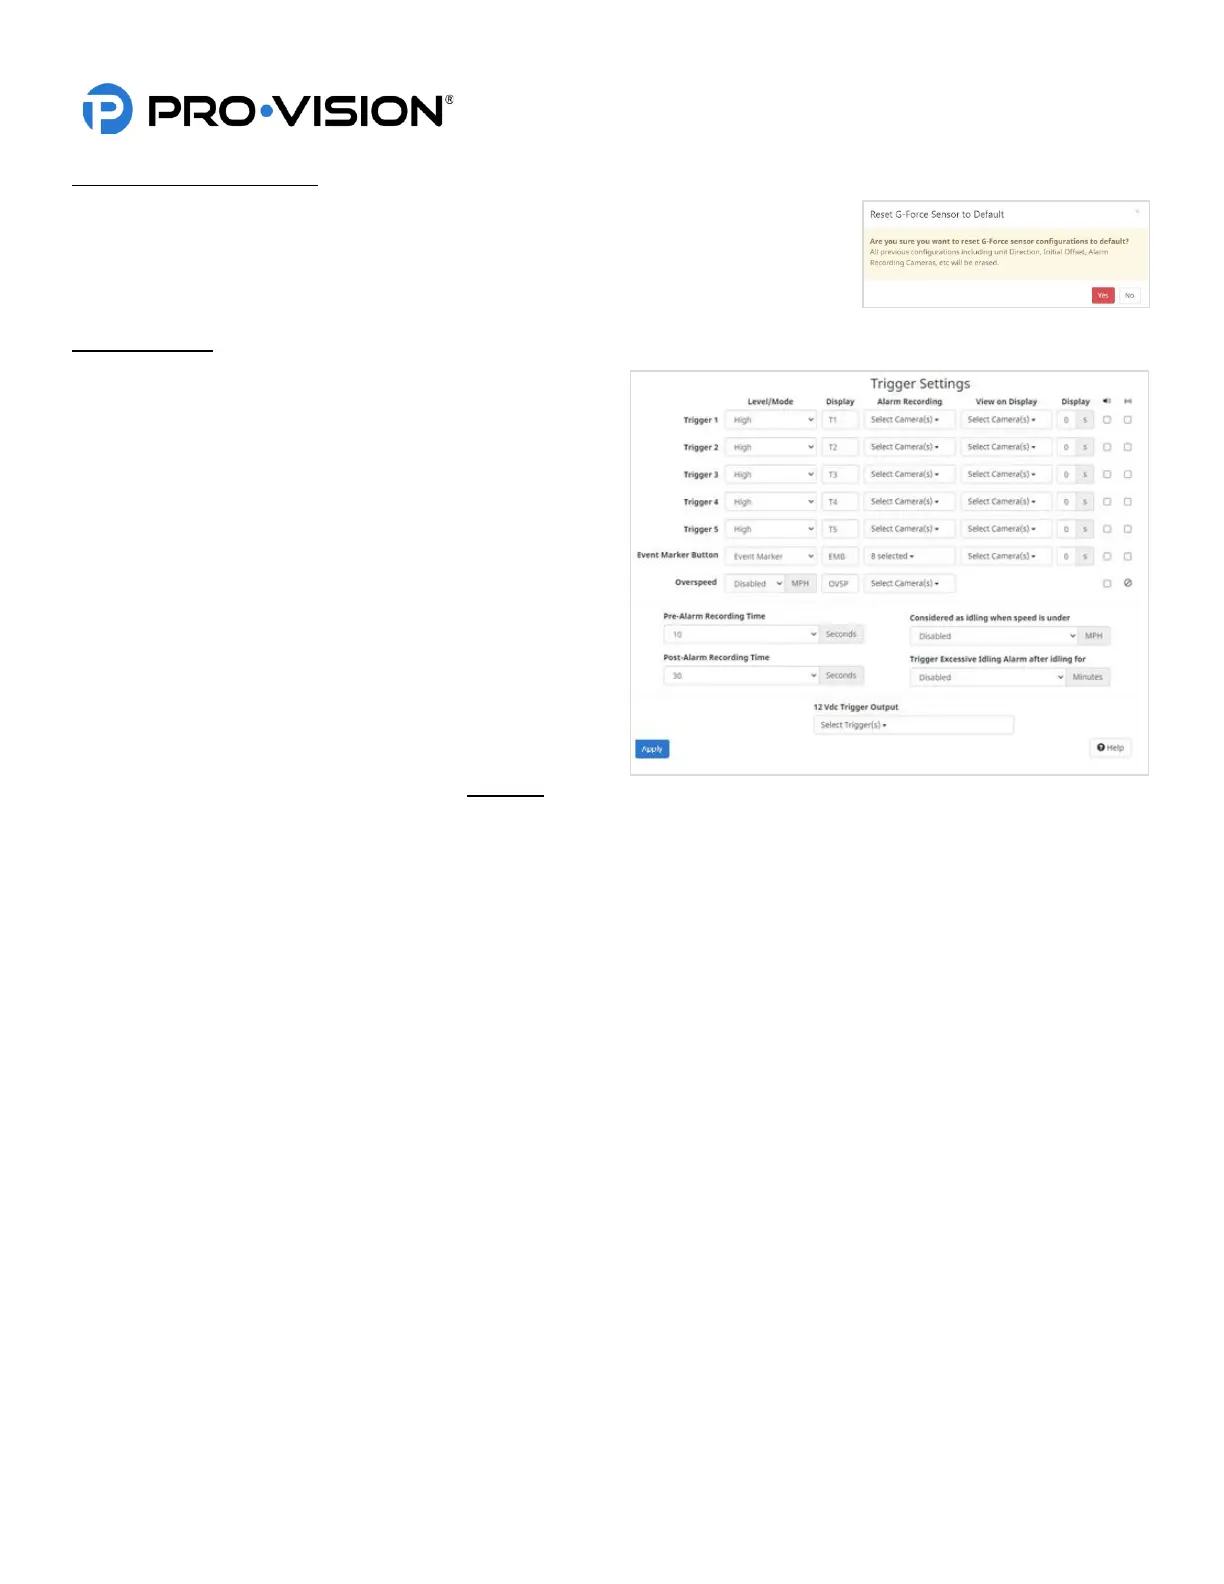
G-Force Calibration (Reset)
If the DVR has been relocated on the vehicle or if it is suspected that the calibration is
incorrect, press the “Reset” button at the bottom of the page. A warning dialog box will
display allowing the user to continue and replace all previous configurations with new
or default settings or cancel the action. To continue the reconfiguration, follow
additional system prompts after selecting “Yes”.
Trigger Settings
This page allows the configuration of all the triggers for
activating Alarm functions. Each row in the trigger setup
pages refers to a specific trigger.
Triggers 1-5 are the physical trigger wires on the rear of the
DVR unit, Event Marker Button is referring to the external
event marker button typically mounted near the driver, and
overspeed is based on the vehicle speed from the GPS.
Level/Mode:
Type of signal set to High if connecting to a 12-24V DC
signal or to “Low” if setting to a ground level signal.
Normally this would be set to “High”, but the wireless
microphone trigger (Trigger 3) should be set to “Low” level.
Display:
Enter a four-character code to show on the video in the
bottom left corner when a trigger is active. Example: If
trigger 1 is for a light bar activation, the word LTS may be used.
Camera Alarm Recording: Select the camera views that will Alarm record when the event has been triggered.
Full Screen View:
If selected when the trigger is active the monitor view will change to the selected view. When the trigger is inactive the
view will return to the default view set on the “Display Settings” page.
Alarm Beep:
Checking this box provides an audible tone to alert the operator that a trigger has been activated.
Remote Activation:
Checking this box will use the selected trigger to send a remote activation signal for BODYCAM devices if the remote
activation feature is also enabled.
Pre-Event Record Time:
Also known as pre-event recording, this is the amount of time the system will "cache" video for an alarm event (0-60
seconds). When a trigger is activated, this amount of time before the activation will be added to the start of the event.
Post-Event Record Time:
Also referred to as post-event recording, this is the amount of time an alarm recording will continue after a trigger has
been deactivated (0-180 seconds).
Idling Alarm:
If desired, set the speed (typically 0MPH) and time before an idling alarm is triggered on the DVR.
12VDC Trigger Output:
Select the desired triggers that will activate the 12VDC output (if connected).
 Loading...