18
17
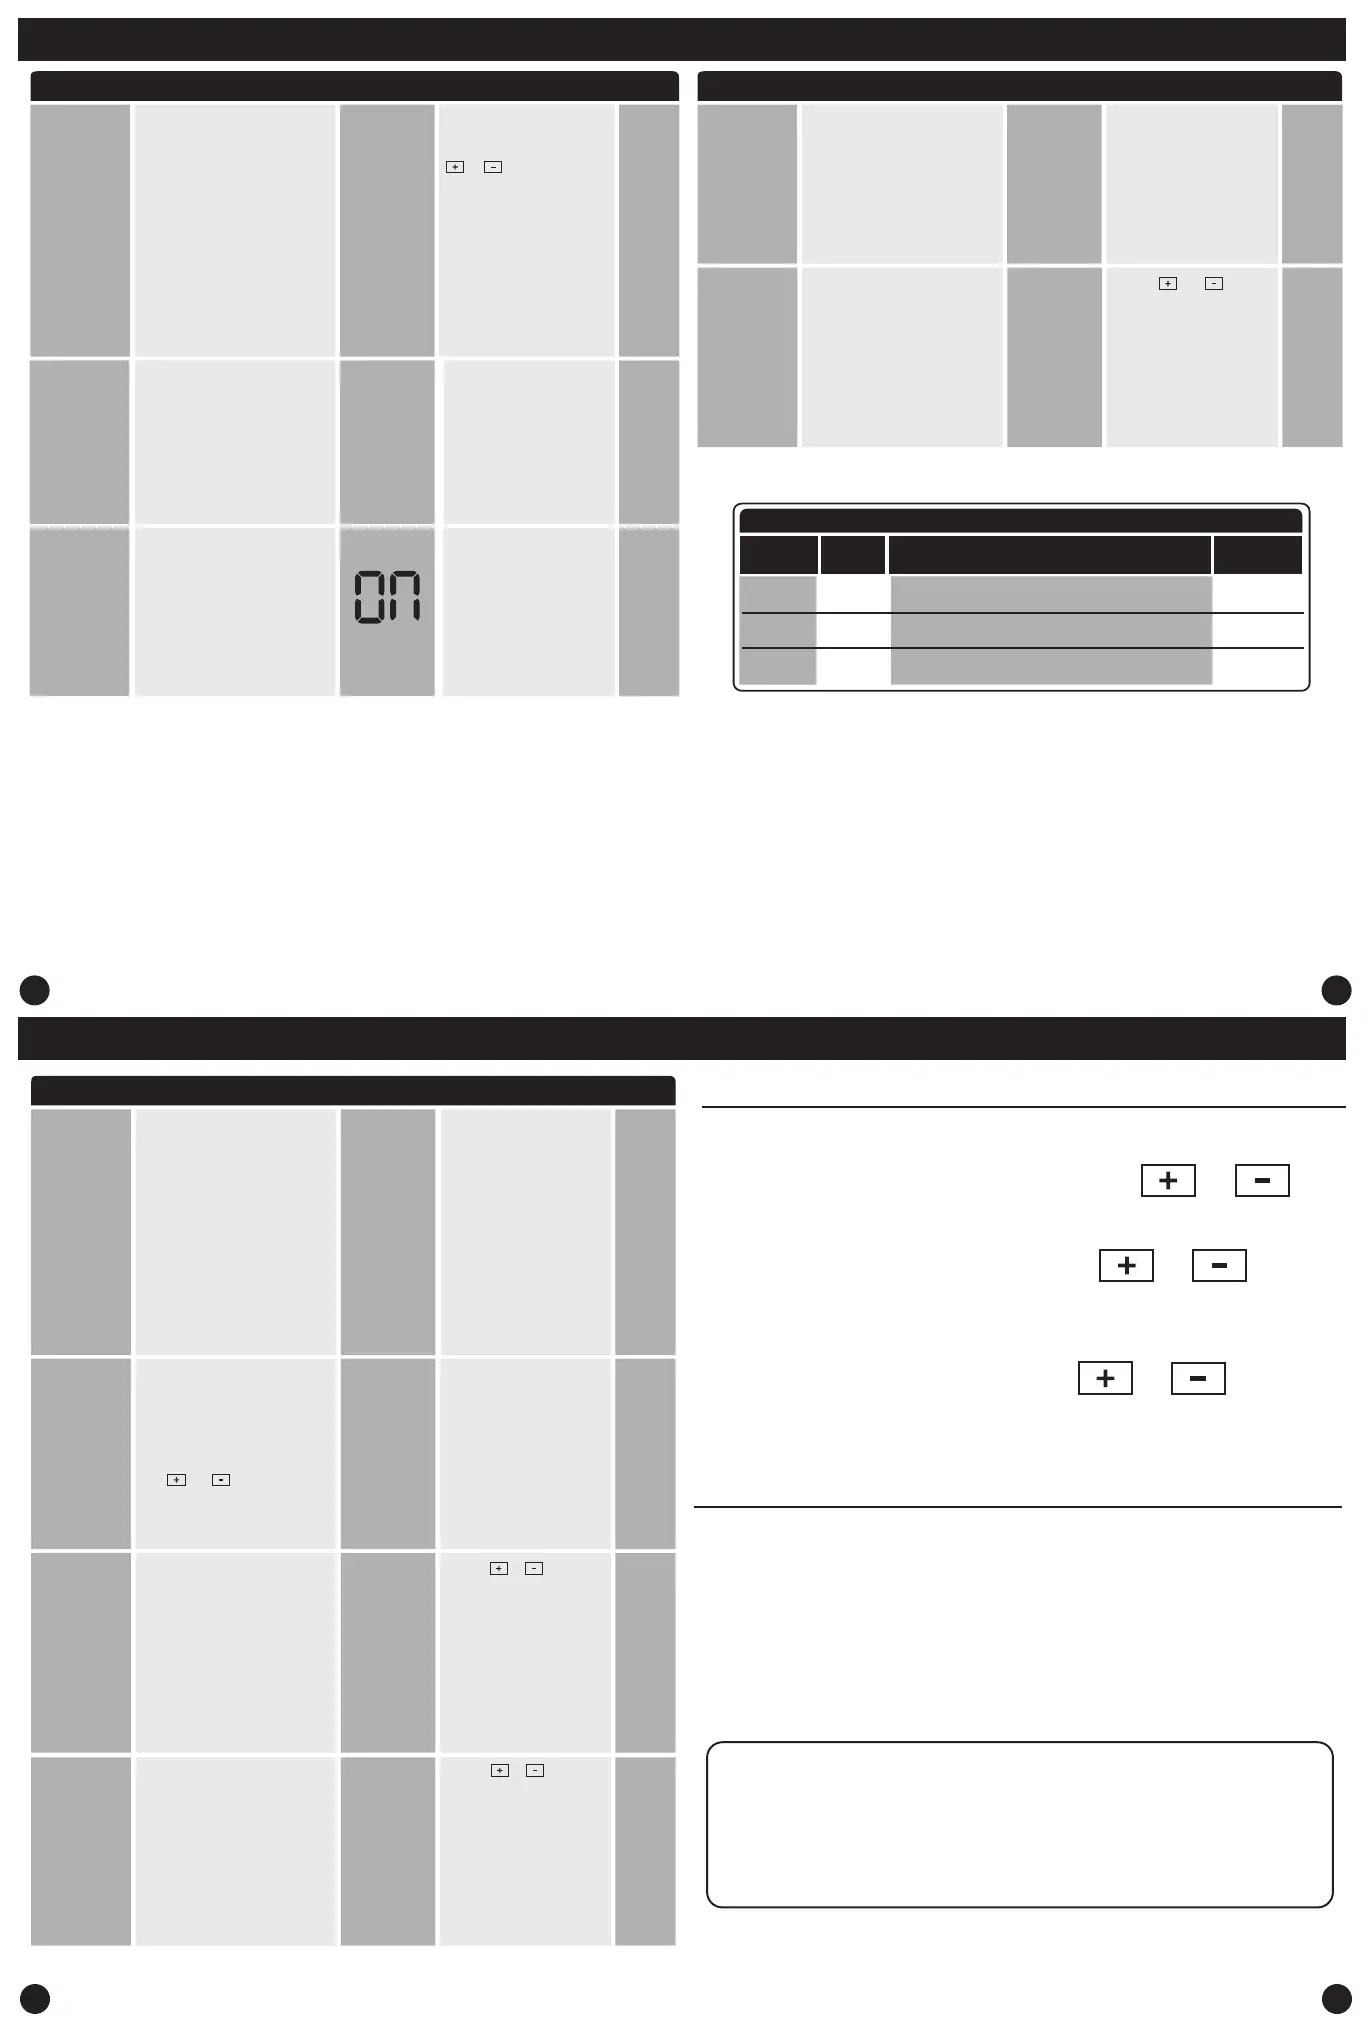
Tech Settings Tech Settings
This feature allows you to put
your phone number in the
display. You can choose ON or
OFF.
Notes:
If contractor call number is selected
ON, the phone number entered will
show in the display if there has been a
continuous call for heating or cooling
for 24 hours or if the light button is
held down for 3 seconds. To remove
the phone number from the display,
hold the light button down for 3
seconds.
Contractor
Call Number
If selected ON, you will see
the input screen after
pressing NEXT STEP. Use the
or button to select
the desired number and
the FAN or SYSTEM key to
move from one character to
another. See note below for
operation.
OFF
OF
PHONE NUMBER
Tech Settings
Adjustment Options Default
LCD Will Show
ProgrammingTech Settings
Tech Settings
Adjustment Options Default
LCD Will Show
You can congure the thermostat
for one of three remote sensor
applications: 0 No Sensor, 1
Indoor, 2 Outdoor, 3 Floor.
Remote
Sensor
Operation
(Only displayed
if a sensor is
connected
to S1 and S2
terminals)
REMOTE MODE
0
0
Use the left and right
arrows to select one of
three options. View the S1/
S2 terminal chart on next
page for an explanation of
these options.
You can disable the sensor on
the T855SH thermostat. At least
one R251S indoor remote sensor
must be connected to disable the
local T855S sensor. Note: Will only
show if remote sensor is set to 1.
Local Temp
Sensor
(Only displayed
if remote sensor
setting is set to 1)
ON enables local T855SH
sensor. OFF disables local
T855SH sensor.
ON
LOCAL TEMP
Enables the use of up to sixteen
indoor sensors R251S. Note: Will
only show Remote Sensor is set
to 1 and Local Temp Sensor is
set to on.
Number
of Indoor
Remotes
(Only displayed
if remote sensor
setting is set to 1)
You can use 1, 4, 9, or 16
indoor sensors. Refer to the
R251S Install Manual for de-
tailed connection information
1
NUMBER REMOTE
1
An outdoor temperature above
balance point will cause the
thermostat to energize the Y
terminal(s) only in calls for heat.
An outdoor temperature below
balance point will cause the
thermostat to energize the W2
terminal only in calls for heat.
Dual Fuel
Balance
Point
(Only displayed
if remote sensor
setting is set to
2 and Dual Fuel
AUX = On)
Use the and buttons
to select OFF, 10, 15, 20, 25,
30, 35, 40, 45, 50 degrees.
OFF
BALANCE POINT
OF
S1 / S2 Terminal
Options Mode
Description
Requires
1
2
3
Indoor
Outdoor
Floor
The local and remote temperatures are averaged.
The outdoor temperature is ashed in clock.
The oor temperature is shown in tech.
R251S
R250S
R250S
Tech Settings
Adjustment Options Default
LCD Will Show
Balance point run time will allow
the W2 auxiliary terminal to ener-
gize even if outdoor temperature
is above selected balance point
temperature. If enabled, auxiliary
will energize for the current cycle
after the balance point run time
has expired.
Note: Only shows if Balance Point is
set to an outdoor temperature.
Balance
Point Run
Time
(Only displayed
if remote sensor
setting is set
to 2)
O, 15, 30, 45, 60, 75, 90
BP RUN TIME
OF
OFF
This setting allows you to set
a maximum oor temperature
limit for heat. Heat will be locked
out when the oor temperature
is above this value. Note: Only
shows when REOP is set to 3.
Floor High
Limit
(Only displayed
if remote sensor
setting is set
to 3)
This setting allows you to set
a minimum oor temperature
limit for heat. Heat will turn on
automatically when the oor
temperature is below this value.
Note: Only shows when REOP is
set to 3.
Floor Low
Limit
(Only displayed
if remote sensor
setting is set to 3)
Use the or buttons to
select the High Limit for the
oor sensor.35 - 120
HIGH LIMIT
Use the or keys to
select the Low Limit for the
oor sensor.
35 - 120
50
86
86
50
LOW LIMIT
The temperature of the oor
sensor will be displayed.
Note: Only shows when REOP is
set to 3.
Use and buttons to adjust.
Floor
Temperature
(Only displayed
if remote sensor
setting is set to 3)
N/A
N/A
76
FLOOR TEMP
20
19
Set Time
1. With system switch set to OFF, press the MENU button
2. Press SET TIME
3. Day of the week will be ashing. Use the or key
to select the current day of the week.
4. Press NEXT STEP
5. The current hour is ashing. Use the or key to
select the current hour. When using 12-hour time, make sure
the correct a.m. or p.m. choice is selected.
6. Press NEXT STEP
7. Minutes are now ashing. Use the or key to
select current minutes.
8. Press DONE when completed.
Programming
All of our programmable thermostats are shipped with an
energy saving pre-program. You can customize this default
program by following the steps on the next page.
There are four time periods for each program (WAKE, LEAVE,
RETURN, SLEEP).
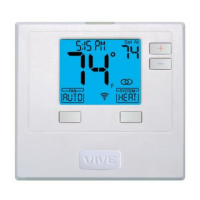
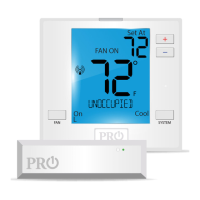
A Note About Auto Changeover:
In Auto you have the ability to switch between Auto Heat or Auto Cool
by pressing the system key. This can be done once the current mode has
reached its setpoint. For example: if in Auto Heat, the heat setpoint must
be satised before the thermostat will allow you to switch to Auto Cool.
You can switch out of Auto by holding down the system key. To get back
into Auto, you must toggle the system key to Auto.
 Loading...