ENGLISH
21
[DISPLAY]
[DIMMER]
Dims the illumination.
[ON]: Dimmer is turned on.
[OFF]: Dimmer is turned off.
[DIMMER TIME]: Set the time to turn on dimmer and to turn off dimmer.
1
Turn the volume knob to adjust the [ON] time, then press the knob.
2
Turn the volume knob to adjust the [OFF] time, then press the knob.
Default: [ON]: [6:00PM] ; [OFF]: [6:00AM]
[BRIGHTNESS]
Sets the brightness for day and night separately.
1
[DAY]/[NIGHT]: Select day or night.
2
Select a zone. (See the illustration on page
20
.)
3
[LVL00] to [LVL31]: Set the brightness level.
[TEXT SCROLL]
[ONCE]: Scrolls the display information once. ;
[AUTO]: Repeats scrolling at 5-second intervals. ;
[OFF]: Cancels.
[CLOCK]
[CLOCK DISPLAY]
[ON]: The clock time is shown on the display even when the unit is
turned off. ;
[OFF]: Cancels.
Display Settings Installation/Connection
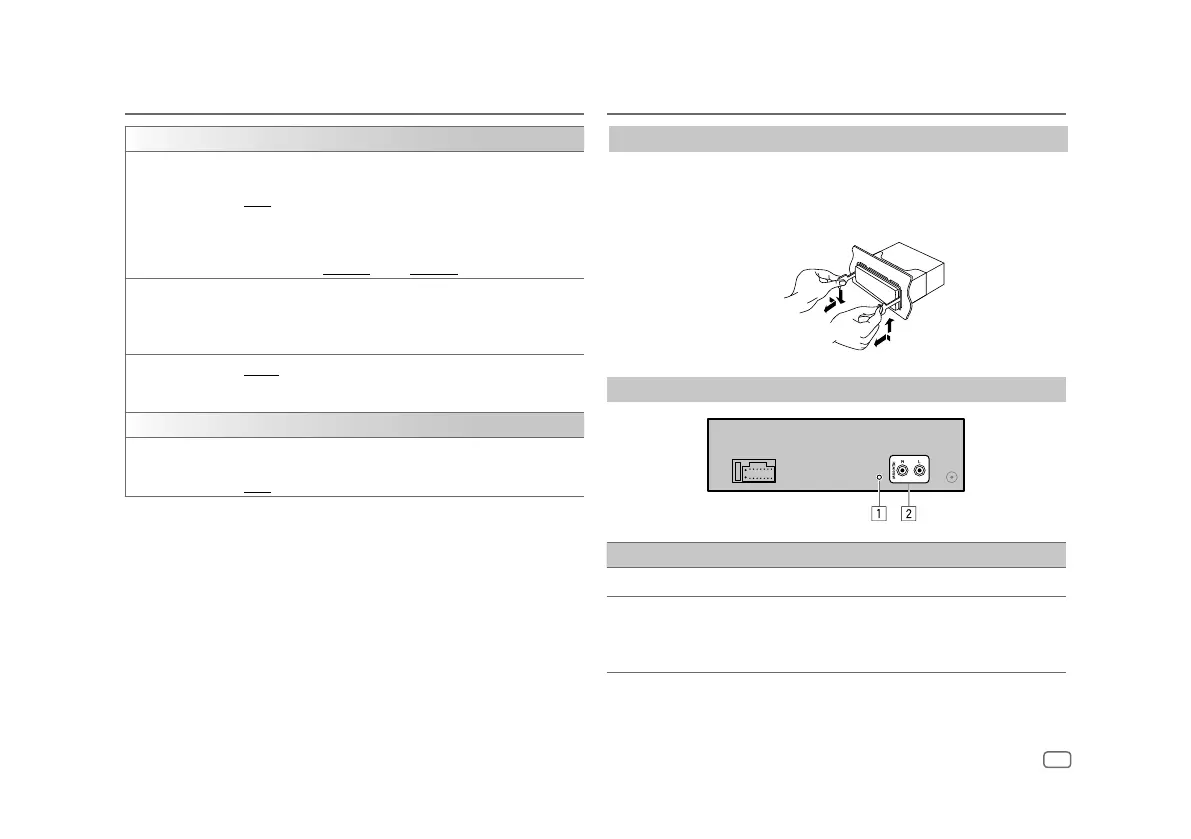
Removing the unit
Insert the extraction keys deeply into the slots on each side, then
follow the arrows as shown on the illustration.
Connect external components
No Part
1
Microphone input jack (Page
12
)
2
Output terminals
REAR/SW: Rear/subwoofer output
•
When connecting an external amplifier to the output terminals of this unit, securely
connect the amplifier ground wire to the car chassis to prevent damage to the unit.