Place all parts of the exercise cycle in a cleared area and remove the packing materials. Do not dispose of the
packing materials until assembly is completed.
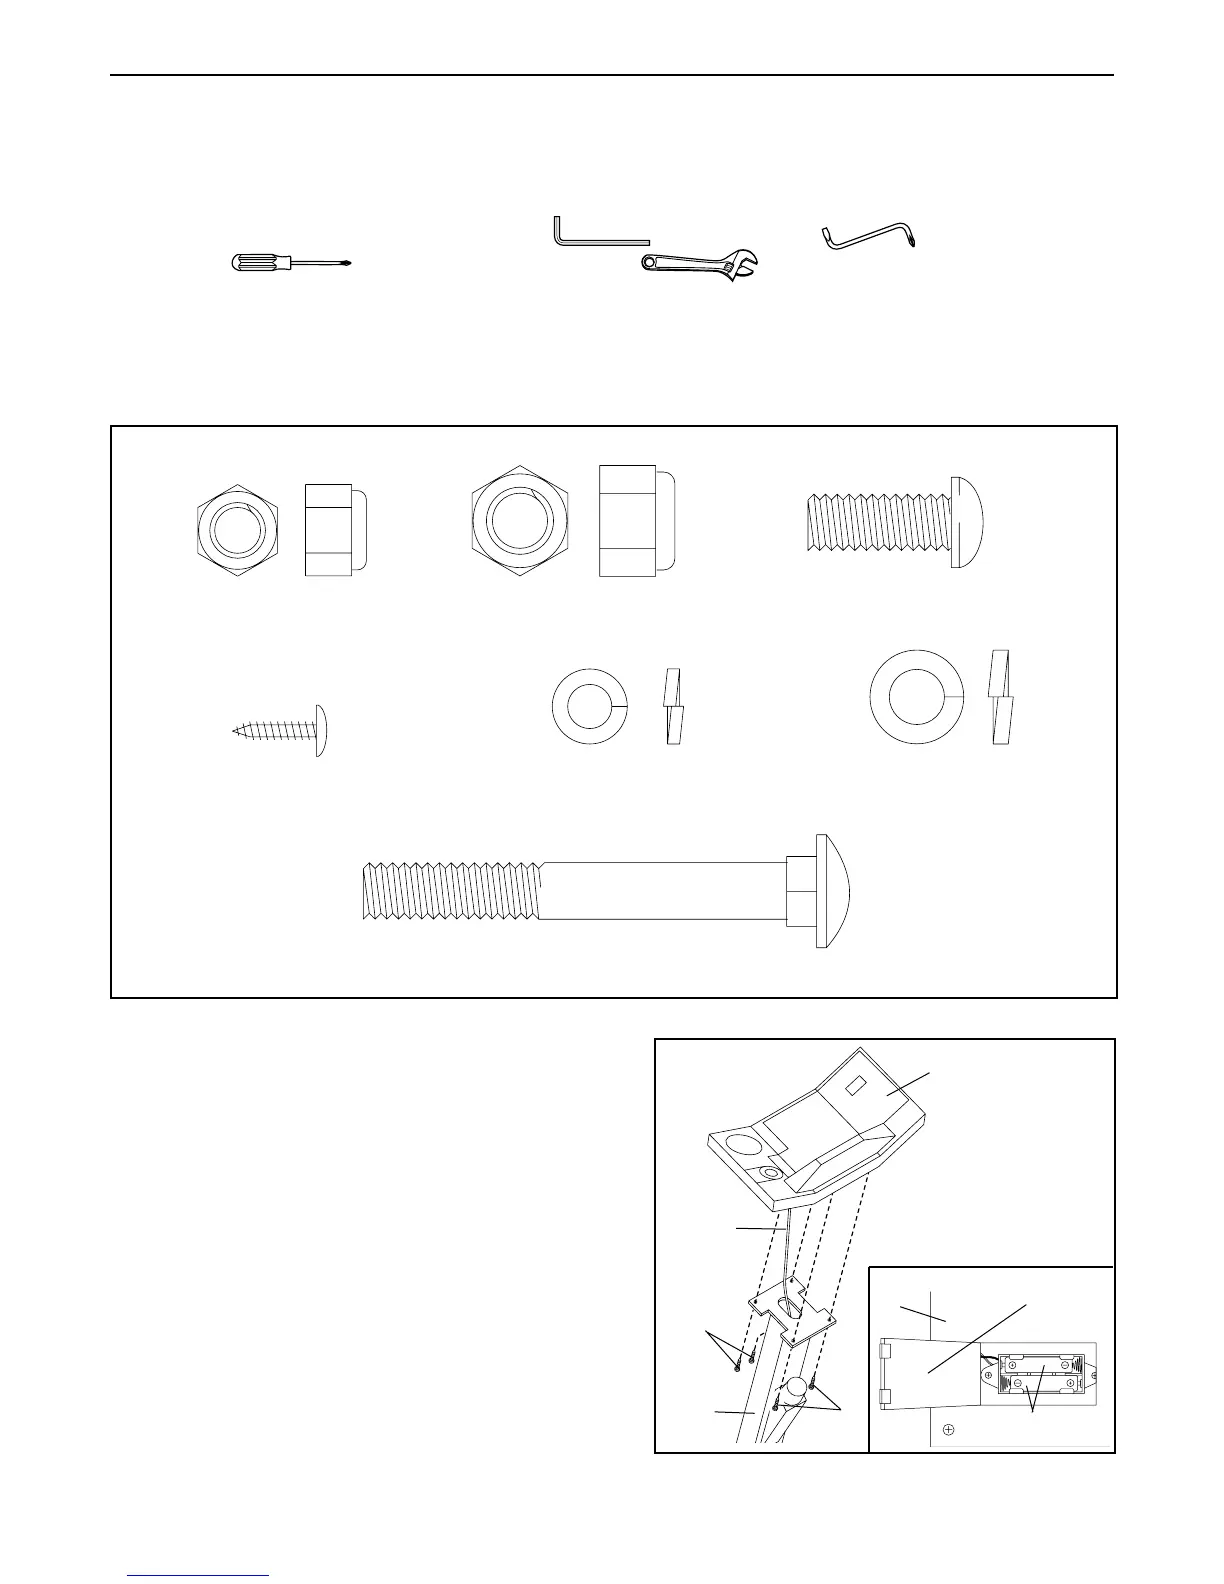
Assembly requires the included allen wrench and screw tool as well as a phillips
screwdriver and two adjustable spanners .
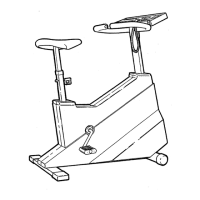
Use the chart below for help identifying the small parts used in assembly. The number in parenthesis below each
part refers to the key number of the part, from the PART LIST on page 14. The second number refers to the
quantity used for assembly. Note: Some parts may have been pre-attached for shipping purposes. If a part
is not found in the parts bag, check to see if it has been pre-attached.
5
ASSEMBLY
M10 x 22mm Button Screw (55)–5
M10 Nylon Locknut (44)–4
M8 Nylon Locknut (56)–3
M4 x 16mm Screw (7)–4
M8 Lock Washer (59)–3 M10 Lock Washer (61)–5
M10 x 75mm Carriage Bolt (54)–4
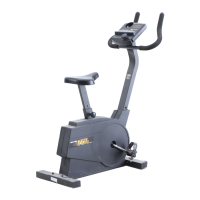
1. The Console (5) requires two 1,5V batteries (not
included). Alkaline batteries are recommended. Refer
to the inset drawing. Locate and open the battery
cover on the back of the Console. Press two batter-
ies into the battery compartment. Make sure that
the negative ends of the batteries (marked “–”)
are touching the springs in the battery compart-
ment. Close the battery cover.
Insert the console wire through the Handlebar Post
(19). Attach the Console (5) to the Handlebar Post
with four M4 x 16mm Screws (7).
1
5
5
19
7
7
Batteries
Battery
Cover
Console
Wire