8
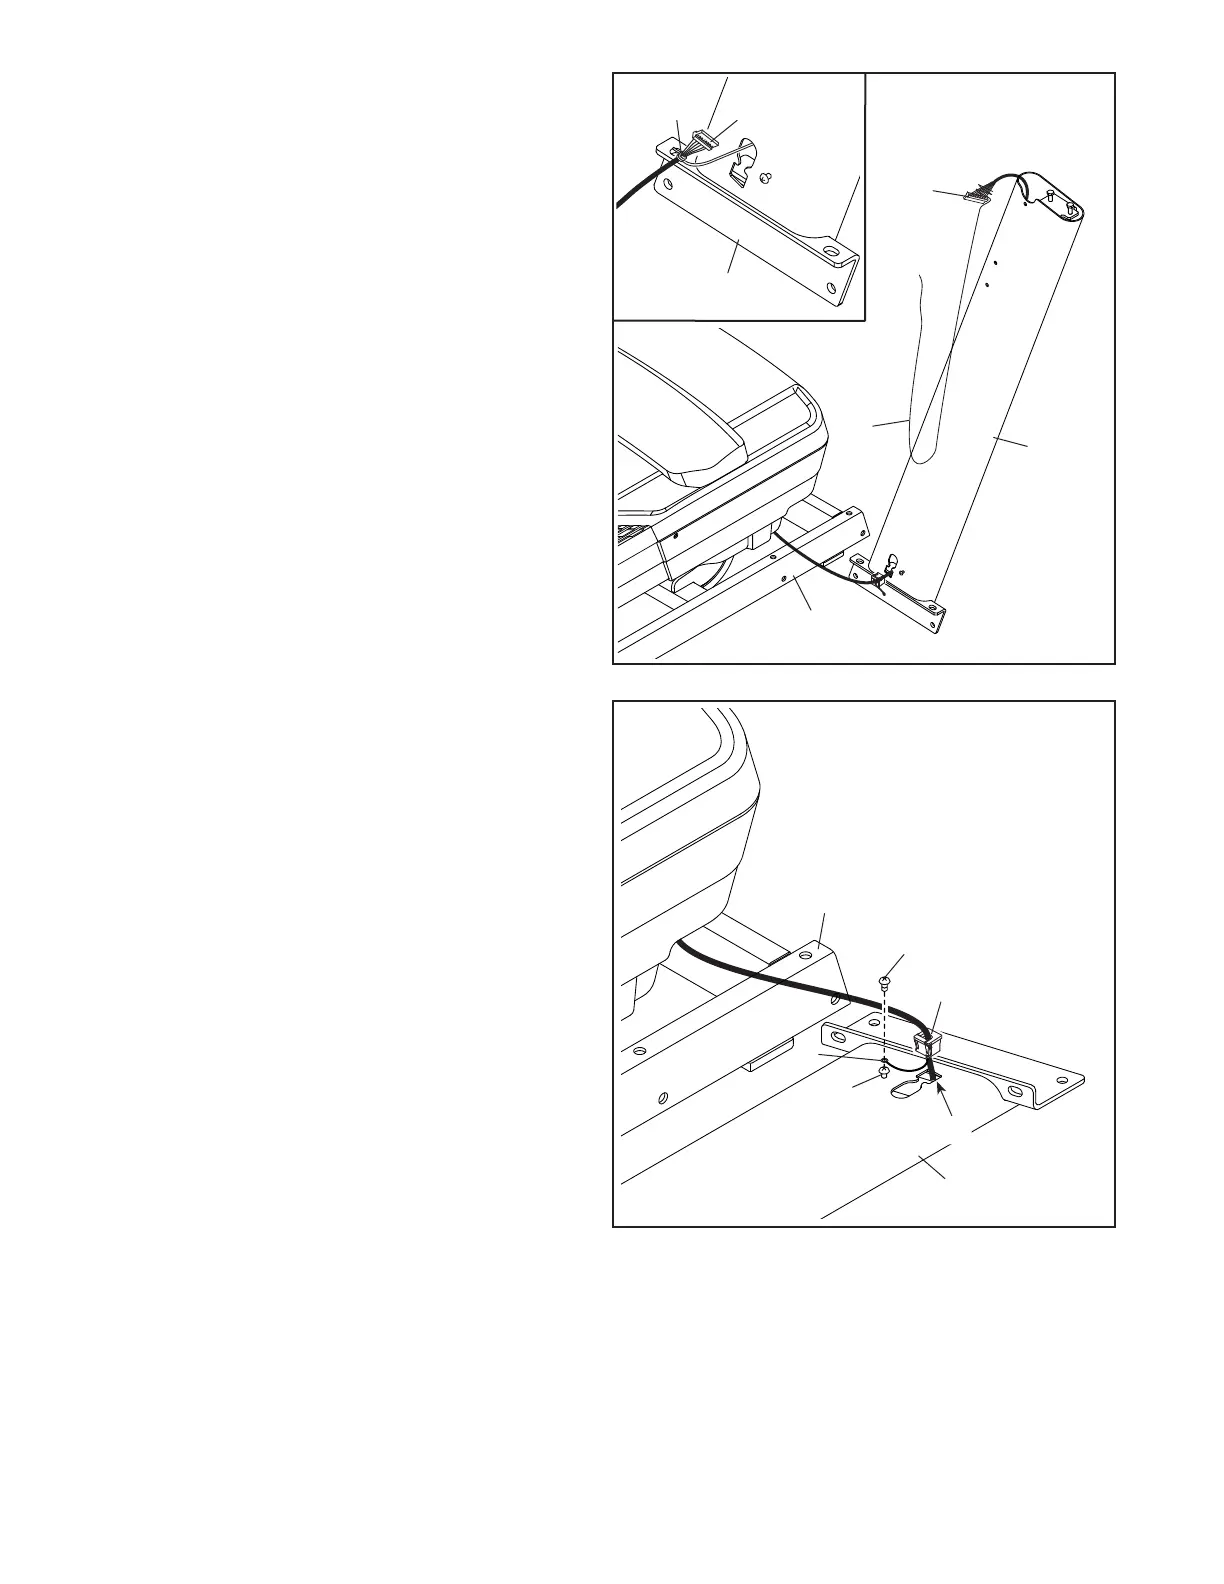
3. Lay the Right Upright (84) near the Base (93).
Press the Grommet (86) into the square hole (B)
in the Right Upright. Make sure not to pinch
the ground wire (C).
If there is a screw (D) preattached to the Right
Upright (84), remove and discard it.
Then, attach the ground wire (C) to the Right
Upright (84) with a #8 x 1/2" Ground Screw (13).
93
84
13
86
C
B
D
3
84
A
2
83
2. Make sure that the power cord is unplugged.
Remove the tie securing the Upright Wire (83) to
the front of the Base (93).
Next, identify the Right Upright (84). Have a
second person hold the Right Upright near the
Base (93).
See the inset drawing. Tie the wire tie (A) in
the Right Upright (84) securely around the end
of the Upright Wire (83). Then, insert the Upright
Wire into the lower end of the Right Upright as
you pull the other end of the wire tie through the
Right Upright.
93
84
83
A