12
10
99
99
80
29
77
77
6
6
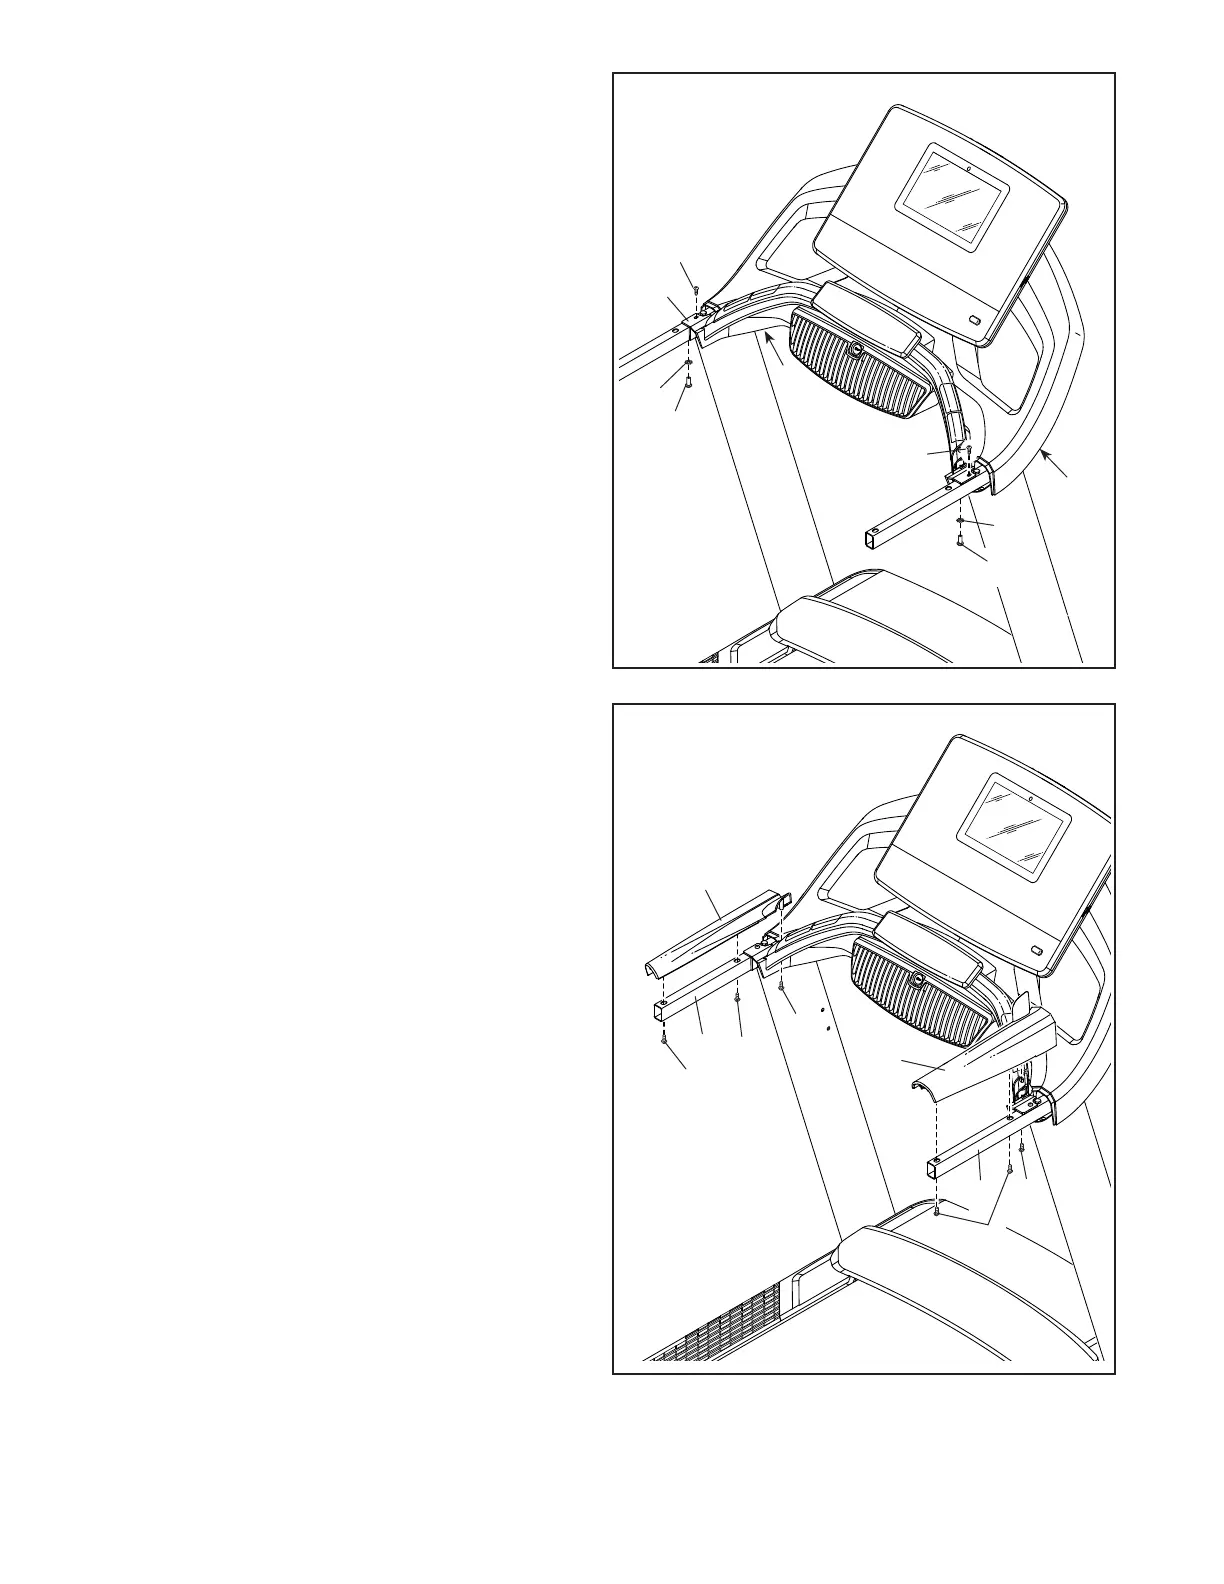
10. IMPORTANT: To avoid damaging the Pulse
Crossbar (80), do not use power tools, and
do not overtighten the #10 x 3/4" Screws (6)
or the 1/4" x 5/8" Screws (99).
Tighten two 1/4" x 5/8" Screws (99) with two
1/4" Star Washers (77), and two #10 x 3/4"
Screws (6), into the Pulse Crossbar (80); start
all four Screws, and then tighten them.
Then, tighten the four 5/16" x 1 1/4"
Screws (29).
11
11. Set the Left Handrail Top Cover (73) on the left
Handrail (74). Start two #8 x 3/4" Truss Head
Screws (24) and one #8 x 3/4" Screw (5) into the
bottom of the Left Handrail Top Cover. Note: The
#8 x 3/4" Truss Head Screws have flatter heads
than the #8 x 3/4" Screws. Then, tighten all three
Screws. Be careful not to overtighten the
Screws.
Attach the Right Handrail Top Cover (81) to
the right Handrail (74) as described above.
29
5
74
73
24
24
5
74
81
24