8
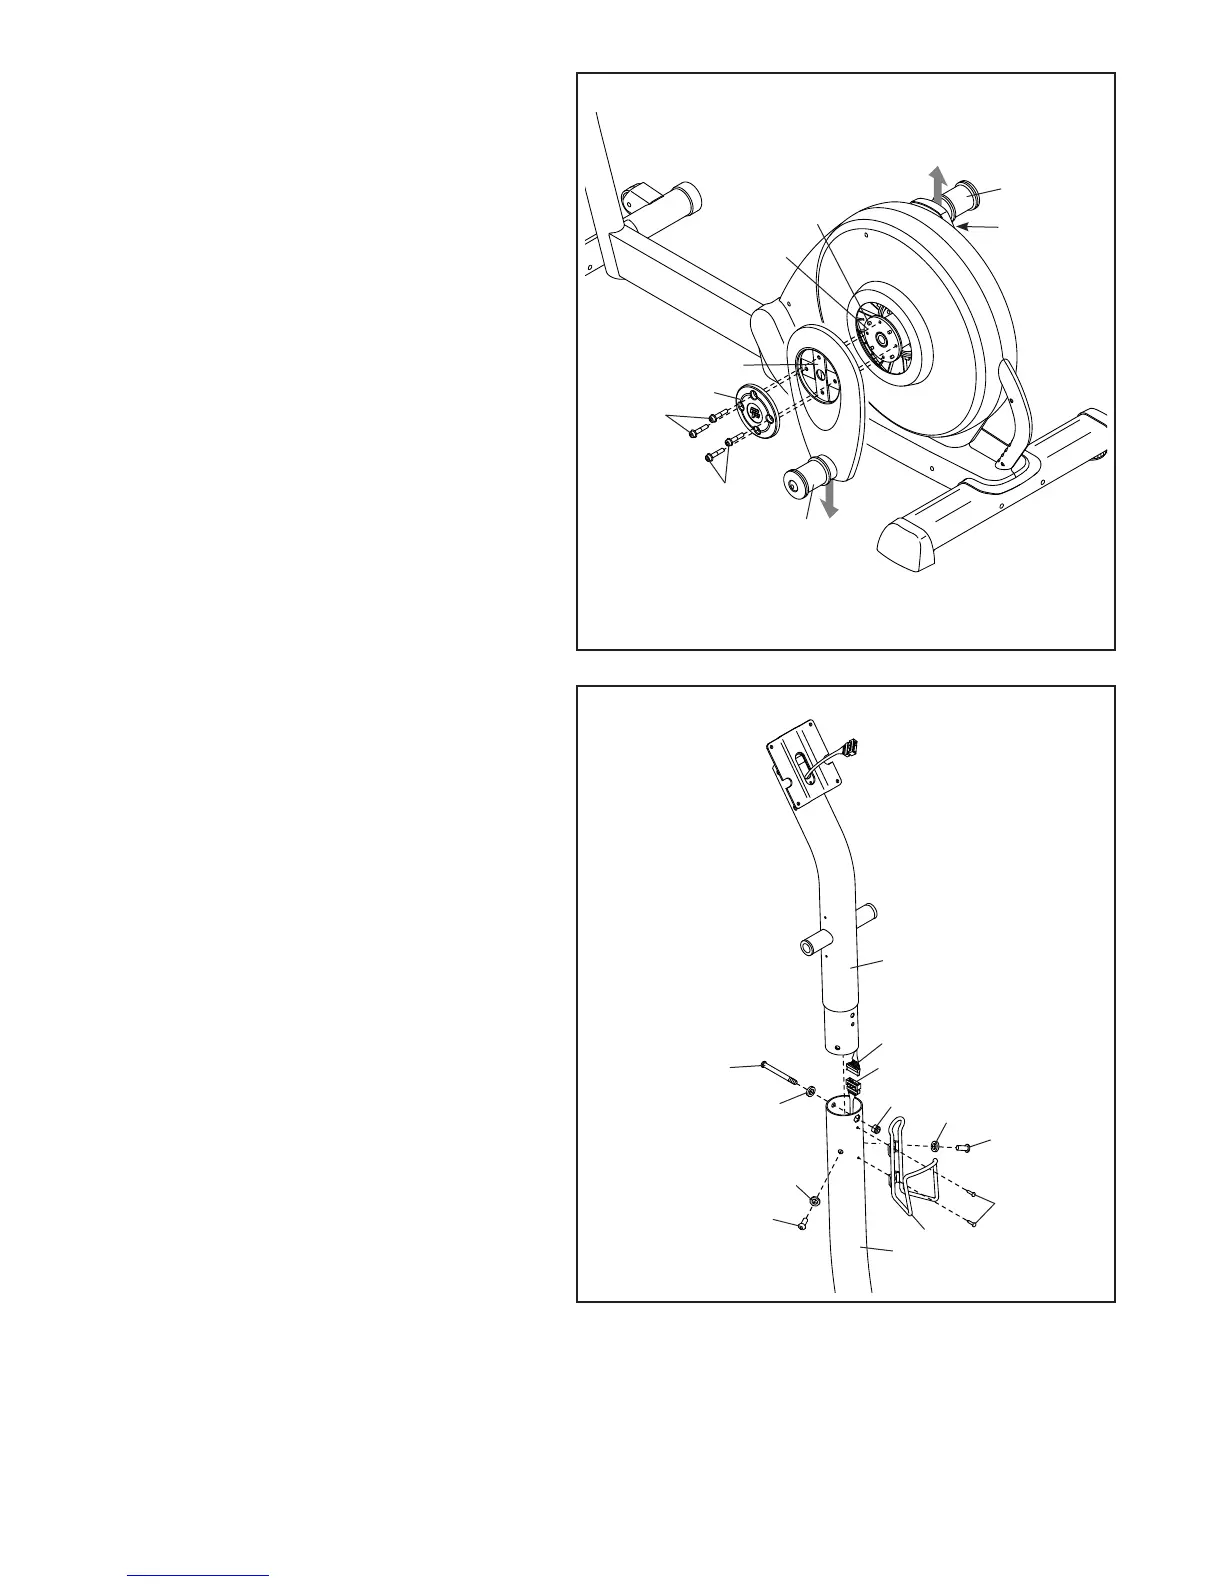
4. Hold a Hub Cover (75) and a Crank Arm (36)
against the Crank (45).
Align the holes in the Hub Cover (75) and
the Crank Arm (36) with the unused holes in
the left side of the Crank (45).
Insert four Hub Screws (87) into the Hub
Cover (75) and the Crank Arm (36), and
finger tighten the Hub Screws into the Crank
(45). Tighten one Hub Screw, and then
tighten the Hub Screw across from the
first Hub Screw. Then, tighten the remain-
ing two Hub Screws.
Repeat this step on the right side of the
elliptical.
Make sure that the Crank Arms (36) are
oriented with the Crank Bushing Sleeves
(43) in the positions shown. Note: There
are no Pulley Screws (98) on the right side.
4
36
45
98
75
87
87
36
43
43
5. While a second person holds the Upright
(3) near the Base (1), connect the Upper
Wire Harness (48) to the Lower Wire
Harness (49).
Tip: Avoid pinching the wires. Insert the
Upright (3) into the Base (1).
Attach the Upright (3) with an M8 x 69mm
Bolt (80), an M8 Split Washer (90), and an
M8 Jam Nut (79). Do not tighten the Bolt
yet; make sure that the Jam Nut is in the
hexagonal hole in the Base.
Next, finger tighten two M8 x 23mm Screws
(84) and two M8 Split Washers (90) into the
Base (1). Do not tighten the Screws yet.
Attach the Water Bottle Holder (22) to the
Base (1) with two M4 x 16mm Blunt
Screws (104).
3
80
48
49
22
84
84
90
90
90
104
Avoid pinching
the wires
79
1
5