Do you have a question about the PROLiNK PIC1006WN and is the answer not in the manual?
Provides initial guidance for setting up the device.
Explains how to easily view IP Camera video without complex network settings.
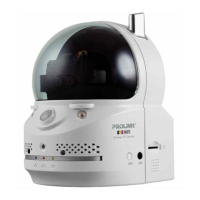
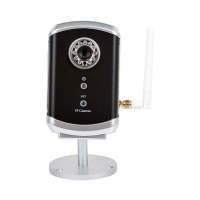
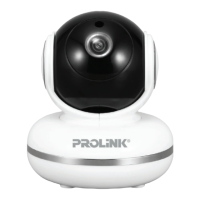
Details the physical components of the IP Camera, including front, side, and rear views.
Outlines the three essential steps to see video from the IP Camera.
Instructions for connecting the IP Camera to a home or office network via Ethernet.
Guide to installing the necessary LiveView software on a computer.
Steps to view the IP Camera's video feed using the LiveView program.
Instructions on how to view the IP Camera's video feed from outside the local network.
Steps to connect the IP Camera to a network wirelessly using 802.11 b/g/n.
Procedure for testing the configured WiFi settings for accuracy.
Final step to enable wireless connection by removing the Ethernet cable.
Displays model name, firmware version, IP Camera ID, network type, and video settings.
Allows viewing the video display and controlling pan/tilt movement. Requires ActiveX.
Configure network settings for wired Ethernet, including DHCP and static IP options.
Settings for enabling and configuring wireless network security (WEP, WPA-PSK).
Configure PPPoE connection settings for ADSL services when no NAT/router is available.
Adjust video quality parameters like resolution, frame rate, brightness, and sensitivity.
Configure video settings for mobile devices, independent of PC viewing settings.
Control IR LEDs for night vision, offering automatic, scheduled, or manual modes.
Configure email and FTP notifications for motion detection or alarms with snapshot attachments.
Configure speaker alarms triggered by motion, PIR, or schedule, including duration.
Configure recording of video files to a Network Attached Storage (NAS) device.
Configure recording of video files directly to a Micro SD-Card.
Schedule email/ftp alarms, NAS recording, or SD-Card recording based on time or events.
Enable or disable the LED display and indications on the IP Camera device.
Synchronize the IP Camera's date and time with an NTP server and configure daylight saving.
Modify the web login account and password for accessing camera settings.
Upgrade the IP Camera's firmware from an FTP server or a local file.
Manually restart the IP Camera to apply changes or resolve issues.
Information and steps to recover from safe mode, typically after a failed firmware upgrade.
Reset the IP Camera to its original factory default settings, useful for forgotten passwords.
Lists the key features and capabilities of the IP Camera.
Provides detailed technical specifications like power, processor, interfaces, and sensor.
Discusses how video quality depends on settings and network bandwidth.
Explains factors affecting WiFi performance like distance and interference.
Explains troubleshooting for a blinking red LED, indicating network connection issues.
Answers how many users can simultaneously access the IP Camera.
Details the video compression format (MPEG4) and its impact on quality.
Clarifies that this model lacks pan/tile control and provides the viewing angle.
Guides on using LiveView for multi-camera viewing.
Explains how to configure ActiveX for non-IE browsers like Firefox or Safari.
Suggests using emulation software for Mac OS to run LiveView.
States that the focus is fixed during production and cannot be adjusted.
Recommends resetting the IP Camera to factory default for forgotten passwords.
Provides steps to access the web configuration page via LiveView.
Guides on changing the video playback password through the web configuration.
Instructs to enable the audio microphone setting for sound.
Clarifies .NET Framework requirements for the LiveView program.
Explains how to flip the video image for ceiling mounting.
Confirms recording capability via LiveView and mentions the need for LivePlay software.
Provides guidance on recommended hard disk capacity for video recording.
Confirms night vision capability and directs to Night Mode configuration.
Troubleshoots audio issues on mobile apps by adjusting streaming type.
Instructions on enabling motion recording within the LiveView software.
Guides on accessing and playing recorded video clips using LivePlay software.
Diagnoses NAS video distortion due to CPU/RAM overload and suggests solutions.
Explains two methods (Web Configuration, LiveView) to configure Night Mode.
Addresses poor video quality over wireless by checking distance, AP load, and antenna position.
Discusses the effective viewing distance and factors affecting clarity.
Suggests increasing "low light sensitivity" for better performance in dark environments.
Explains direct PC connection via Ethernet, including IP address assignment and LiveView access.