ProMinent
®
Page 34
IMPORTANT
• If, after cleaning, the radiator protection tube appears even more discoloured and dull
or if it is damaged, it must be replaced!
• Do not use acids that will lead to corrosion or stress facture, e.g. hydrochloric acid.
• Read the safety information provided with the cleaning agent selected.
•Wear appropriate safety clothing when cleaning (safety goggles, gloves, etc.).
• Make sure that the cleaning agent does not get into the protective tube.
• When cleaning UV disinfection systems, ensure that the cleaning agent does not get
into the pipe network. This particularly applies to the disinfection of drinking water and
other similar applications.
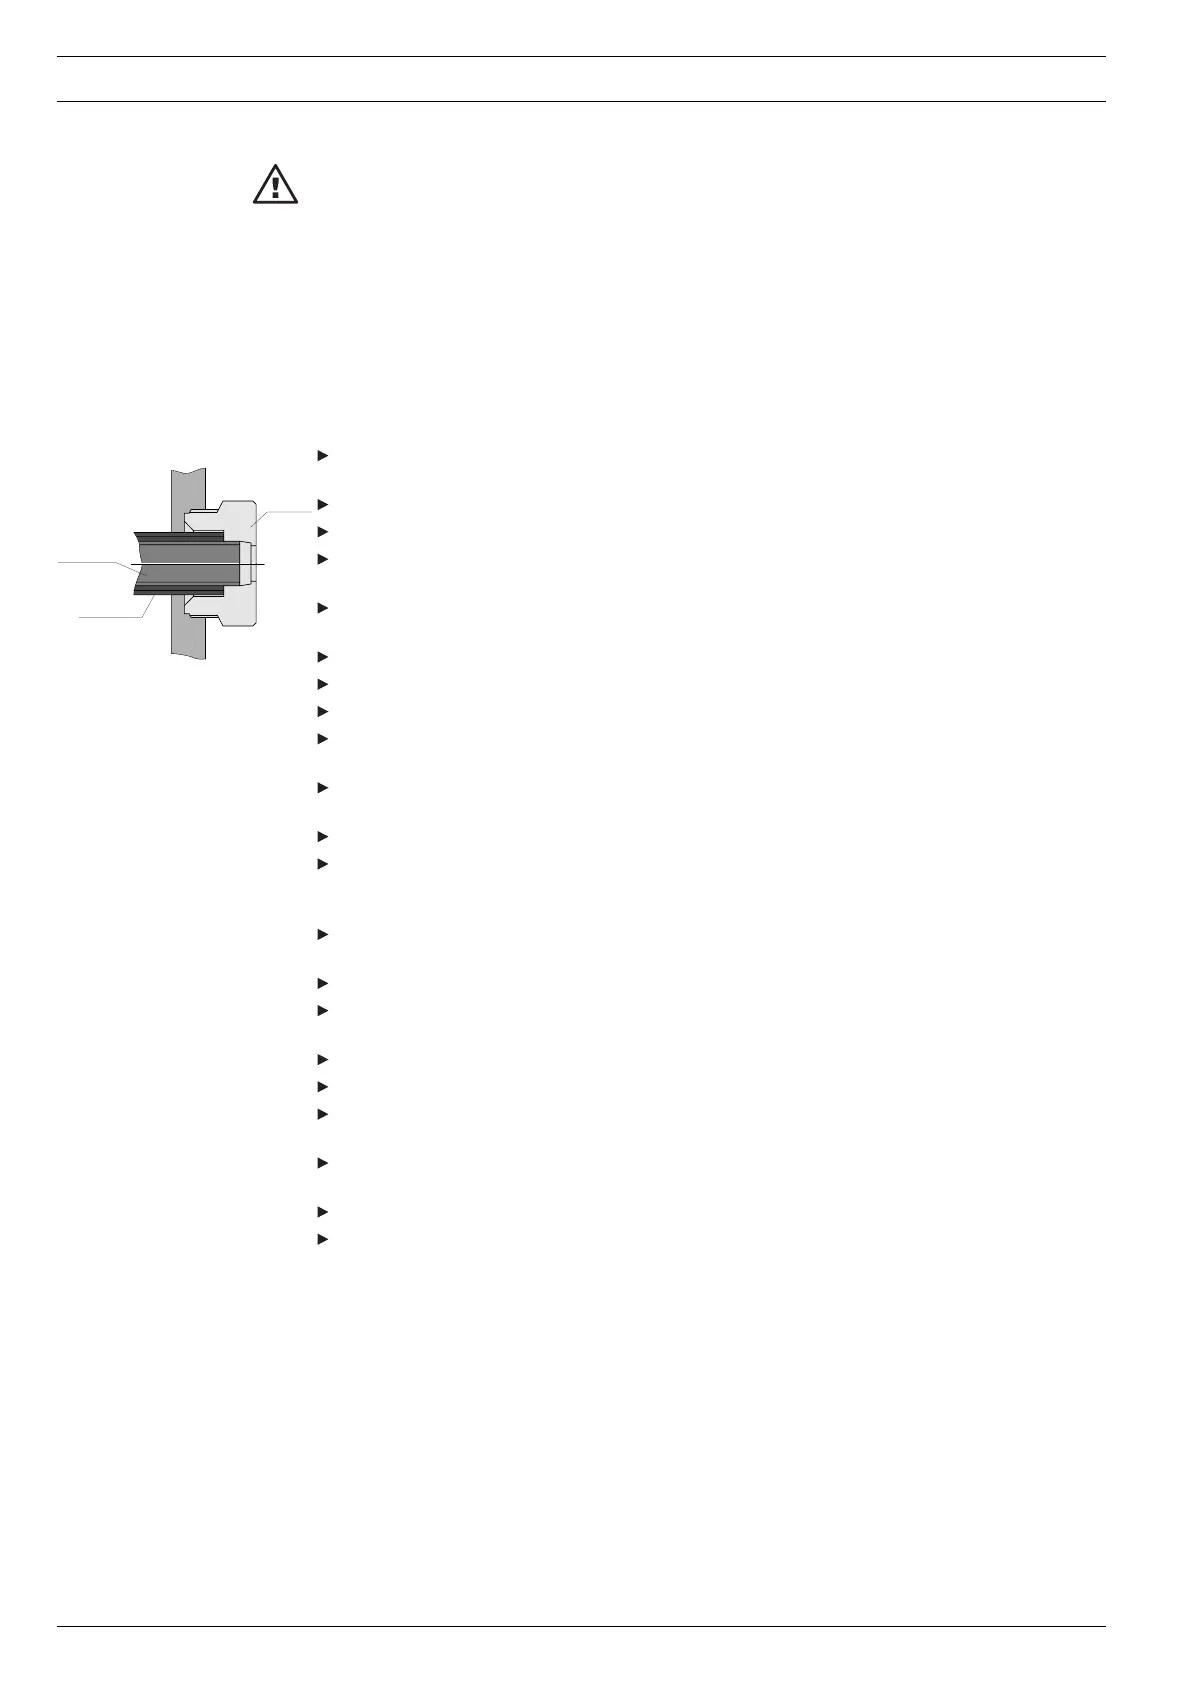
Use the hook spanner provided to loosen and unscrew the protection tube clamp on the
motor side.
Use a small screwdriver or tweezers to remove the O-ring from the protection tube carefully.
Screw the assembly aid into the radiation chamber on the motor side.
Insert the auxiliary assembly tube (PVC tube) into the radiation chamber from the lid end
and clamp it gently in the assembly aid.
Use the hook spanner provided to loosen and unscrew the protection tube clamp on the lid
end.
Remove the protection tube on the lid end.
Carefully remove the O-ring from the protection tube.
Check the protection tube for damage. If it is damaged, it must be replaced.
Wipe the protection tube using a sponge or cloth that has been soaked in the cleaning
solution. The cleaning solution must not get into the protection tube.
Rinse the remainder of the cleaning solution off the protection tube using clarified water. Do
not allow any moisture to get into the tube.
Rub the protection tube dry.
Check the O-rings that seal the protection tube and the O-rings in the groove of the tube
clamp for damage or malformation. O-rings that are damaged or malformed must be
replaced.
Push the protective tube carefully over the auxiliary assembly tube from the lid end until it
locks into place. The protection tube should now protrude by approximately 1 cm.
Push the O-ring over the lid end of the protection tube.
Push the tube clamp over the protection tube and screw it into the radiation chamber;
tighten it by hand.
Remove the auxiliary assembly tube and unscrew the assembly aid.
Push the O-ring over the motor side of the protection tube.
Push the tube clamp on the motor side over the protection tube and screw it into the
radiation chamber; tighten it by hand.
Use the hook spanner to tighten the tube clamp on both sides. Only a small amount of force
is required.
Clean the UV sensor as described in section 7.3.
Finally, install the UV lamp and fill and bleed the radiation chamber (see section 7.1).
NOTE
Comply with current guidelines and regulations when disposing of the cleaning solution.
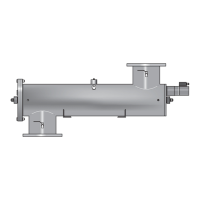
Maintenance
Assembly aid
Protection tube
Auxiliary
assembly tube