17
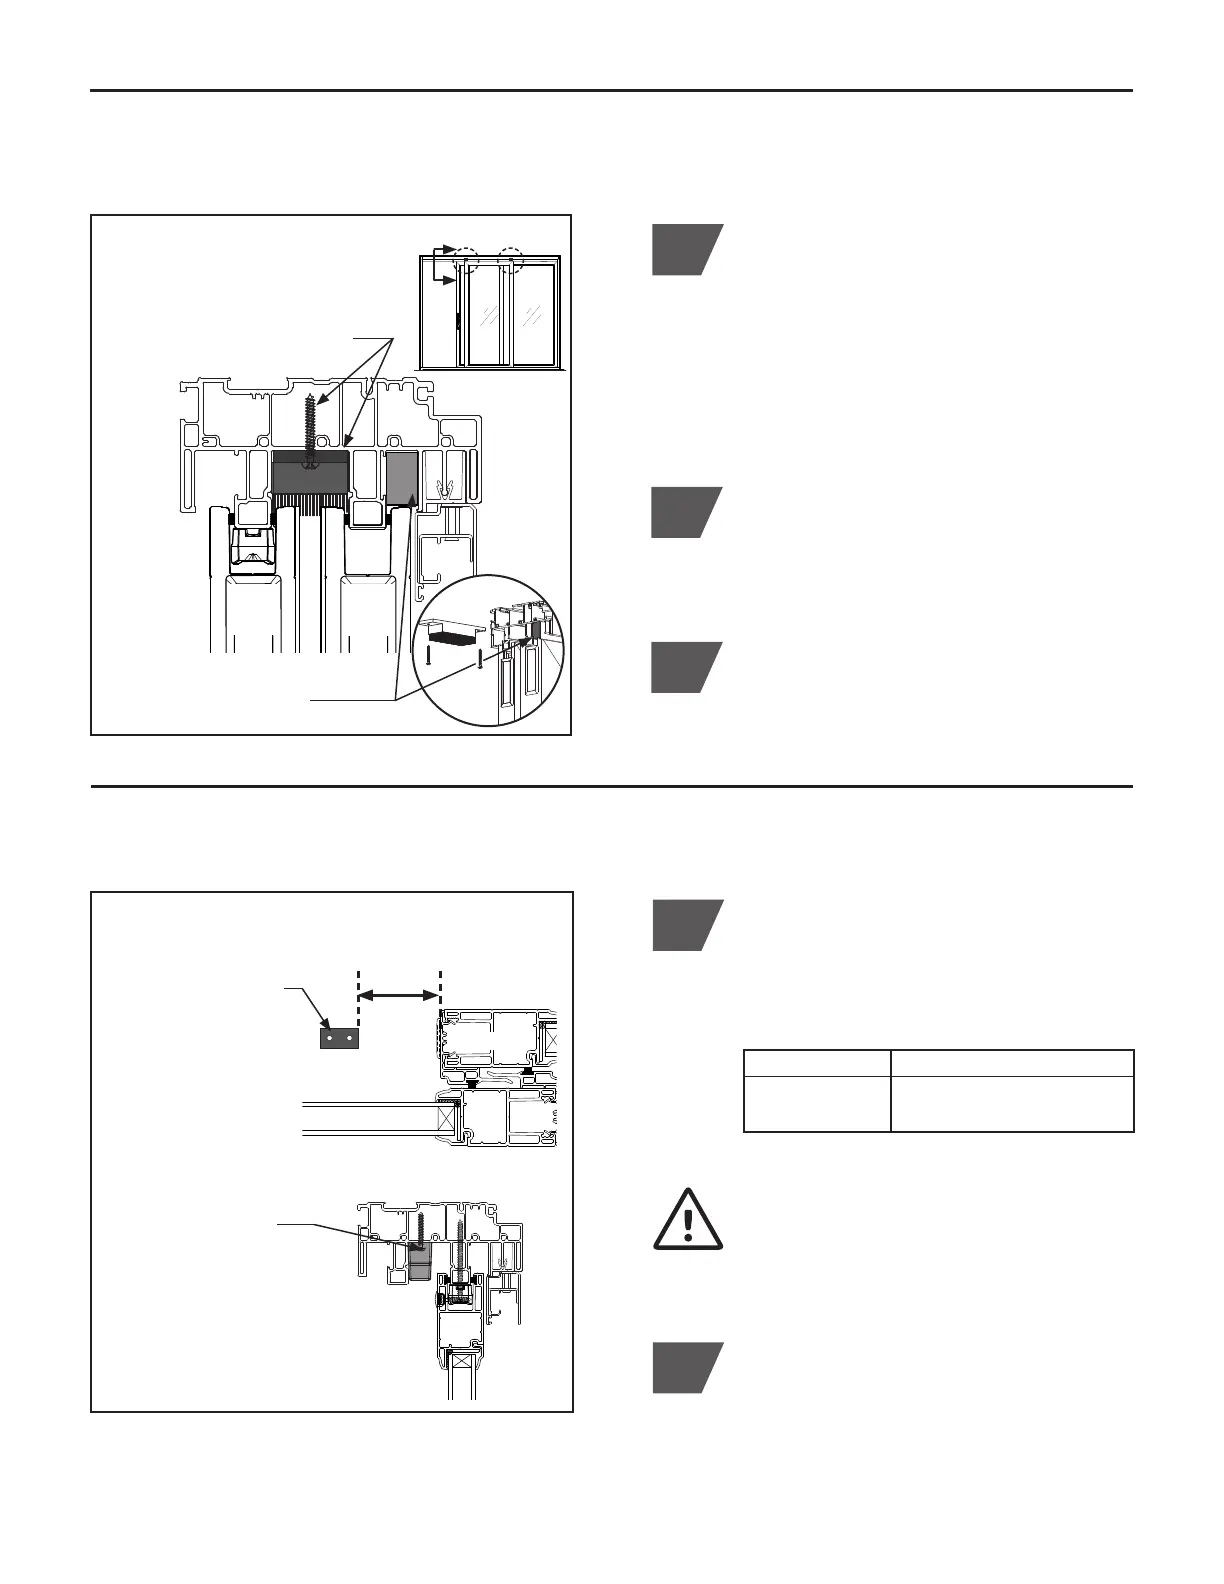
J. INSTALL HEAD WEATHER STRIP BLOCKS & INSECT STOPS
1
Locate weather strip blocks directly above
each interlock. With active door open, insert
both blocks into center channel of frame
header. Slide first block past active side
interlock using the second block. Use a thin
long screwdriver to push second block into
position over active sash side interlock. Close
active sash. Slide first block into position over
fixed end sash interlock.
(Figure J.1)
K. INSTALL SASH STOP
1
Place sash stopper (Pack #5) on the active
sash header track, behind active sash.
Locate the sash stopper per the appropriate
dimension provided in chart below and per
the illustration in (Figure K.1).
Sash Type Dimension ‘A’
Without Blinds 2
3
⁄4" from edge of fixed sash
With Blinds 4" from edge of fixed sash
IMPORTANT! To avoid a pinch hazard
between exterior handle set and fixed
sash, do not allow less than the above
dimensions.
2
Install sash stopper with (2) #8 x 1
1
⁄4" Phillips
pan head screws (Pack #5).
Install (2) #8 x 1
1
⁄4"
Phillips pan head
screws
(Figure K.1)
Sash Plan View
Dim.
'A'
Header Section
Place sash stopper
on the active sash
header track, locate
at the distance
provided in chart
2
Secure each head weather strip block using
(2) #8 x 1
1
⁄4" Phillips pan head screws (Pack
#4). For active sash side, close sash to
access the opposite screw hole. DO NOT
over tighten screws. (Figure J.1)
3
Insert (1) foam plug (Pack #3) in the open
cavity between the fixed center sash and
screen track, each side of sash and as shown.
Foam plug must align with edge of fixed center
sash, as shown in Detail. (Figure J.1)
Head Weather Strip Block Section
End
Active
Sash
Fixed
Center
Sash
Insert (1) foam stop (plug) in
open cavity, each side
Locate weather strip blocks above
each interlock, secure using (2)
#8 x 1
1
⁄4" screws each block
Sash Stop Location
Fixed End
Fixed Center