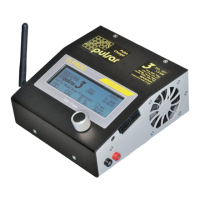
10 pulsar 3
Invers – switch the display from negative to positive.
Contr. – display contrast: 0-15.
Light – display backlight intensity: 0-15.
Pause – pause time between processes (e.g. charging/discharging in cycles): 15-900s in 15s intervals.
Process set-up – charging NiCd and NiMH cells
Window description: From top left: charging is
set; in memory window M 18; type of battery NiMh;
charging current 0,5A; “=,=Ah” – the limiter is
disabled; Inflex is disabled; reflex is enabled; Δ
4,0mV (standard value)
All process settings are conducted In a very similar way. First, choose the appropriate memory window that is to
be programmed (from M 1 to M 20). Secondly, enter the program window by holding the dial, where the “Mode &
Accu” option is selected. Here the battery type and the type of the process that is to be programmed is set. For
lithium NiXX batteries the following programs have been prepared: Disch. (discharge), Charge (charge), Dis.Ch.
(discharge/charge), Ch.Dis. (charge/discharge), Format (format).
The process parameters can be changed if necessary. Through holding the dial we enter the program window
where we chose the “Parameters” option, which enables us to set all the parameters important for the process
according to our requirements.
And so, for NiCd and NiMH:
-exit- – return to memory window.
Inflex – enables ending the process earlier. Inflex should be used only with charges higher than 1C and
accupacks with more than 4 cells. Enabling the Inflex mode is signalized (while the process is in progress)
by an „I” symbol under the battery animation.
Reflex – enables charging and supercharging NiCd and NiMh batteries without the threat of the „Memory
effect” occurring. In this charging mode short discharging impulses are emitted. Packages charged with
reflex often have a lower resistance.
Δ – „Delta-Peak“ setting, if the set value diverges from the suggested one, an exclamation mark is displayed
(! Δ). With NiCd the value May be set from 4 to 25mV and 1-15mV with NiMH.
Exiting the settings menu can be made by choosing -exit- or automatically after 10 seconds from the last dial
movement.
Warning! Checking Inflex and Delta-Peak starts after 2 minutes with NiCd and after 4 minutes with NiMH.
Caution is advised when full packages are to be plugged (supercharging them with higher charges), to avoid
overloading the packages.
Setting the charging current
After a press of the dial the required current can be set In the memory window, and after confirming (press of the
dial) the limiters’ value. The current’s value can be between 0,1A to 0,25A set in the following intervals: 0,1A
intervals up to 10,0A, 0,5A above 10A. The limiter’s capacity is set from “-,-Ah” (the capacity is not controlled) to
200Ah. Using the limiter is advised, especially with new packages which have not yet been formatted. The limiters
value should be set a bit higher then the cells capacity (by about 5-10%), which will prevent unnecessary package
overload when the proper evaluation of Inflex and Delta-Peak is impossible, as a result of unequally charged
cells.
After all settings meet our requirements we can plug in the battery packages to the charger. Before beginning
the process it is necessary to check if the number of cells in the package matches that indicated by the
charger. After adjusting the number of cells, if necessary, we can start the process by pressing the Rotary knob.
It is important to stress that the procedure described above shows how to set all of the parameters and in
practice, to start the process, it May be limited to a few steps. Proper memory setting and creating ready
programs to all battery packages is recommended as it will make operating the charger easier and faster.
Process set-up – charging LiXX and NiZn cells
All process settings are conducted In a very similar way. First, choose the appropriate memory window that is to
be programmed (from M 1 to M 20). Secondly, enter the program window by holding the dial, where the “Mode &
Accu” option is selected. Here the battery type and the type of the process that is to be programmed is set. For