6 pulsar 3
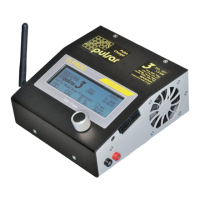
Right side
1. Rotary knob
2. Charge output minus
3. Charge output plus
4. Temperature indicator socket
5. Balancer socket
Left side
1. Rotary knob
6. USB socket
7. SD memory card
8. BT antenna (optional) Important: Dismount
antenna for transport!
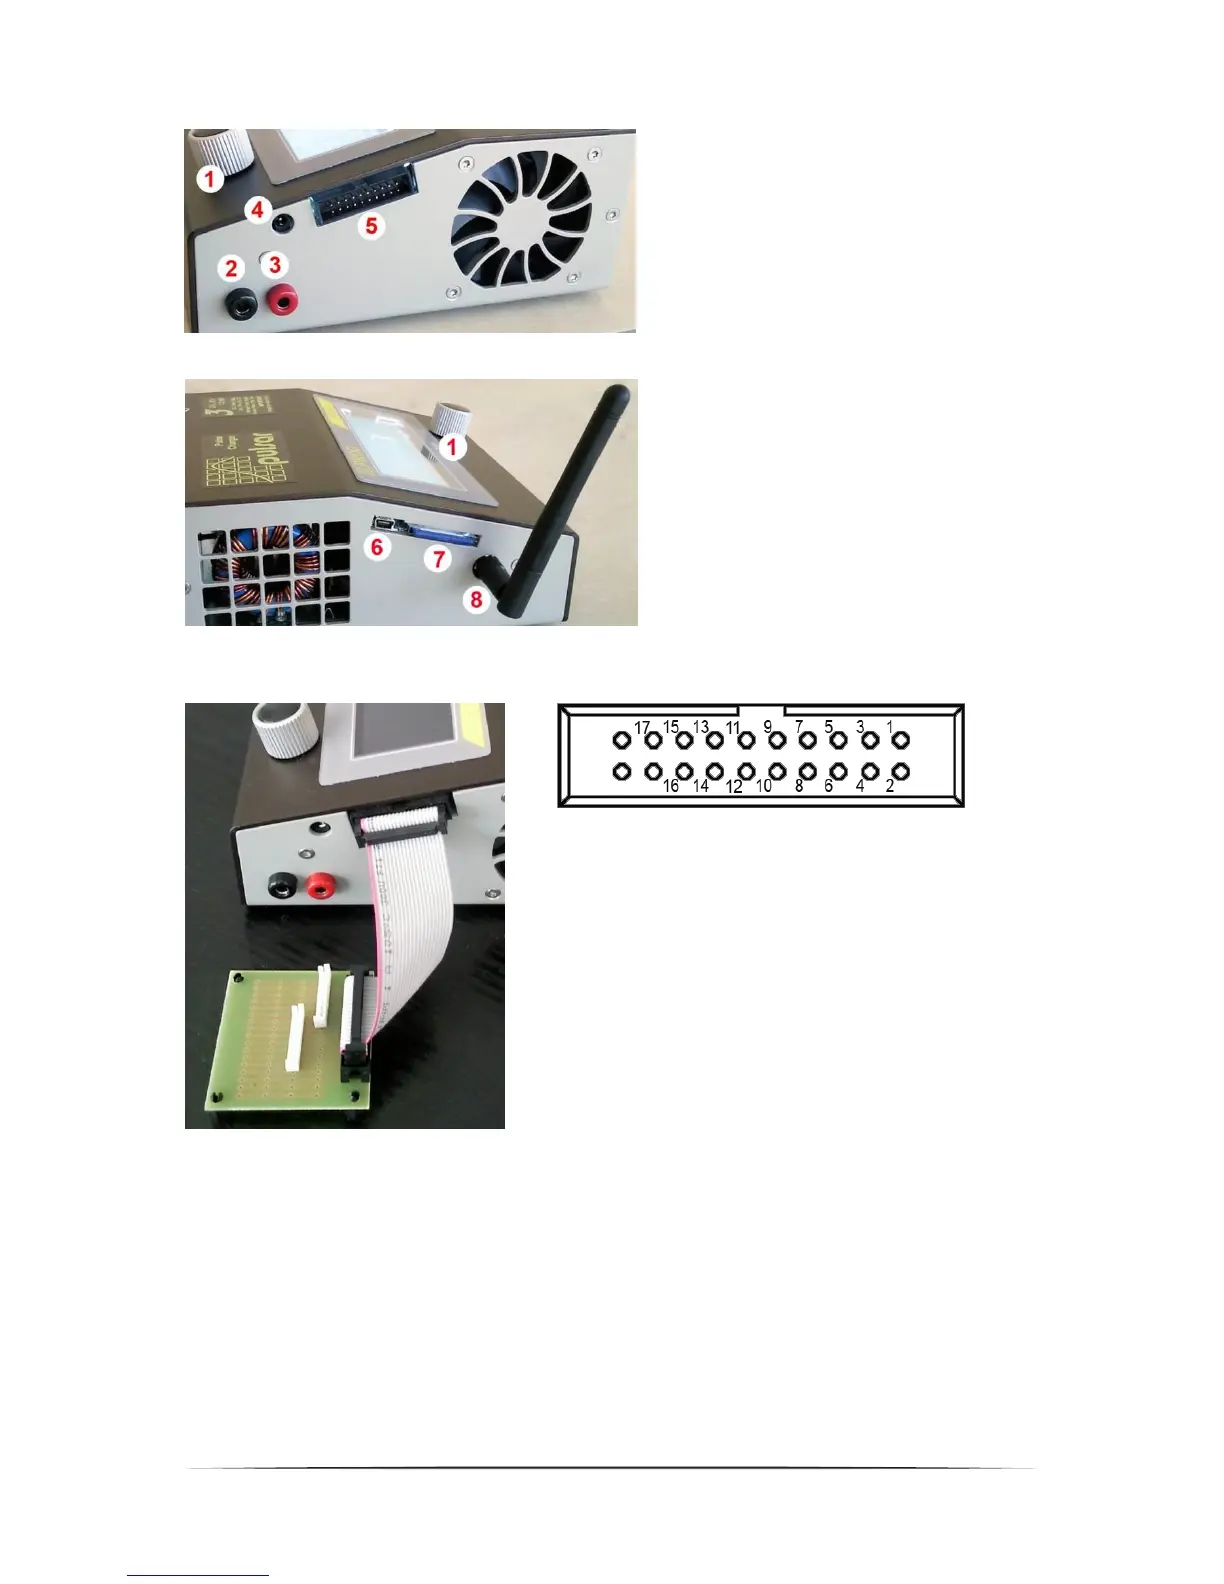
Plugging the balancer
Pulsar 3 balancer socket – the device’s right side view
Plugging separate pins: 1 = – cell 1; 2 = + cell 1; 3 = + cell 2; 4 = +
cell 3; 5 = + cell 4; 6 = + cell 5; 7 = + cell 6; 8 = + cell 7; 9 = + cell 8;
10 = + cell 9; 11 = + cell 10; 12 = + cell 11; 13 = + cell 12; 14 = + cell
13; 15 = + cell 14; 16 = + cell 15; 17 = + cell 16. Additionally it is
possible to plug in a temperature indicator to pins 19 and 20 (NTC
10kΩ).
WARNING! Do not plug in packages, which do not have pins
specially prepared to be used with Pulsar 3, directly to the
device! Pin 20 has a positive voltage for the measuring
temperature indicator!
We recommend using our adapter to connect the balancer plugs in
the packages. It makes proper plugging with different types of pins
easier. The connection’s details can be fund in appendix 1 on page
22 of this manual.
Attention!
All battery packs equipped in balancing joints should be plugged into the balancer socket (5) first, and then
to the charger through cables (2,3). In this way the correct number of cells in the pack will always be
recognized.
Before plugging the adapter plug to the charger, first plug in the pack balancer plugs to the adapter (see
appendix 1 page 22). In this way the charger will be safe from potential damage resulting from mixing the
battery balancing plugs or from them being improperly connected. In this case a short circuit would damage
only pins or paths on the adapter board, which will work as a fuse. If damage occurs by such short cirquit, it
will result in a loss of guarantee services.
As a safety measure temperature control through a plugged in temperature indicator is always advised.