7 pulsar 3
After plugging the pack into the charger it is necessary to ALWAYS control and confirm the indicated number
of cells. Confirming an invalid number of cells in the package may result in damaging the package and
cause other material damage.
Always pay attention to the proper charging and discharging current choice. The charge must be selected
accordingly to the type, kind and size of the cells.
Charging cables with appropriate connections and pins as well as wire section fitted to the charge should be
used. Using high-current cables with silicon isolation with a 4 mm² diameter is recommended. Charging
cables should be short.
Pulsar 3 is equipped in a system, which prevents arcing when the cables are being plugged in for charging.
However, it is recommended that cables should be plugged in and out rapidly and firmly.
In order to avoid arcing, plugging and unplugging by a battery-lead connection to the power supply or AC
adapter should be done rapidly and firmly.
After unplugging the charger from the power supply, it shouldn’t be reconnected earlier than 5 seconds.
The process can be interrupted through holding down the rotary knob (interrupting the process through
unplugging the device is forbidden).
Batteries (parameters)
*- the voltage can be lowered by 200mV or increased by 100mV every 10mV max. Any change in
charging/discharging voltage will result in a change in max. charging/ min. discharging voltage of the same value.
Operating principle – general description
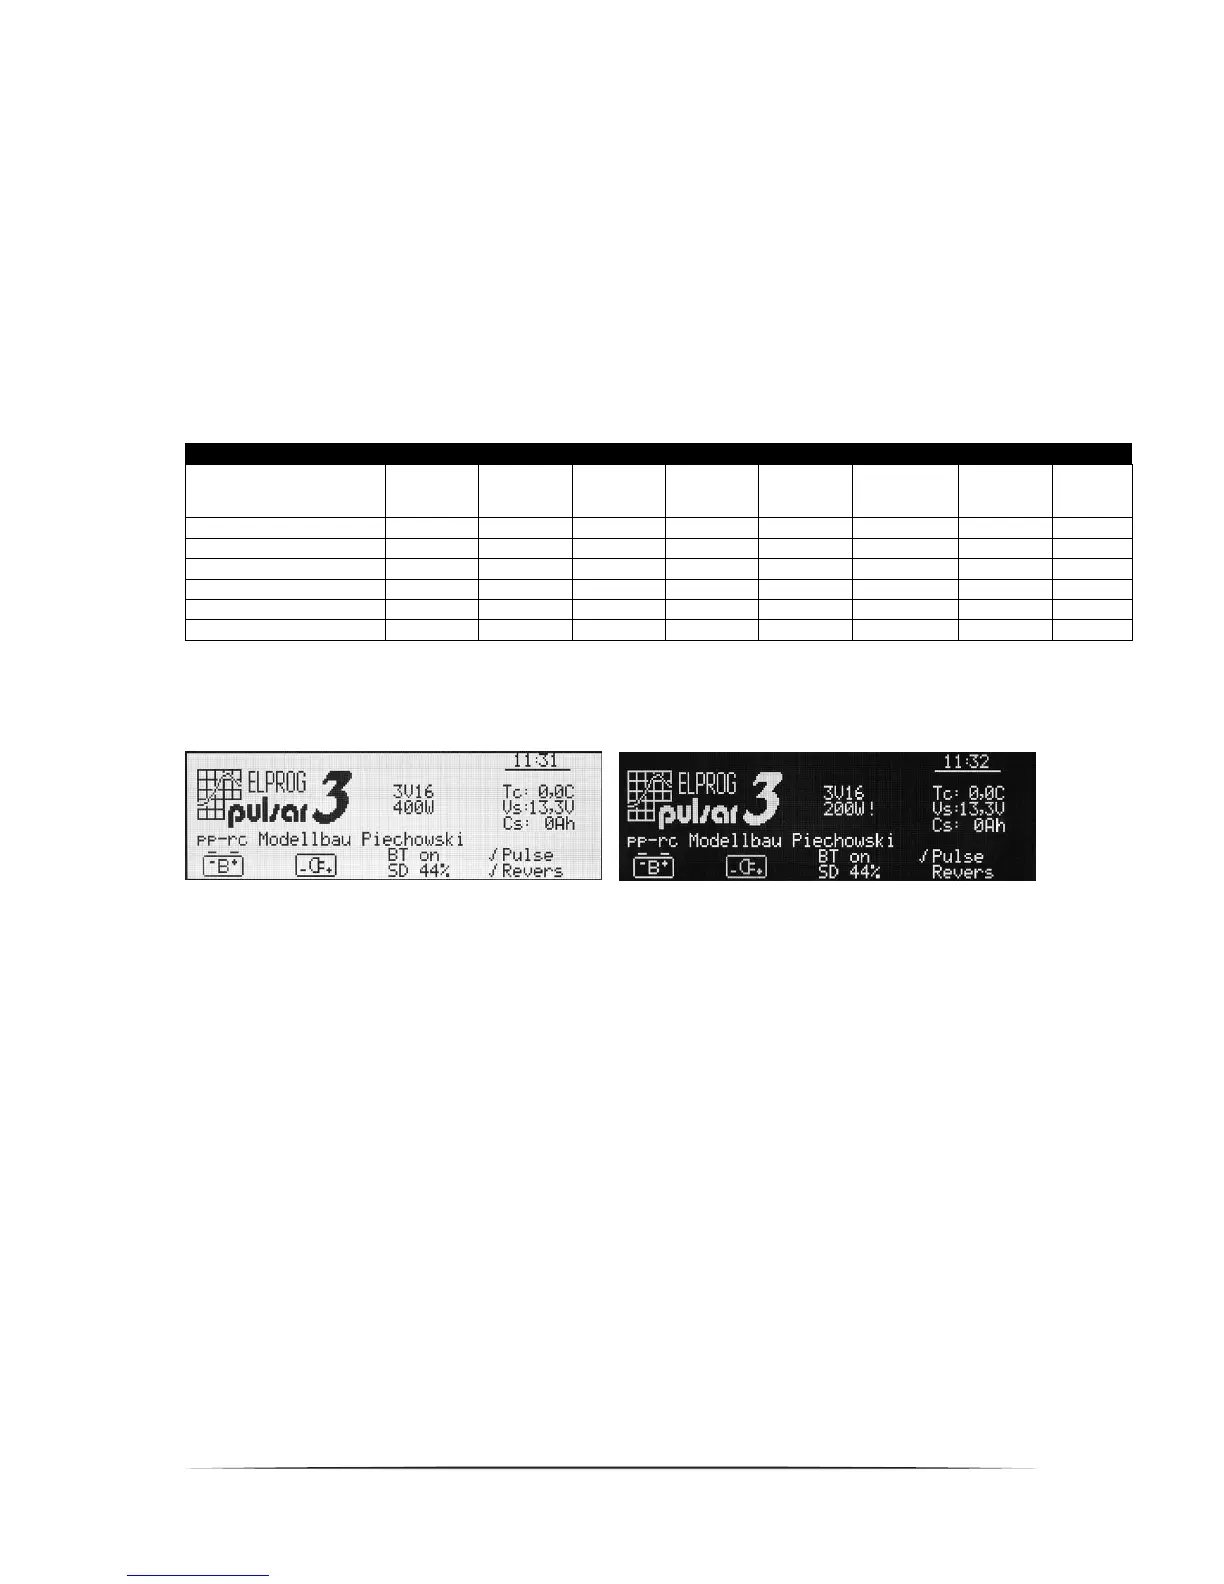
Main menu (shown in positive and negative)
Window description: From top: clock; software version (here v3.15); power (400W), on the right switched to AC
adapter, the adapter has a 240W Power, thus the power output is limited to 200W (the limitation is signalized by
an exclamation mark); personalization (pp-rc Modelbau Piechowski) shows the max. amount of characters; BT on
(radio communication activated); SD 44% (the memory card is 44% full); TC current temperature (0,0°C –
temperature indicator not plugged In); Vs adapter voltage (13,3V); Cs (0 Ah) taken capacity (e.g. car battery);,
Pulse – impulse mode activated; Revers – energy return during discharge; on the left – activated; on the right -
deactivated.
Pulsar 3 is operated using a Rotary knob. The dial can be turned left and right, pressed for a short (up to 1
second) or held for a long (more than 1 second) time. Both pressing and holding is confirmed by an appropriate
acoustic signal (if the sound has not been muted in the setup). Options are chosen from the list by turning the dial
to the one that interests us (blinking line), and then choosing it by pressing the dial. The value of the chosen
option is set in the same way.
After plugging in to the power supply, Pulsar 3 will display the main menu. The operation mode can be changed
(setup, one with the battery symbol, the other with a power supply symbol), after which we are redirected to the
last used memory window.
The memory window is a starting point to all process’ settings and parameters. Memory windows are numbered
from 1 to 20 (on the left side there is a frame with an „M” as well as numbers from 1 to 20). Settings made in there
remain memorized even after the charger has been turned off.
Through holding the dial for a long time we enter the program window. There we have the following options: