17 pulsar 3
3. Δ 58% = Current difference between resistance of the weakest and strongest cell is 17 % (if 0
% is showed, the cell values are equal; if 100 % is showed, the cell has double value of the
best cell).
4. ↓ 5,3 mΩ = Resistance of the cell with the hightest value (cell 1 in this case)
5. Row of numbers – singular package cells’ numbering starting from the first, plugged into the package’s
“minus” cable
6. mΩ/c = Display mΩ per cell
7. B: 0% = current balancer power (100 % max. balancer power). Info: The values of inner resistance might
be influenced by balancing. For this reason, the balancing power is displayed as well!
8. Upper line = 100 %
9. Middle line = 50 %
10. Bars – equalized capacities in bar graphics. The highest bar shows the cell (here cell 12), which required
the greatest balancing (100%)
11. Singular bottom lines – balancer power level (cingular channel). The higher the line, the higher the
balancing power of that cell is.
12. Single cell inner resistance = The cell with the highest and lowest resistance is marked by an arrow
(cells 1 and 6 in this case)
Warning! Pulsar 3 conducts estimates correct to three decimal places and so they are displayed on the
computer screen. Due to the size of LCD displays, the values are rounded up to two decimal places. Because of
this some differences may occur.
Process initialization
After plugging the battery, Pulsar 3 checks and displays the number of recognized cells.
Warning: all packages with a balancing connection must always be plugged in the following order – first the
balancer, then the charging cable. Thanks to this the charger will always recognize the right amount of cells in the
package! It is important to check if the number of cells in the package has been properly recognized before
starting the process. After adjusting the number of cells, if necessary, we can start the process by pressing the
Rotary knob.
Info: If the Pulsar is connected to an LiXX battery pack without balancer, the double confirmation of cell count is
necessary.
Process end, reports and alarms
Warning! Interrupting the process in progress is allowed only through holding the dial and not by unplugging the
package!
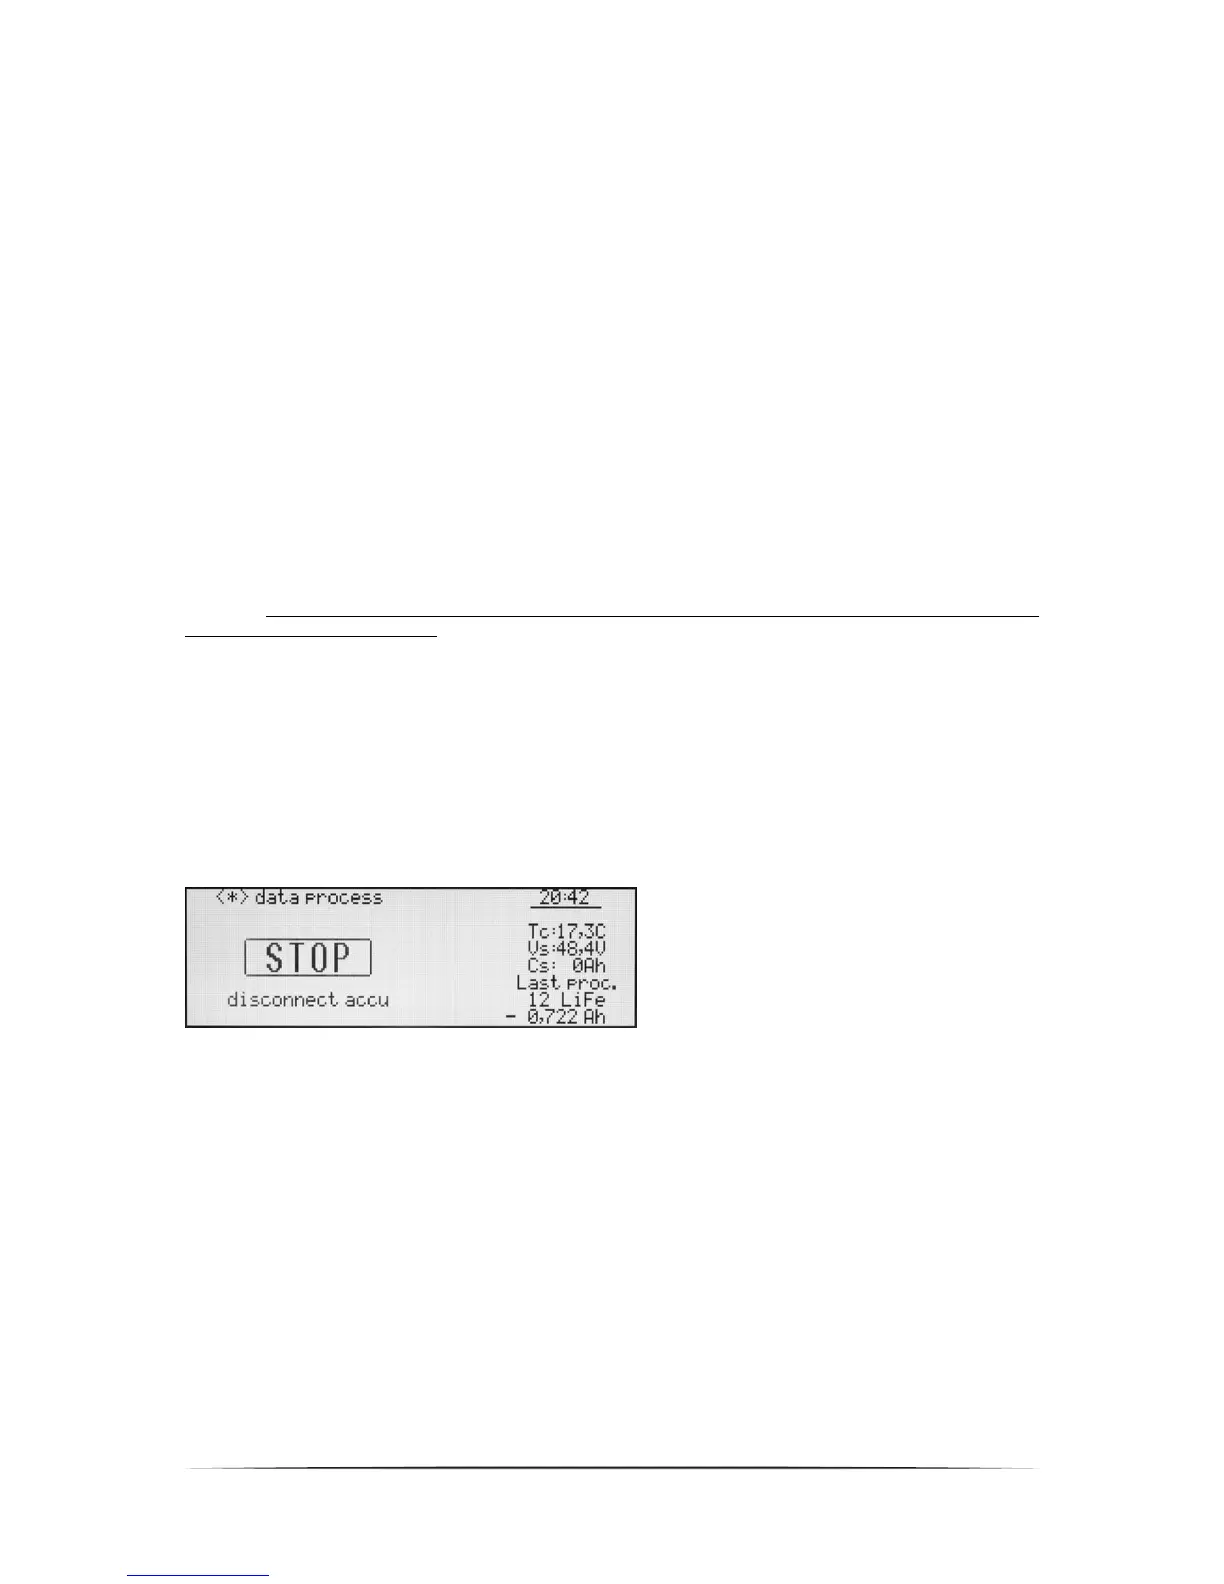
Window after ending the process, the displayer
show a „STOP” message and the backlit blinks
recurrently (after manual process interruption). An
acoustic signal is also generated, which fades after
30 seconds and is turned off after 5 minutes. To
start another process (return to memory window)
the package must be unplugged from the charger!
The window May display the following information:
<*> data process – through turning or pressing the Rotary knob, last process windows will be displayed directly
before the process’ end
Messages (in the frame):
END – proper process end.
STOP – premature process end – as show on the picture above (by holding the dial).
LIMITER – process end after reaching the capacity limit set in the limiter.
TIMER – process end after exceeding the process’ time limit (24 hours per process).
PAUSE – displayed automatically between processes in progress. Below it the time left before starting the next
process is shown. If the battery temperature “T on” is higher than the one set in the setup a „Tc to high: xx,x C”
message will be displayed until the battery cools down.
! Δ x,xx V ! – displayed when the process, with a plugged in balancing (for LiXX cells), ends after the voltage
difference between singular cells exceeds 50mV.
Alarms – stopping the process
Vc high – when the voltage of one of the cells (or package) exceeds the allowable value
Vc low = Too low cell voltage (can possibly happen while test)
Tc high – when the package temperature exceeds the set limit