10
USER MANUAL FOR KRYPTON XG50 THERMAL IMAGING MONOCULAR
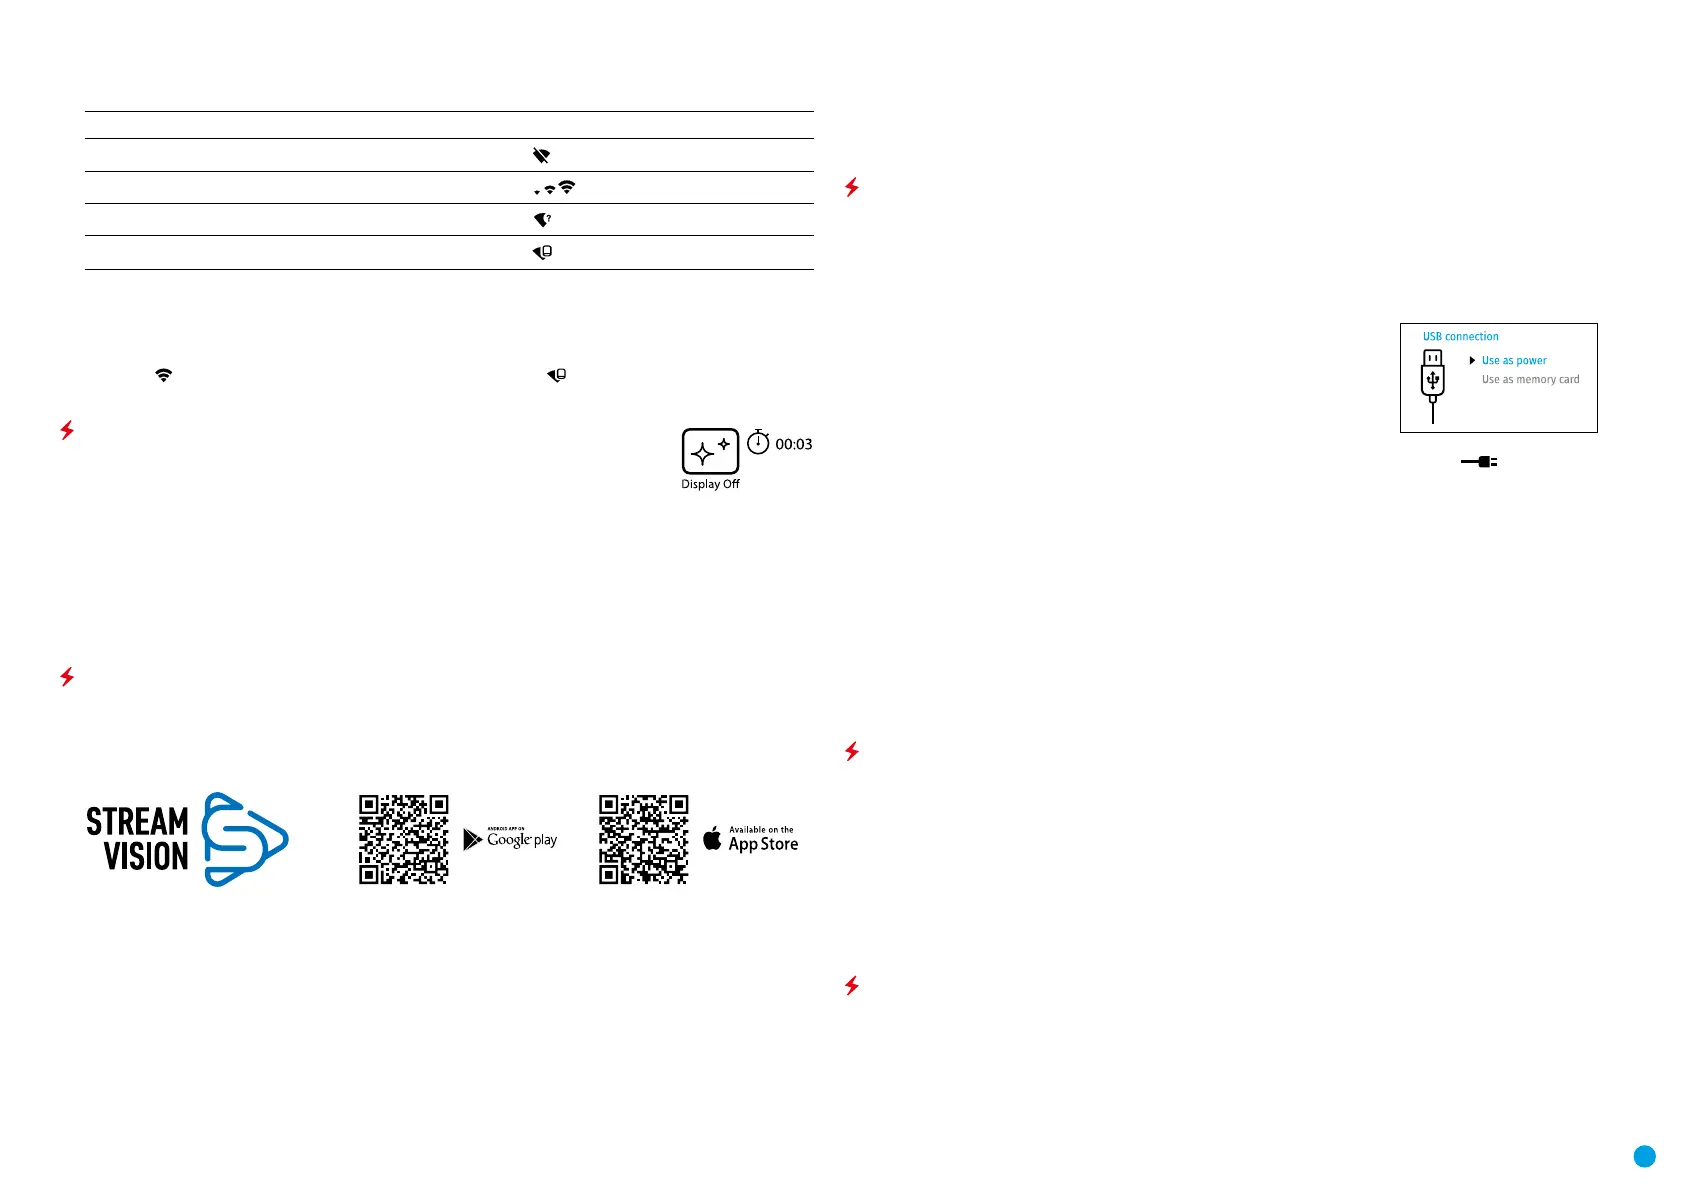
Turn on the wireless module in the main menu. Wi-Fi is displayed in the status bar as follows:
Connection Status Indication on the status bar
Wi-Fi is switched off
Wi-Fi connection is in progress
Wi-Fi is switched on, no connection with device
Wi-Fi is switched on, device connected
•
The device is recognized by an external device as KRYPTON_XXXX where XXXX are the four last digits of the
serial number.
•
After entering the password (default: 12345678) on a mobile (see Wi-Fi Setup section of the Main Menu
Functions section of this manual for more information on setting a password) and setting up a connection,
the icon
in the thermal imaging monocular status bar changes to .
DISPLAY OFF FUNCTION
This function deactivates the image transmission to the display by minimizing its
brightness. This helps prevent accidental disclosure. However, the device stays on.
When this function is in use, the device switches to the standby mode, which allows it to
be switched on quickly if necessary.
•
When the device is on, press and hold the ON (9) button for less than 3 seconds. The display goes blank and
the message Display Off appears.
•
Press the ON (9) button briey to turn on the display.
•
When you press and hold the ON (9) button, the display shows the message Display Off with a countdown.
Holding the button down for the duration of the countdown will power the device off completely.
STREAM VISION
KRYPTON XG50 thermal imagers support Stream Vision technology, which enables the transmission of an image
in real time from the thermal imager to your smartphone or tablet via Wi-Fi.
Detailed instructions on the operation of Stream Vision technology can be found in a separate booklet or on
the www.pulsar-vision.com website.
Note: the Stream Vision application allows you to update the rmware features of your Pulsar Device.
How to update instructions are as below:
•
Download free of charge Stream Vision App on Google Play or App Store. Scan the QR codes to download
Stream Vision free of charge:
•
Connect your Pulsar device to your mobile device (smartphone or tablet).
•
Launch Stream Vision and go to section My Devices.
•
Select your Pulsar device and press Check Updates.
Important:
if your Pulsar device is connected to phone, please turn on mobile data transfer (GPRS/3G/4G) to download
update;
if your Pulsar device is not connected to your phone but it's already in the My Devices section, you may use
Wi-Fi to download update.
•
Wait for the update to download and install. Pulsar device will reboot and will be ready to operate.
USB CONNECTION
•
Connect one end of the USB cable (23) to the device micro-USB port (11) and the other end to the port on
your computer.
•
Switch the device on with a short press of the ON (9) button (the computer will not detect the device if it is
switched off).
•
The device is detected by the computer automatically and no drivers need to be installed.
•
Two connection modes will appear on the display:
Use as power.
Use as memory card.
•
Use the RIGHT (6) and LEFT (8) buttons to select the connection mode.
•
Press the MENU (7) button briey to conrm the selection.
USE AS POWER
•
When this mode is selected, the computer is used as an external power supply. The icon appears in the
status bar. The device will continue operating and all the functions are available.
•
A battery installed in the device will not be charged.
•
When disconnecting the USB from the device connected in Use as Power mode, the device will continue to
operate from the rechargeable IPS7 battery if it is present and provided it has enough charge.
USE AS MEMORY CARD
•
When this mode is selected, the device is recognized by the computer as a ash card. This option is designed
for working with les that are stored on the device’s built-in memory. However, the device functions are not
available in this mode and it will switch off automatically.
•
If video recording was in progress when the connection was made, recording stops and the video is saved.
•
When USB cable is disconnected from the device in Memory card mode, the device remains turned OFF. Press
the ON (9) button to turn on the device.
TECHNICAL INSPECTION
It is recommended to carry out a technical inspection before each use of the device. Check the following:
•
The device appearance (there should be no cracks on the body).
•
The state of the objective and eyepiece lenses of the thermal imaging module (there should be no cracks,
grease spots, dirt or other deposits).
•
The state of the rechargeable battery (it should be charged) and the electric contacts (there should be no
signs of salts or oxidation).
•
The controls should be in working order.
•
The thermal imaging module is properly and rmly xed on the optical device.
MAINTENANCE
Maintenance should be carried out at least twice a year and include the following steps:
•
Wipe the exterior metal and plastic surfaces with a cotton cloth to remove dust and dirt. Silicone grease may
be used for this.
•
Clean the electrical contacts of the rechargeable battery on the device using a non-greasy organic solvent.