9
USER MANUAL FOR KRYPTON XG50 THERMAL IMAGING MONOCULAR
Restore Default
Pixel Map
This option allows the user to return all previously disabled defective pixels to their original
state.
•
Use the RIGHT (6) or LEFT (8) buttons to select the Restore Default Pixel Map icon .
•
Activate the function by briey pressing the MENU (7) button.
•
Using the RIGHT (6) or LEFT (8) buttons, select Yes if you want to return to the factory pixel
map or select No if you do not.
•
Conrm your selection with a short press of the MENU (7).
Attention! One or two pixels on the display of the device in the form of bright white, black or
colored (blue, red or green) points may appear. These points cannot be removed and are not
a defect.
Microphone
Turning microphone on / off.
This item allows you to enable (or disable) the microphone for recording sound during video
recording.
•
Press and hold the MENU (7) button to enter the main menu
•
Select Microphone option with the RIGHT (6) or LEFT (8) buttons.
•
A short press of the MENU (7) button opens the submenu.
•
To turn the microphone on or off press RIGHT (6) or LEFT (8) buttons.
•
Conrm your selection with a short press of the MENU (7) button.
Icon Brightness
Icon brightness
•
Press and hold the MENU (7) button to enter the main menu.
•
Use the RIGHT (6) or LEFT (8) buttons to select the Icon Brightness icon .
•
Press the MENU (7) button briey to enter the submenu.
•
Use the RIGHT (6) or LEFT (8) buttons to select the desired brightness level from 0 to 10.
•
Press the MENU (7) button briey to conrm the selection.
Calibration Mode
Calibration mode selection
There are three calibration modes: Manual, Semi-Automatic and Automatic.
•
Press and hold the MENU (7) button to enter the main menu.
•
Use the RIGHT (6) or LEFT (8) buttons to select the Calibration Mode icon .
•
Press the MENU (7) button briey to enter the submenu.
•
Use the RIGHT (6) or LEFT (8) buttons to select one of the calibration modes described
below.
•
Press the MENU (7) button briey to conrm the selection.
Automatic. In this mode the rmware determines the need for calibration. The calibration
process starts automatically.
Semi-Automatic. The user determines the need for calibration based on the image quality
and can action at a convenient time depending on the object being observed.
Manual. In the Manual (silent) calibration mode the user determines the need for calibration
(as in SA mode) but the lens cover must be closed during calibration.
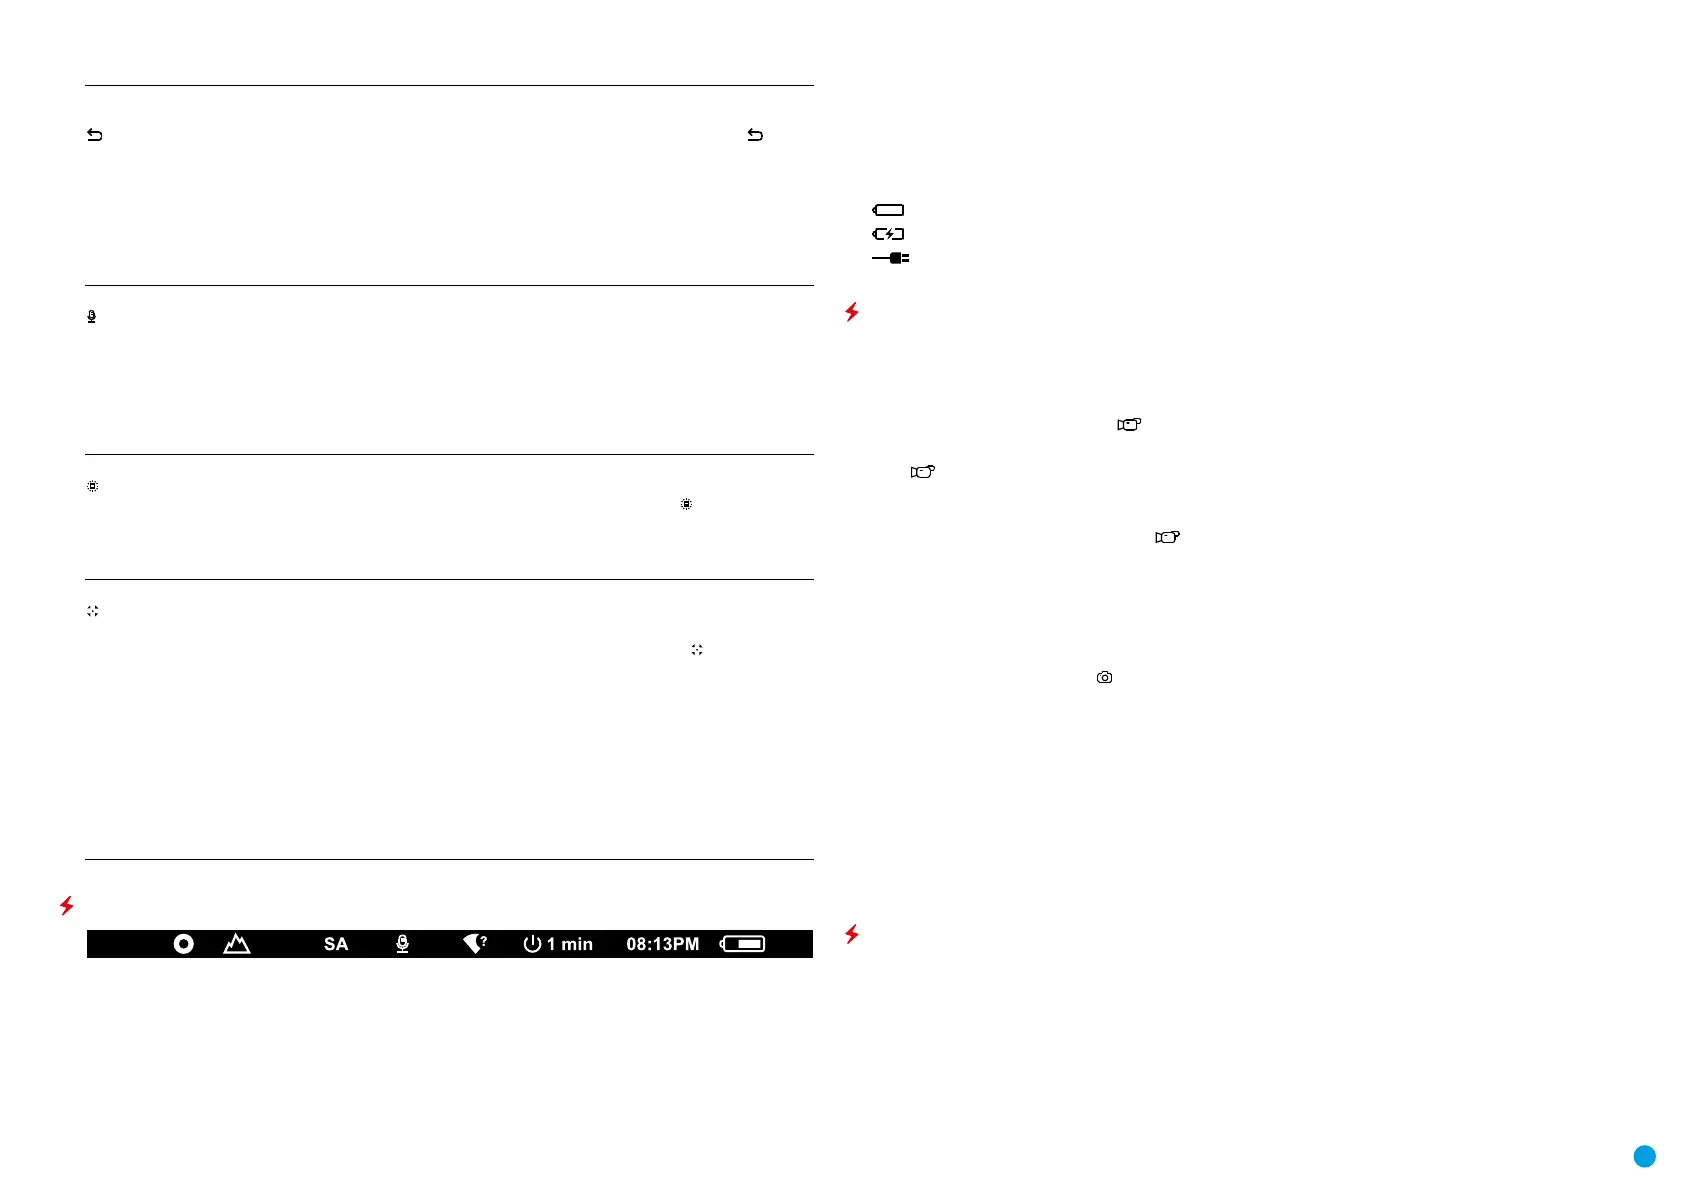
STATUS BAR
The status bar is at the bottom of the display and displays information on the actual operating status of the
device, including:
•
Color Mode (shown only when the Black Hot color mode is selected)
•
Observation Mode
•
Calibration Mode (in Automatic calibration mode a countdown timer will appear instead of the calibration
mode icon 3 seconds before automatic calibration begins)
•
Microphone
•
Wi-Fi Connection
•
Auto shutdown function (for example, 1 min)
•
Time
•
Power Indication:
- charge level if the device is powered by a battery
- charge level if the device is charging and powered by a battery
- no battery, the device is connected to an external power supply
VIDEO RECORDING AND PHOTOGRAPHY
The KRYPTON XG50 thermal imagers are equipped with the option to record video and still images
(photography) of the observed image by saving them on the built-in memory card. It is recommended to set the
date and time (see the corresponding menu items) before using the photo and video functions.
The built-in recorder operates in two modes:
VIDEO MODE. VIDEO RECORDING
•
The VIDEO mode is activated when you turn on the device.
•
The icon and the remaining recording time in HH:MM (Hours:Minutes) format are displayed in the upper
left corner, for example, 5:12.
•
Press the RIGHT/REC (6) button briey to start video recording.
•
When the video recording starts, the icon will disappear and the REC icon and timer in MM:SS
(Minutes:Seconds) format will appear lREC | 00:25.
•
Press the RIGHT/REC (6) button briey to pause or resume video recording.
•
Press and hold the RIGHT/REC (6) button to stop video recording.
•
Video les are saved to the built-in memory card after the video recording has been stopped.
•
Press and hold the RIGHT/REC (6) button to switch between the video and photo modes.
PHOTO MODE. PHOTOGRAPHY
•
Switch to PHOTO mode by pressing and holding the RIGHT/REC (6) button.
•
Press the RIGHT/REC (6) button briey to take a photo. The image freezes for 0.5 sec while the photo is saved
to the internal memory.
Notes. You can enter and navigate the menu during video recording. The recorded videos and photos are saved
to the built-in memory card of the device in the formats img_xxx.jpg (photos) and video_xxx. mp4 (video) where
xxx is a 3 digit counter. The counter for multimedia les cannot be reset.
Attention! The maximum duration of a recorded video le is ve minutes. After this time expires, the video is
recorded to a new le. The number of recorded les is limited by the capacity of the internal memory of the
device. Regularly check the free capacity of the internal memory and move recorded footage to other storage
media to free up space on the internal memory card.
WI-FI FUNCTION
The device has a function enabling wireless communication with external devices (smartphone or tablet) via
Wi-Fi.