RESET BUTTON: Press and hold the RESET BUTTON for 30 Seconds to reset the camera back to the
factory default settings. (Please keep the power on when doing a RESET)
1.4 PC System Requirements
System configuration requirements:
CPU: 2.06 GHZ or above.
Memory: 256M or above.
Network Card: 10M or above.
Display Card: 64M or above memory.
Recommended Operating system: Windows XP, Windows Vista, Windows 7.
1.5 Hardware Installation
Follow the steps below to set up your camera hardware.
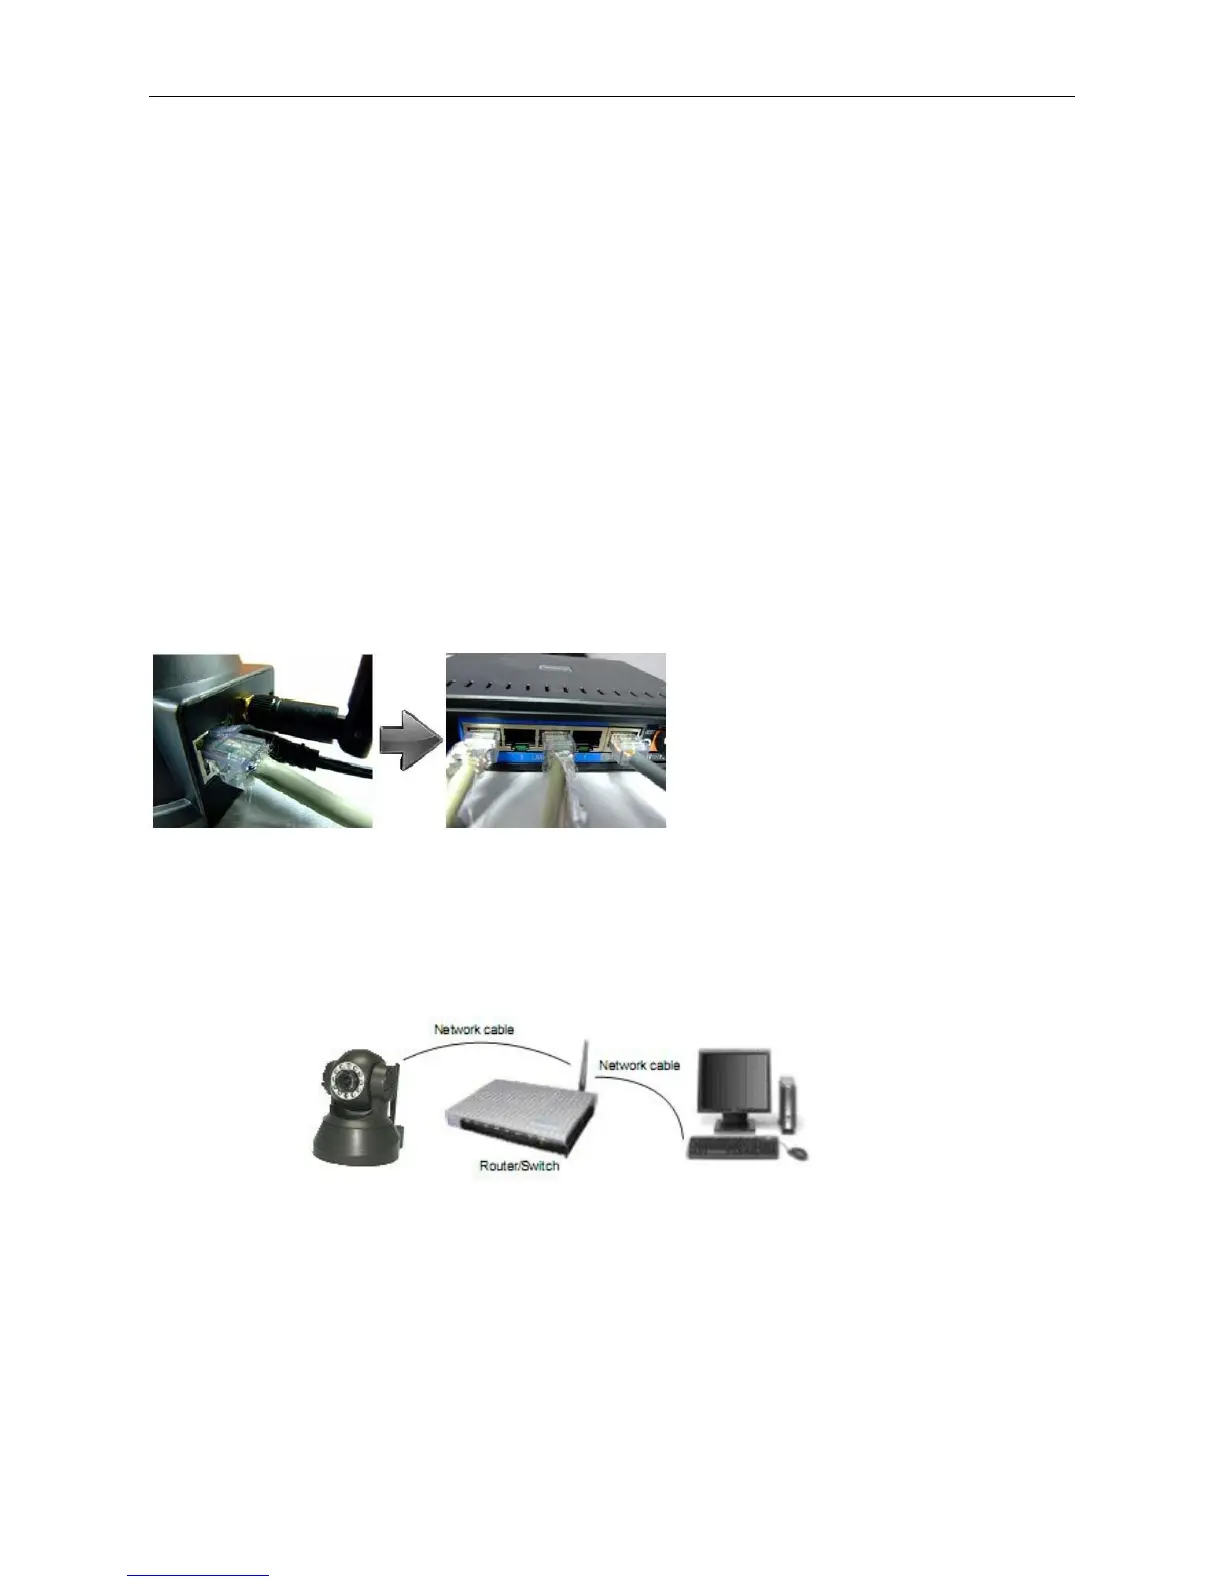
1. Install the Wi-Fi antenna.
2. Plug the power adaptor into the camera and into an AC outlet.
3. Plug the network cable into the camera and router/switch.
4. It takes approx 30 seconds to boot up the camera, then you will find the IP address from “IP Camera Tool”
(Figure 2.1).
5. When the power is on and the network cable is connected, the green LED on the rear panel will stay on.
The yellow LED will keep flashing, and the Indicator LED on the front of the camera will flash. (The indicator
LED can be controlled by software).
Figure 1.4
1.6 Software Installation
Attention: In order to make the installation correctly, we suggest that you turn off your Firewall and Antivirus
software before installing ActiveX. Correct software installation is essential to the successful use of this
product. Install the following software:

 Loading...