32
TESTING THE 4POINT TIEDOWN SYSTEM
OPERATING SEQUENCE
#
IMAGE
7
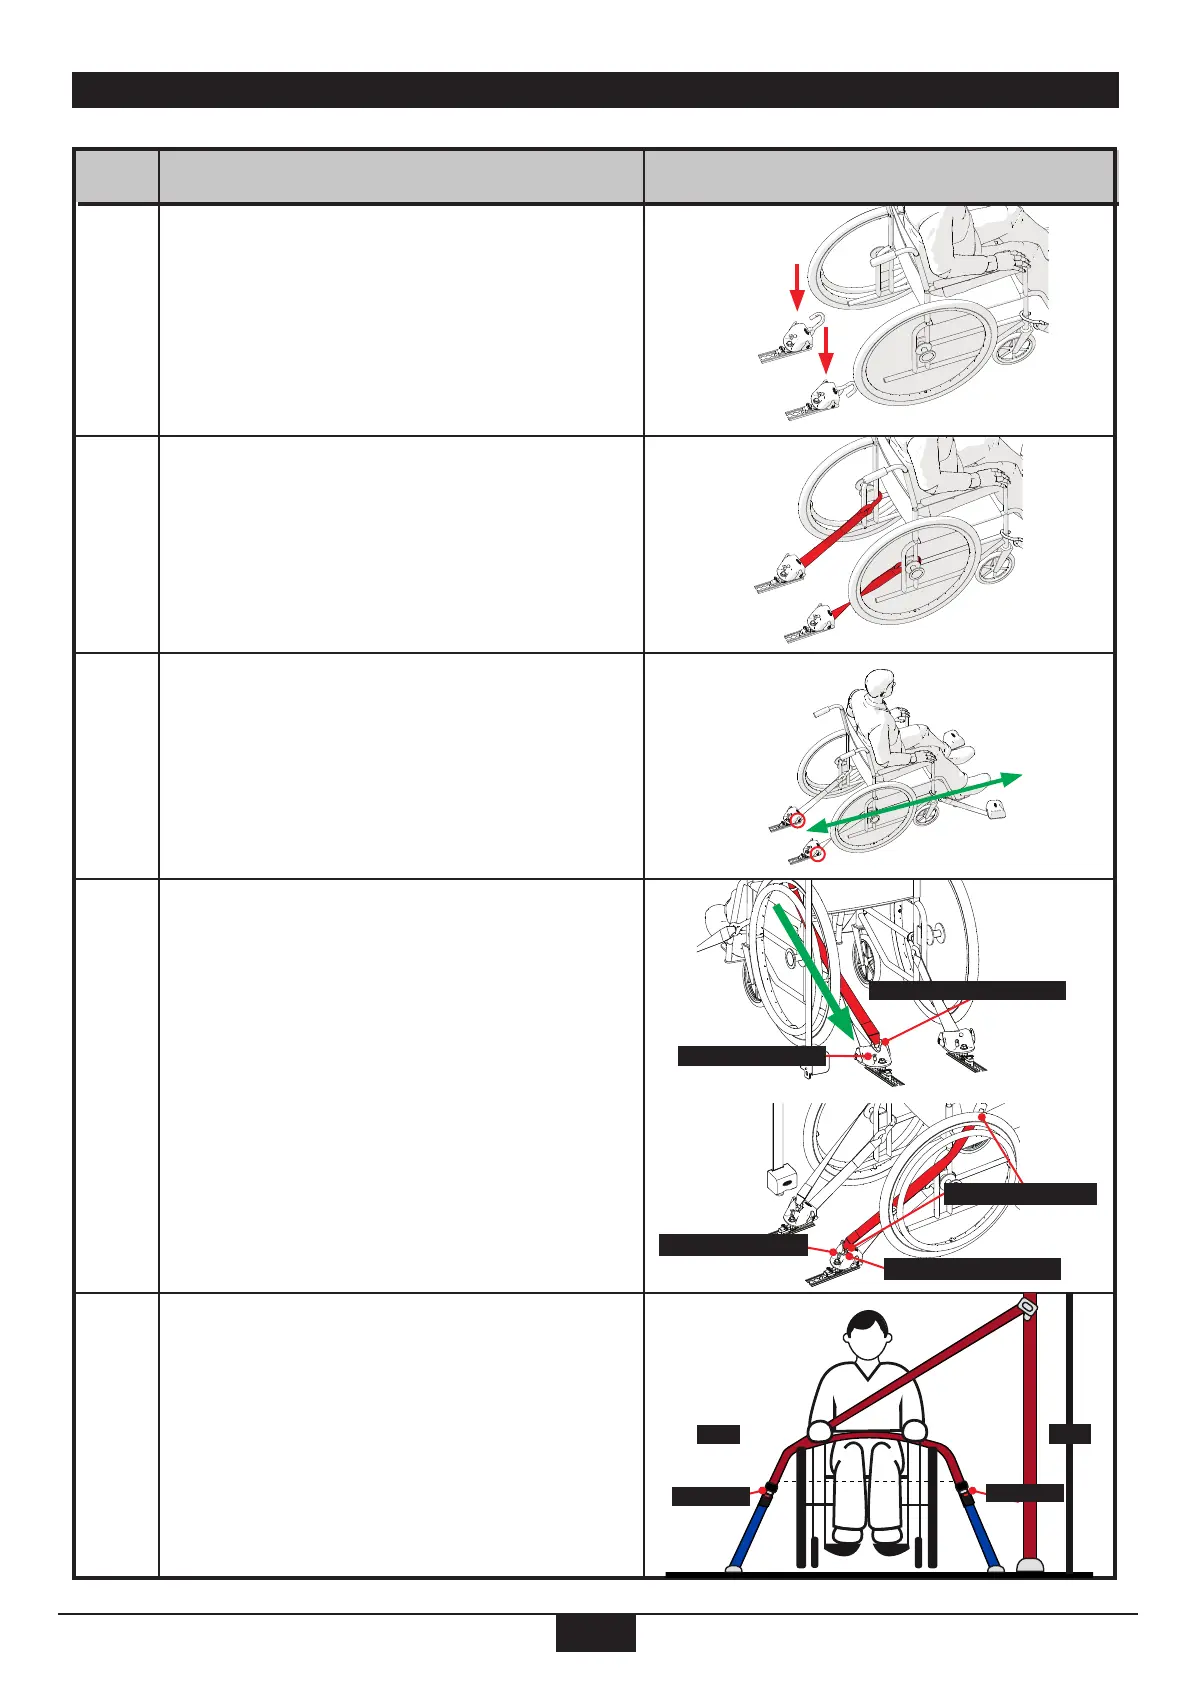
Attach Rear Retractors or Rear Manual
Tiedown Straps into oor anchorage points
and lock them in place.
8
Completely pull out each Webbing and
attach hooks to solid frame members at an
approximate 45 degree angle with oor.
9
Move wheelchair forward and back to remove
webbing slack or manually tension webbing using
the retractor knobs or webbing loop/adjuster on
manual belts.
Lock wheelchair brakes (or power o electric chair)
10
OCCUPANT BELTS THAT ATTACH TO REAR QRTS
Attach Shoulder belt connector to pin on rear
tiedown closest to wall.
Attach 1/2 lapbelt (or other half of lapbelt) to pin
connector on rear tiedown on aisle side.
Pull the Shoulder Belt over occupant’s chest and
buckle Shoulder Belt to Removable Pelvic Belt or pin
connector on full lapbelt.
Pin on Rear Retractor
Shoulder Belt Pin Connector
Attach tongue on lower end of shoulder belt (tongue
2) into buckle stalk on Wall side.
Pull shoulder belt over occupants chest and attach
buckle (1) into the aisle side buckle stalk.
11
OCCUPANT BELTS THAT ATTACH TO 2 BUCKLE STALKS
Removable Pelvic Belt
Pelvic Belt Pin Connector
Pin on Rear Retractor
AISLE
WALL
Tongue (1)
Tongue (2)

 Loading...

