22
Chapter 5. Expansion Card Installation
Warning:
The following instructions should only be performed by an authorized or trained
technician.
Strictly adhere to the instructions in this section to install PCIe add-in card(s) in NAS.
Failure to do so could result in property damage, bodily harm or even death.
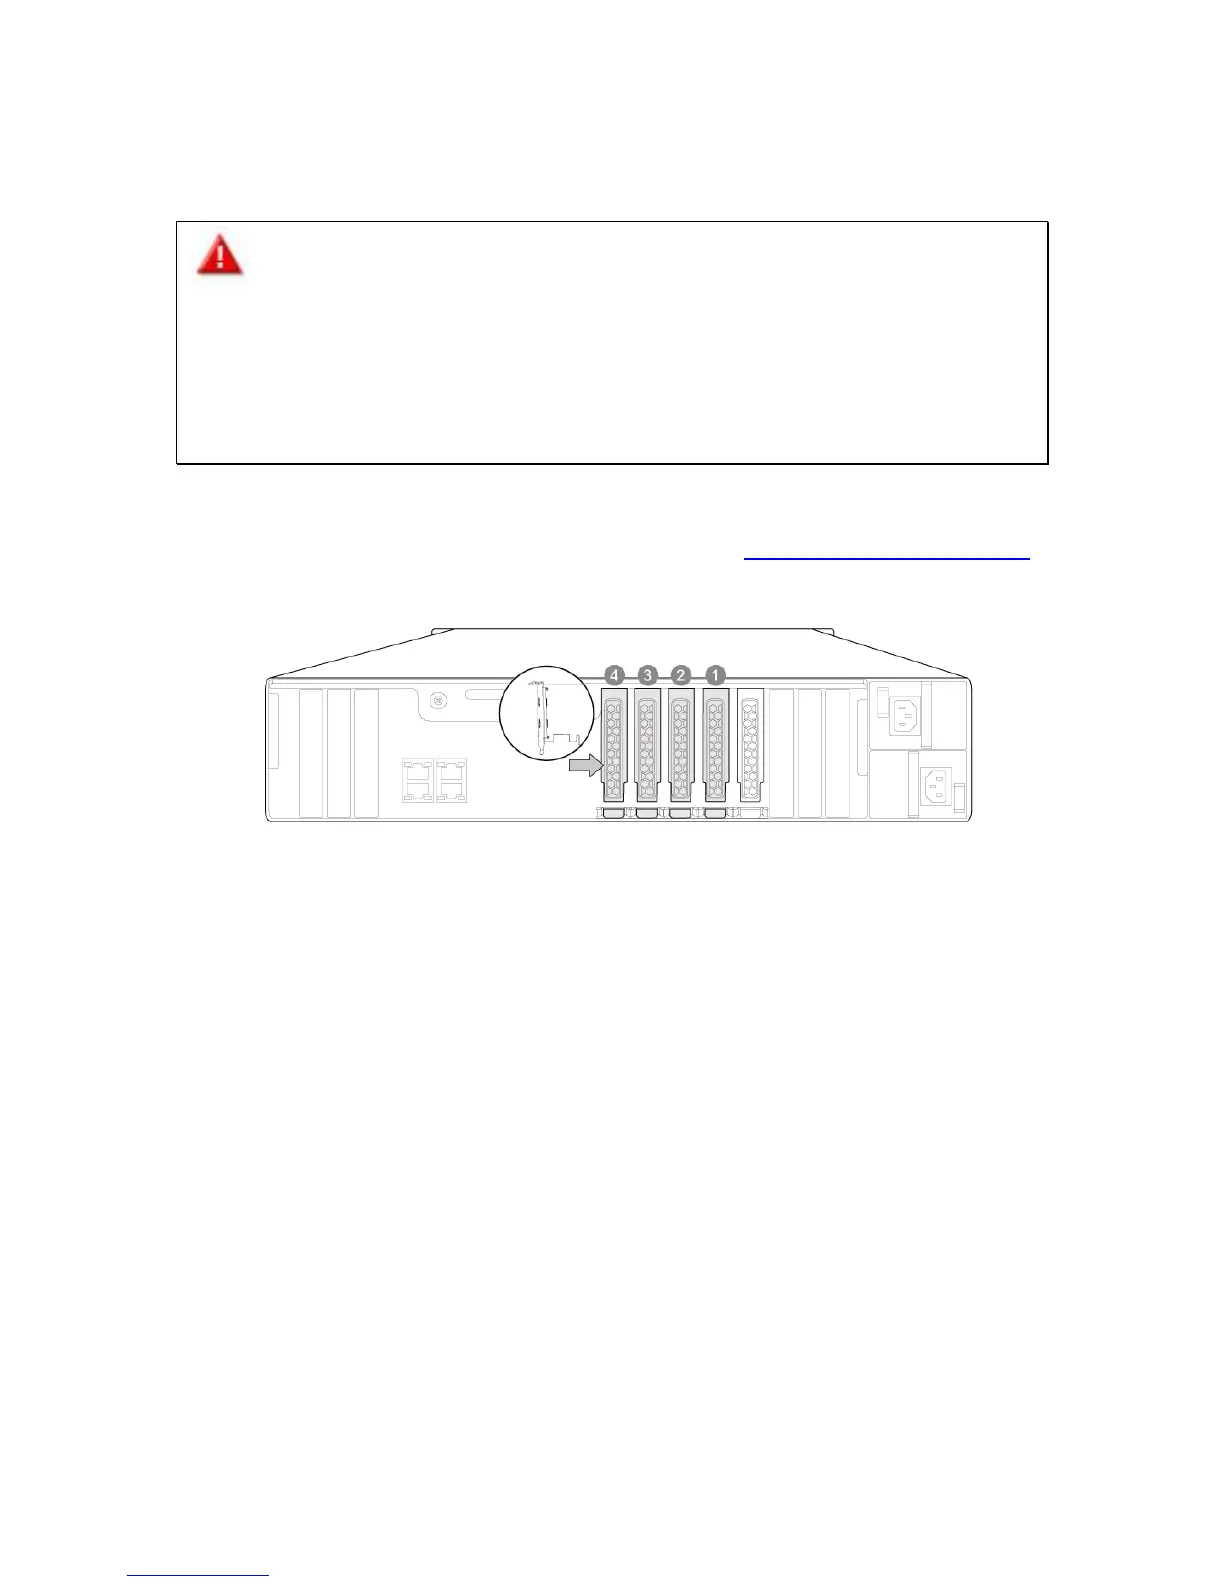
The TES-x85U series provides 4 low-profile PCIe expansion slots so that users can add
functionality to their NAS. Refer to the compatibility list at http://qnap.com/compatibility.
Follow the steps below to install add-in card:
1. Power off the NAS. Wait for device to fully power down.
2. Disconnect power cord(s), network cable(s), and any other cables attached to the
device.
3. Before opening the NAS, wear an antistatic wrist strap and connect the crocodile clamp
to ground to prevent electrostatic discharge from damaging equipment.
4. Loosen the 2 screws on the back of the NAS located on the handle.
 Loading...