Installing Expansion Modules
Quantum DXi4700 Capacity Upgrade Guide 37
Installing the DXi4700 Expansion Module
Installing the DXi4700 Expansion Module Rack Mounting Rails
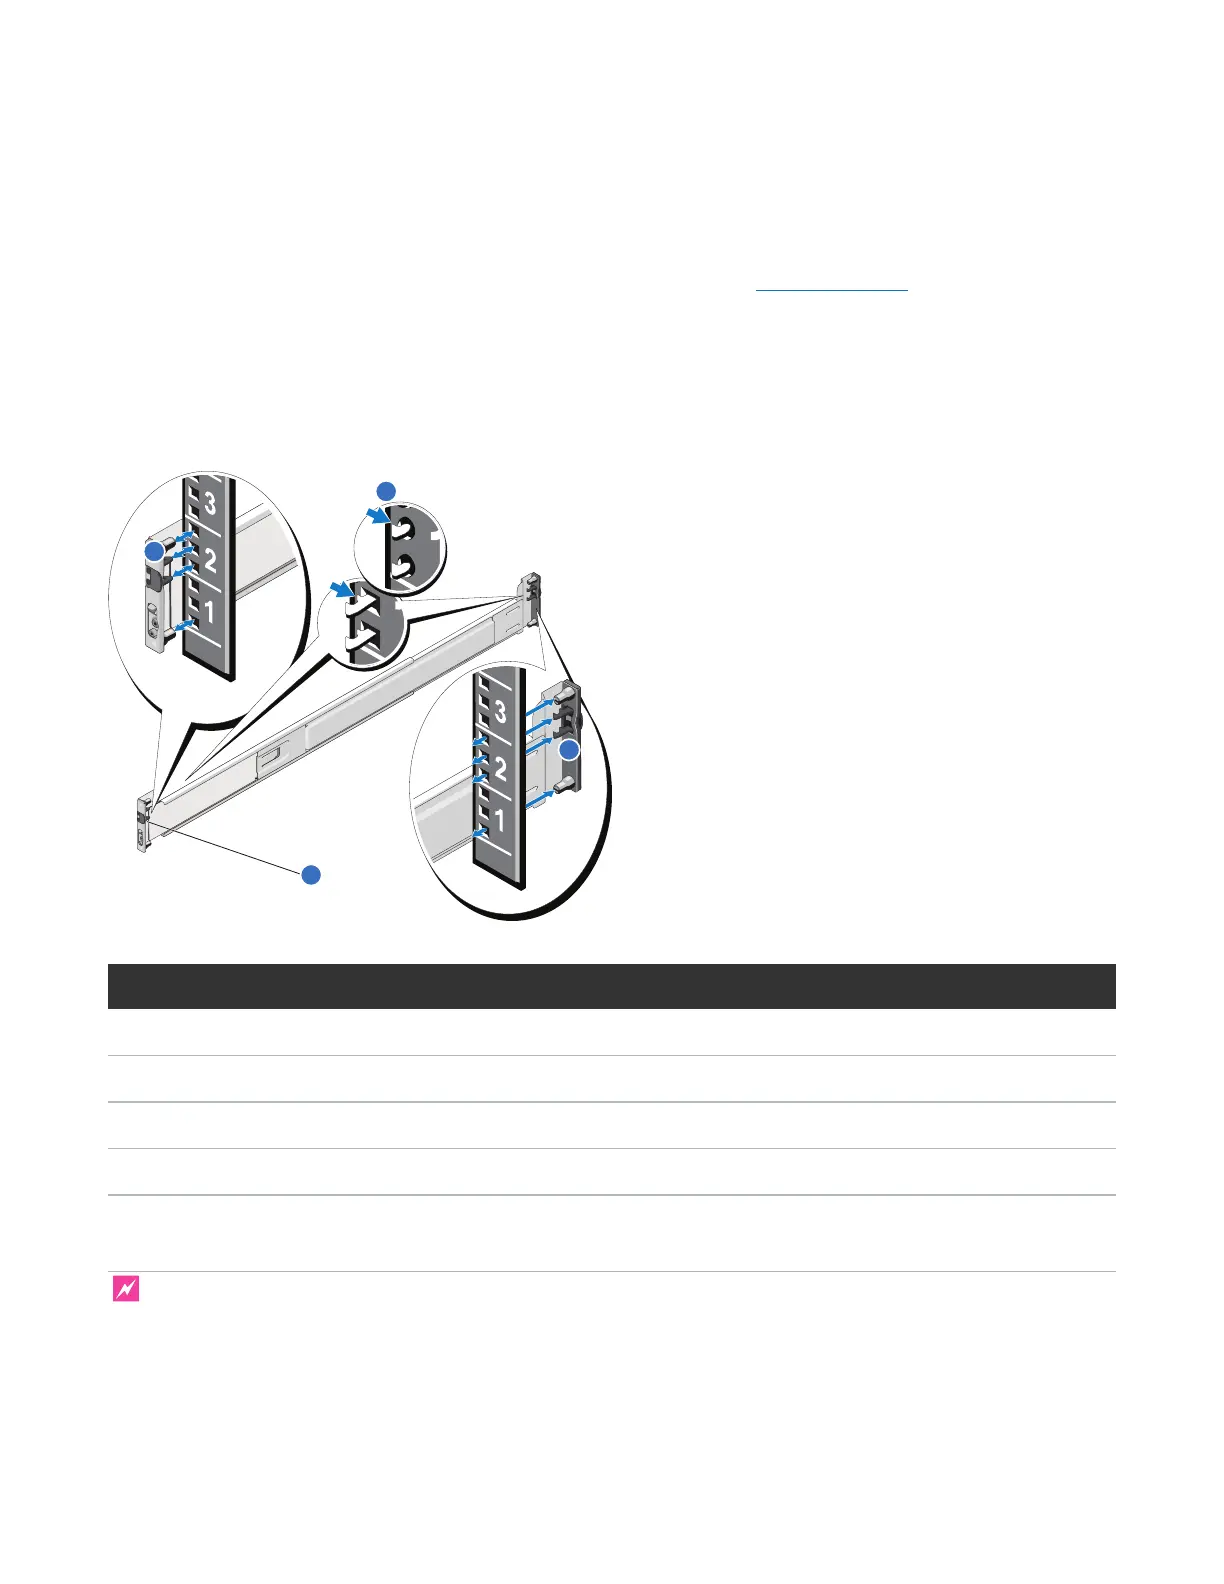
1. Position the left and right rail end pieces labeled FRONT facing inward, and orient each end piece to
seat in the holes on the front side of the vertical rack flanges (see Figure 28 below).
2. Align each back end piece in the bottom and top holes of the desired U spaces.
3. Engage the back end of the rail until it fully seats on the vertical rack flange and the latch clicks into
place. Repeat these actions to position and seat the front end piece on the vertical rack flange.
Figure 28: DXi4700 Expansion Module Rails Installation
Item Description
1 Latches click into place in rack flange (round or square holes).
2 Rail front end.
3 Latch release button.
4 Rail back end.
Installing the DXi4700 Expansion Module
WARNING: The DXi4700 Expansion module (JBOD, including hard drives) weighs 62.6 pounds (28.4

 Loading...


