15
Operation
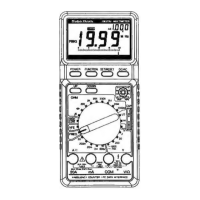
3. Press SELECT until appears.
4. Connect the black test lead to the cathode or a component pin.
5. Connect the red test lead to the anode or the other component pin, or remove one
of the leads of the component from its circuit and touch the test leads across the
component. Then note the first reading.
6. Reverse the test leads and note the second reading.
• Ifonereadingshowsavalueandtheotherisoverrange(.OFappears),thedeviceis
good.
• If OF appears during both readings, the device is open.
• If both values are very small or zero, the device is shorted.
nNote:
• Thevaluesformostsemiconductorsmayvarydependingonthetemperature.
• Thevaluesthatappearduringadiodecheckshowtheactualforwardvoltage(max.
3.0V).Ifthevoltageexceeds3.0V,O.F appears. This means the diode check cannot be
made using this meter.
• Check diode polarity: Connectthetestleadstothetwoendsofthediode.Measure
andnotethevoltage.Then,reversethetestleads.Thesideofthediodewherethe
meter shows a higher voltage using the red test lead is the anode (+) side. The side of
the diode where the meter shows OF using the red test lead is the cathode (–) side.
 Loading...