RD4000 Locating System User Manual
Page 41
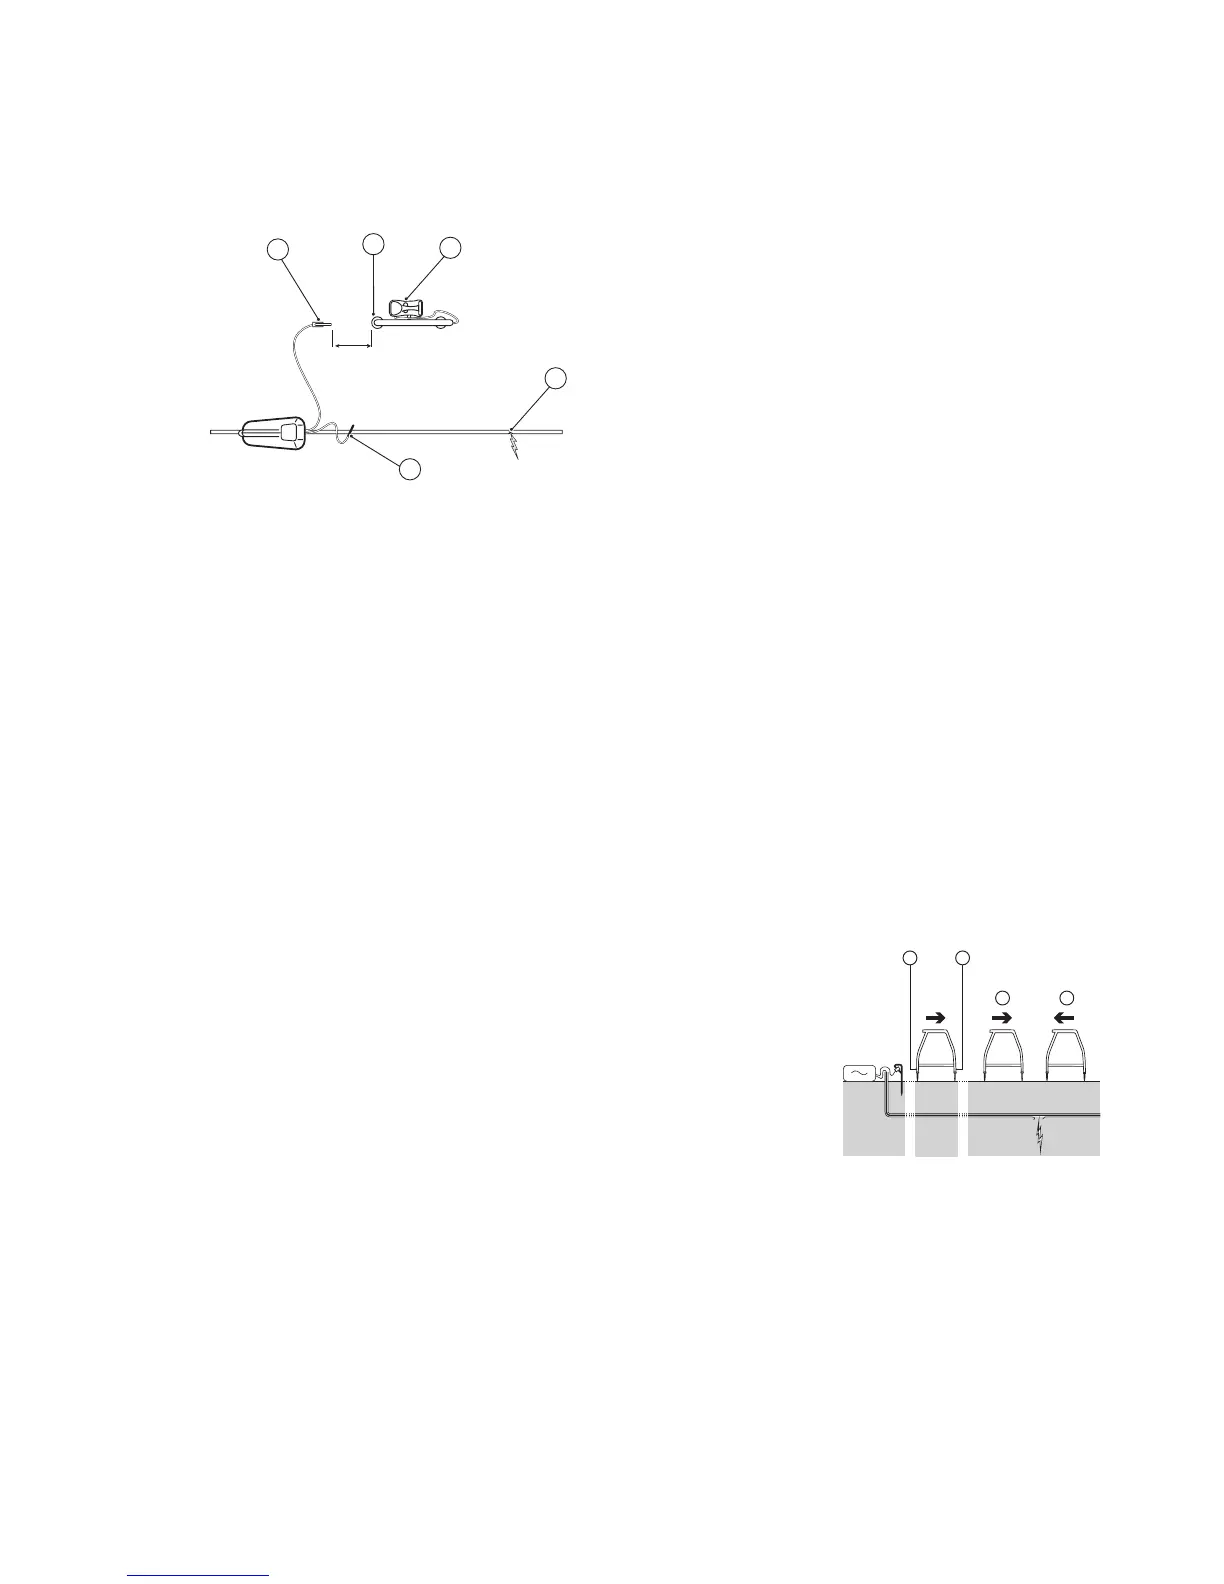
How to obtain a reference reading:
(1) Transmitter to Ground stake (black connector)
(2) A-frame green spike
(3) Receiver (facing green spike)
(4) Fault
(5) Transmitter to cable sheath (red connector)
Applying the correct FF signal to the line.
• Ensure that the transmitter is switched on and is connected to a ground stake
• Connect the A-frame to the receiver accessory socket and switch the receiver on
• Position the receiver approximately two metres/six feet from the ground stake and push the A-frame spikes
into the ground with the green spike towards the ground stake
• Attach the receiver to the A-frame by the retention hook. (If you are holding the receiver separately, make
sure that the receiver is in line with the A-frame and is pointing towards the green spike.) The fault direction
arrow should be pointing away from the ground stake. If it is not, make sure that the transmitter is connected
correctly (red connector to the cable and black to the ground stake)
• Take the dB reading and keep it for reference. If there is a single fault on the cable, it will be approximately
the same dB value as the reference reading.
Tip. To establish how often to take readings on the cable, move away from the ground stake and take
further readings until the arrow has difficulty in locking and the dB reading is low. Measure the
distance that the receiver is now away from the ground stake. This is the distance that you can
safely use between taking readings on the cable to ensure that you do not miss the fault.
Finding a fault
Starting from the transmitter, walk along the cable route pushing the
spikes into the ground with the green spike pointing away from the transmitter.
Where there are no faults the dB reading will be low and the direction arrow may
flicker forward and back.
Note: Flickering arrows may also indicate that you may be too far away
from the fault or ground stake (or both) for the receiver to lock on.
If you are trying to locate high resistance faults or there is a long
distance between faults, carry on with the survey and the receiver will lock on when you
get closer to the fault.
1. Red spike
2. Green spike
3. Fault ahead
4. Fault behind
2
2m
1
3
4
5
1 2
34