ESP-TM2 Controller
4
EN
Installation
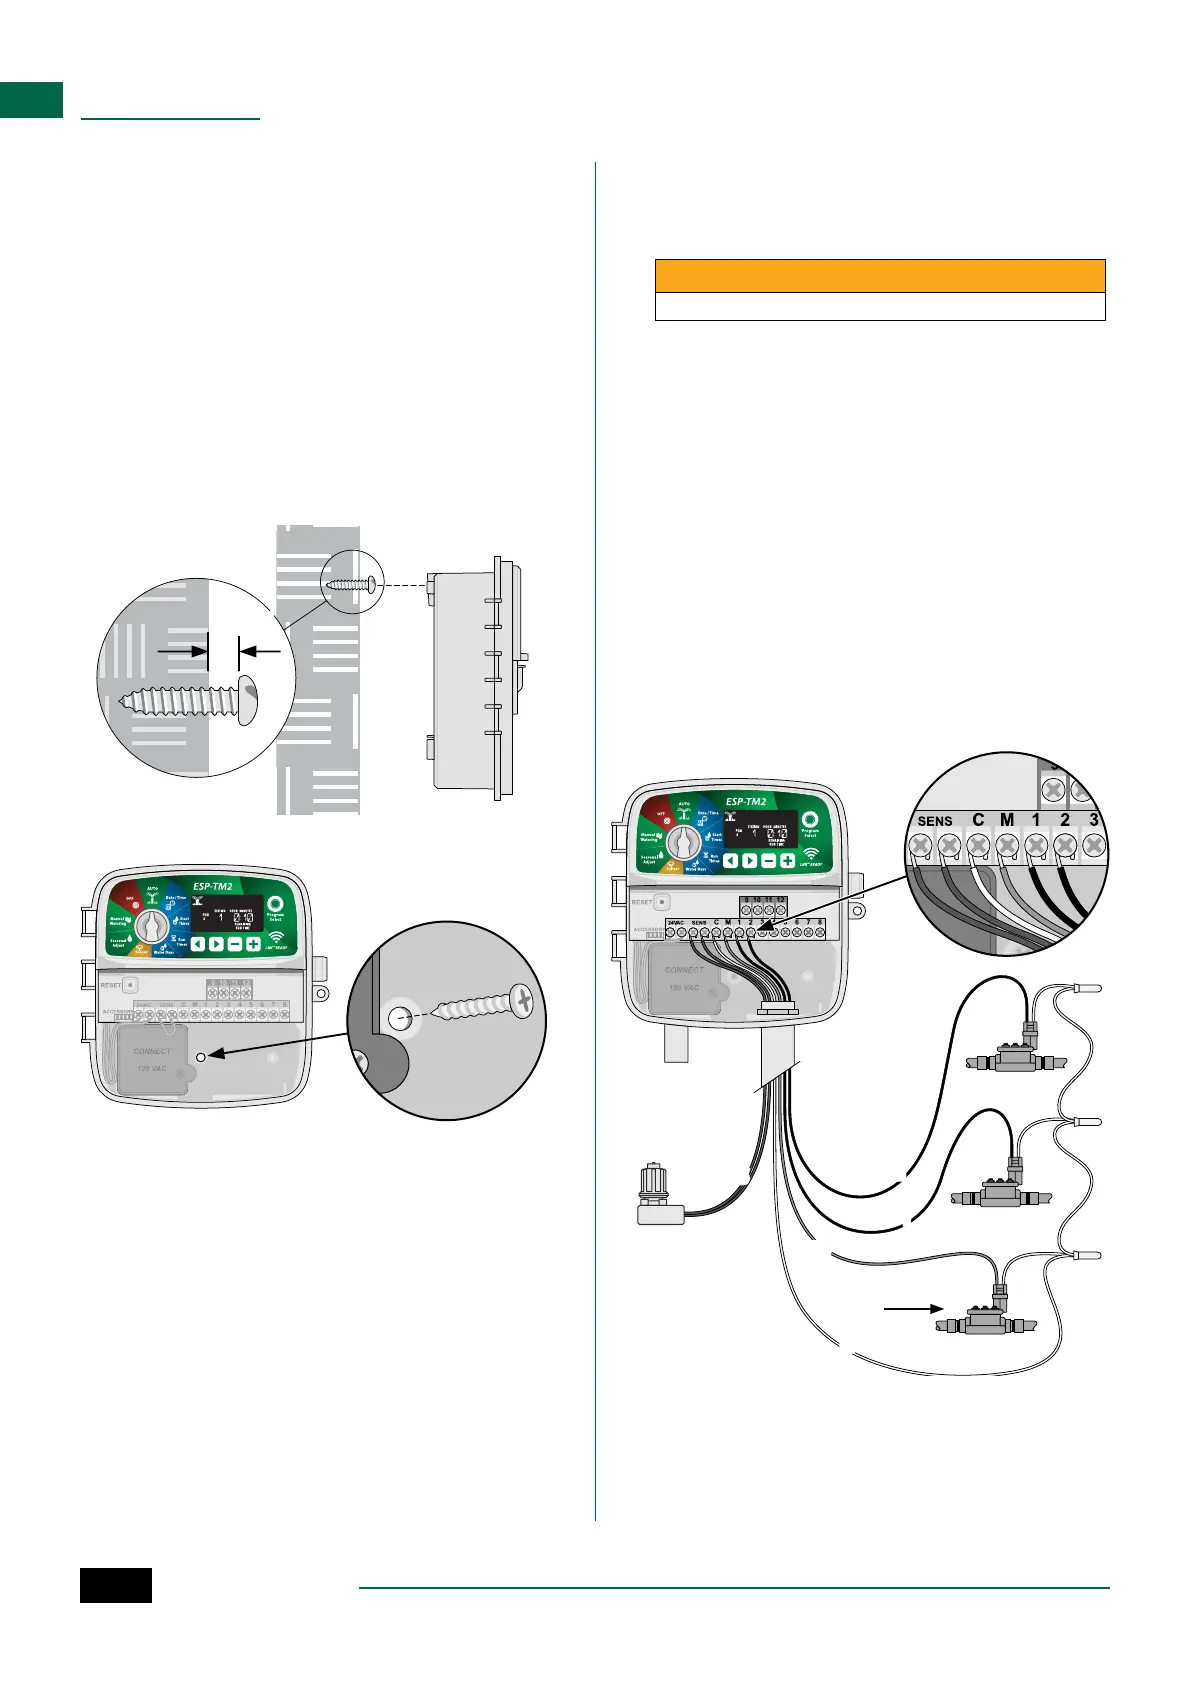
Mount Controller
NOTE: Choose a suitable mounting location close
to a 230VAC wall outlet.
A
Drive a mounting screw into the wall, leaving an
1/8 inch gap between the screw head and the
wall surface (use the supplied wall anchors if
necessary), as shown.
B
Locate the keyhole slot on back of the controller
unit and hang it securely on the mounting screw.
C
Remove the wiring bay cover on the lower part
of the controller unit, and drive a second screw
through the open hole inside the controller and
into the wall, as shown.
1/8 IN.
A B
C
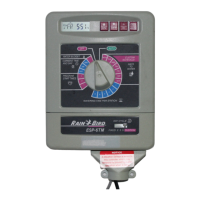
Wiring Connections
Connect Valves
A
Route all field wires through the opening at the
bottom of the unit, or through the knock-out
in back of the unit. Attach conduit if desired, as
shown.
WARNING
Do not route valve wires through the same opening as power wires.
B
Connect one wire from each valve to one of
the numbered station terminals (1-12) on the
controller, as shown.
C
Connect a field common wire (C) to the common
terminal (C) on the controller. Then connect
the remaining wire from each valve to the field
common wire, as shown.
NOTE: The ESP-TM2 controller supports one valve
solenoid per station terminal.
Connect Master Valve (optional)
D
Connect a wire from the master valve (M) to the
master valve terminal (M) on the controller. Then
connect the remaining wire from the master valve
to the field common wire, as shown.
A
B
D
MASTER
VALVE
C
MV
1
2
S
C