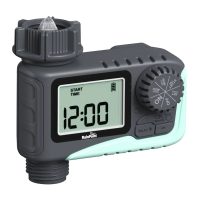
STEP 1: SET CLOCK
1. Turn the dial to SET CLOCK.
2. Use the "+" or "-" button to select 12H/24H mode, press "OK"
to conrm.
· 12H mode: with "AM" or "PM"
· 24H mode: without "AM" or "PM"
3. " " ashing: Use the "+" or "-" button to set hour and press "OK"
to conrm.
" " ashing: Use the "+" or "-" button to set minute and press"OK"
to conrm.
" " ashing: Use the "+" button to select the day of the week, then
press "OK" to conrm.
" " without ashing means "Thursday" has been selected.
4. Turn the dial clockwise to save the changes in this STEP and go to
next STEP.
TIPS:
1. Press and hold the "+" or "-" button can increase or decrease the time
quickly.
2. When the setup of this STEP is nished, please turn the dial to save
the changes instead of press the "OK" button. If you press the "OK"
button after setting, it will return to the previous setting instead of
saving it.
- 08 -
EN