This document is a user manual for the RainPoint ITV101P water timer, designed to help users manage their watering schedules efficiently. The device is intended for outdoor use and aims to save water by providing precise control over irrigation.
Function Description
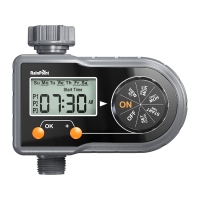
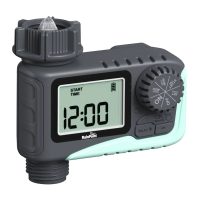
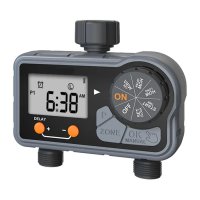
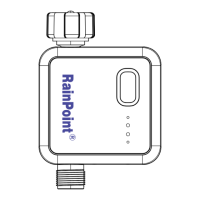
The RainPoint ITV101P is a smart water timer that allows users to program and automate their garden watering. It features a large LCD screen for easy readability and a rotary dial for intuitive navigation through settings. The timer supports up to three independent watering plans per day, offering flexibility for different watering needs. Users can set specific start times, durations, and frequencies for each plan.
The device includes a "Rain Delay" function, which enables users to pause their watering schedule for a set period (24, 48, or 72 hours) without disrupting their original programming. This feature is particularly useful for conserving water during periods of natural rainfall. For immediate watering needs, a "Manual/Hand Watering" mode is available, allowing users to water for a specified duration without affecting their programmed schedules.
The timer also has an "OFF" mode, which stops all watering programs and closes the valve, saving the current settings for future use. This is useful for extended periods when watering is not required, such as during vacations or the off-season.
Usage Features
Installation and Setup:
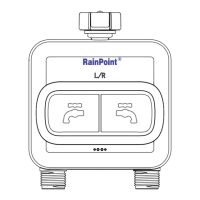
The timer is designed for easy installation. It connects to a standard garden faucet and a garden hose. Users are advised to wrap Teflon tape around the threads of both the faucet and the timer outlet to ensure a tight, leak-free connection. The timer should be installed vertically to prevent rainwater accumulation and internal leakage.
Battery Operation:
The ITV101P operates on two AA alkaline batteries (not included). It's crucial to use new alkaline batteries and avoid mixing old and new, or different types of batteries (carbon-zinc or rechargeable) to ensure optimal performance and lifespan. The device includes a low battery indicator on the LCD screen, prompting users to replace batteries before they run out completely. When the battery is low, the valve automatically closes to prevent leakage.
Activation:
Before first use or after a period of inactivity, the timer needs to be activated. This involves a series of steps to ensure the internal valve mechanism is functioning correctly. The activation process includes turning the dial to "ON," holding the "MANUAL" button to enter manual watering mode, confirming with "OK," waiting for the valve to open, and then turning the dial to "OFF" to close it. This sequence should be repeated several times to ensure proper valve operation.
Programming:
Programming the timer involves several steps, guided by the rotary dial:
- Set Clock: Users set the current day of the week and time. The display supports both 12-hour (AM/PM) and 24-hour modes.
- Start Time: Up to three watering plans (P1, P2, P3) can be configured with individual start times. Users can also turn off a specific plan by setting its start time to an "OFF" indicator.
- How Long: For each plan, users define the watering duration, ranging from 1 minute to 3 hours and 59 minutes. Similar to start times, durations can be set to "OFF" to disable a plan.
- How Often: This step allows users to set the watering frequency. There are two modes:
- Day of the Week Mode: Users select specific days of the week for watering.
- Every X Days Mode: Users can choose to water every 2, 3, 4, 5, or 6 days. All three watering plans share the same frequency setting.
- View Set: After programming, users can review all their settings for the three watering plans (start time, duration, and frequency).
Automatic Watering:
Once programmed and the dial is set to "ON," the timer will automatically execute the watering plans. During active watering, the remaining watering time and a flashing water drop icon are displayed. Pressing the "+" button during watering will show the current day and time.
Manual Watering:
To initiate manual watering, turn the dial to "ON," press and hold the "MANUAL" button, and then set the desired watering duration (from 0 to 8 hours). The timer valve will open after a 5-second delay. Manual watering can be stopped by holding the "MANUAL" button again or by turning the dial to "OFF" (remembering to turn it back to "ON" to resume programmed schedules).
Rain Delay:
To activate rain delay, turn the dial to "ON," press and hold the "DELAY" button, and then select the desired delay period (24, 48, or 72 hours). All programmed watering plans will be skipped during this time. To cancel the rain delay, hold the "DELAY" button again while the dial is on "ON."
Maintenance Features
Filter Cleaning:
The timer includes a filter at the water inlet to trap dirt particles and prevent clogging. Regular cleaning of this filter is essential for proper operation. If the filter is dirty, it should be removed and rinsed with running water. If worn, it should be replaced.
Winter Storage:
To prevent potential freezing damage, especially in temperatures below 37°F (3°C), the timer should be stored indoors during colder months. It is also recommended to remove the batteries when the timer is not in use for an extended period.
Troubleshooting:
The manual provides a troubleshooting guide for common issues such as water inlet leakage, the valve not stopping/flowing, no response from manual/rain delay functions, low battery life, low water pressure, and the LCD screen not displaying. Solutions include checking filter placement, ensuring proper faucet connection, replacing batteries, cleaning the filter, and activating the timer correctly.
General Care:
The device should only be used with clean, cold water. It is designed for outdoor use, but placing it in a sheltered outdoor location can prolong its lifespan. Users are advised not to use tools for installation, only hand-tighten connections. The product should not be subjected to extreme force or shock, and it should never be immersed in water to avoid electrical shock.