
B
brittany38Aug 6, 2025
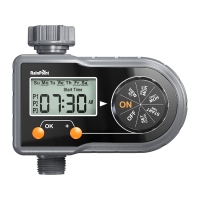
Why is the LCD screen not displaying on my RainPoint Lawn and Garden Equipment?
- LlvasquezAug 6, 2025
If the LCD screen on your RainPoint Lawn and Garden Equipment isn't displaying, there are a couple of things to check: 1. **Battery Issue:** The batteries might be dead. Replace them with two new AAA alkaline batteries, ensuring they are installed correctly. 2. **Sunlight Exposure:** Direct sunlight can affect the display. Try to shield the display from direct sunlight and check if the battery is low.