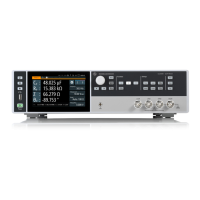
Trying out the instrument
R&S
®
LCX Series
34Getting Started 1179.2254.02 ─ 03
Setting the initial state
1. NOTICE! Check all terminals to make sure that they are not damaged.
Power on the R&S LCX, as described in Chapter 3.6, "Connecting to power",
on page 17.
2. Switch on the R&S LCX, see Chapter 3.10, "Switching on or off", on page 24.
3. NOTICE! Risk of measurement inaccuracy. Measurements can be inaccurate,
if performed when the instrument is not warmed-up. Wait until the instrument
has reached its operating temperature before you start the measurement pro-
cedure.
The warm-up time is up to 30 minutes.
To start from an initial state, set the instrument to default:
a) Press the [settings] key at the front panel.
On the front panel, press the [settings] button.
b) In the "Device" tab, select "Save/Recall Device Settings".
c) Select "Default Settings".
The instrument prompts you to confirm the operation.
d) Confirm with "Ok".
The R&S LCX resets all parameters except for system settings.
e) Select
to return to the settings menu.
Connecting the test fixture
The figure shows schematically the elements to be connected.
► To connect the test fixture, proceed as described in Chapter 3.9, "Connecting
a test fixture", on page 22.
Setting up the test signal
To configure the test signal:
1. To set the frequency:
a) On the screen, select "Frequency".
b) Enter, e.g. 10 kHz using the keypad on the screen.
c) Confirm with .
2. To select the level parameter:
Before setting the test signal level, you can select either the signal voltage, or
the signal current for the level setting:
a) Press the [settings] at the front panel.

 Loading...