EasyManua.ls Logo

Raspberry Pi RP2040 User Manual

Raspberry Pi RP2040
77 pages
To Next Page IconTo Next Page
To Previous Page IconTo Previous Page
Page #44 background imageLoading...
Page #44 background image
WARNING
If you start Visual Studio code by clicking on its desktop icon, or directly from the Start Menu then the build
environment will not be correctly configured. Although this can be done manually later in the CMake Tools Settings,
the easiest way to configure the Visual Studio Code environment is just to open it from a Developer Command
Prompt Window where these environmental variables are already set.
We’ll now need to install the CMake Tools extension. Click on the Extensions icon in the left-hand toolbar (or type Ctrl +
Shift + X
), and search for "CMake Tools" and click on the entry in the list, and then click on the install button.
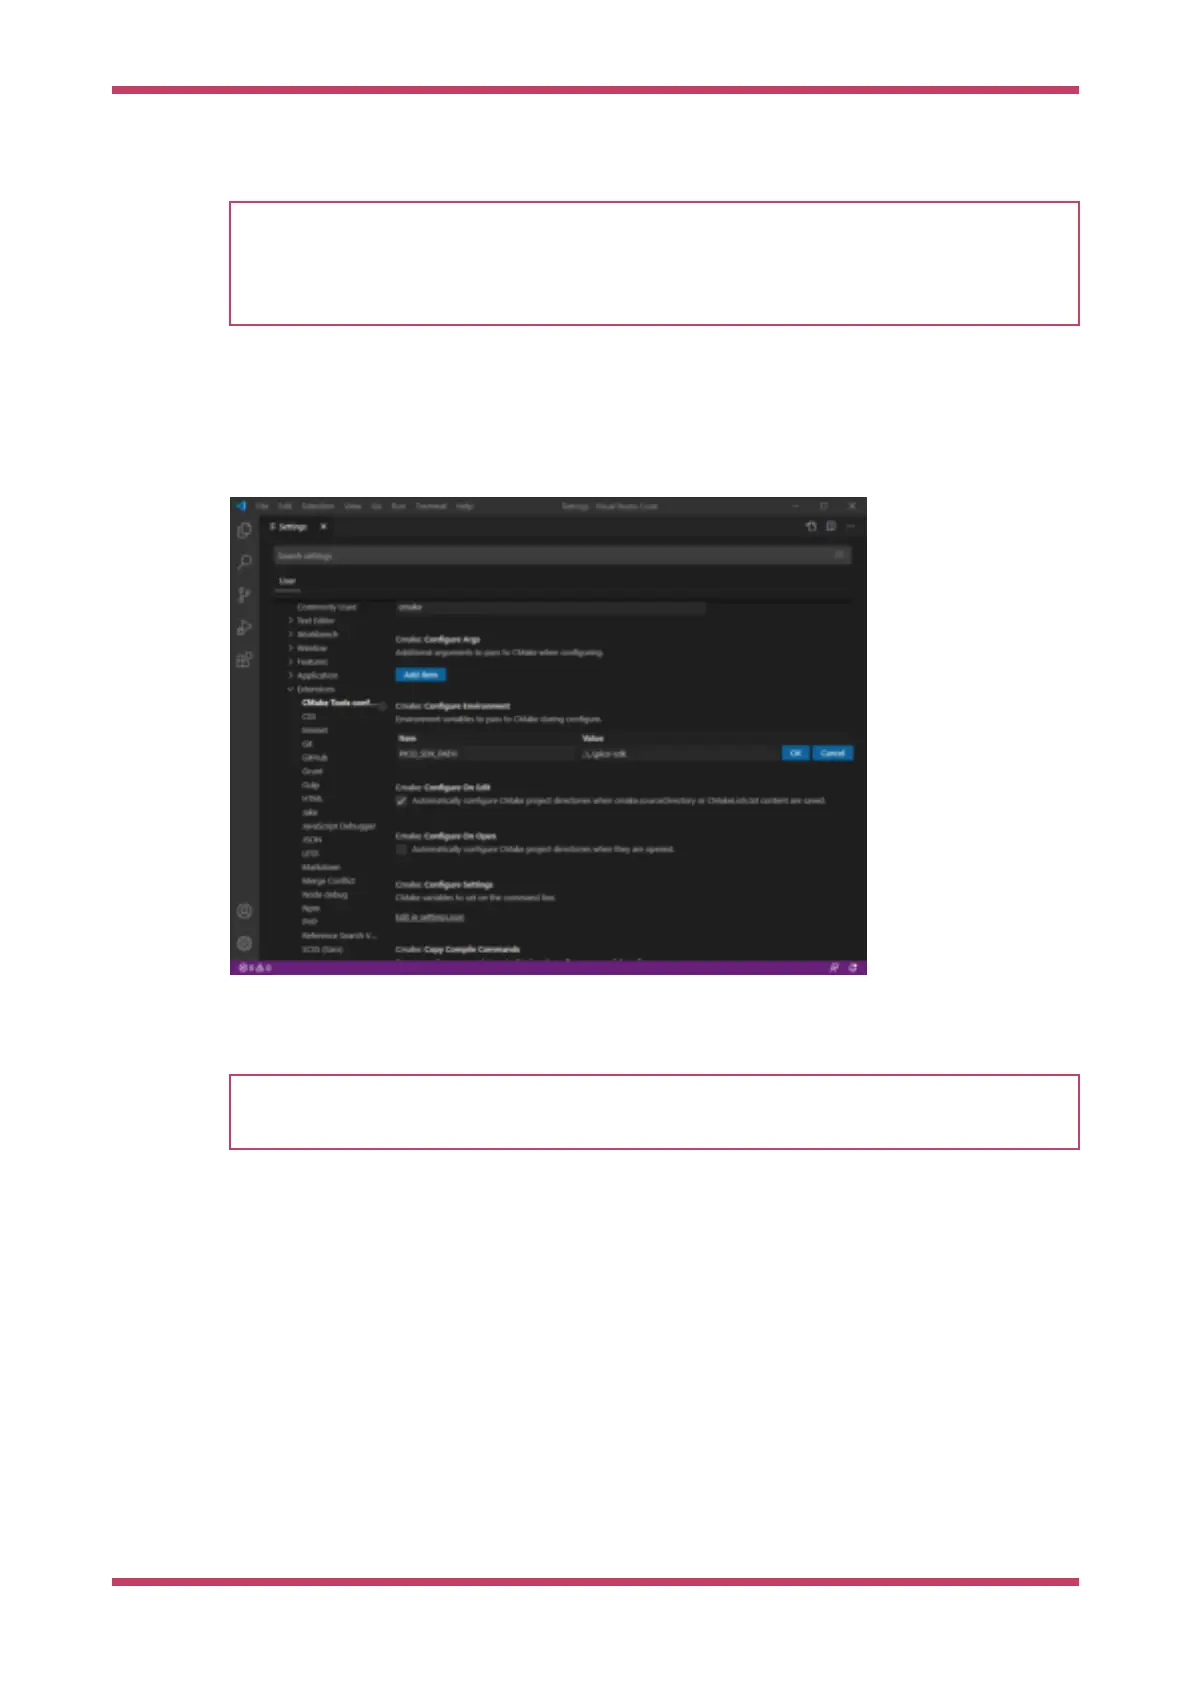
Then click on the Cog Wheel at the bottom of the navigation bar on the left-hand side of the interface and select
"Settings". Then in the Settings pane click on "Extensions" and the "CMake Tools configuration". Then scroll down to
"Cmake: Configure Environment". Click on "Add Item" and add set the
PICO_SDK_PATH to be ..\..\pico-sdk as in Figure 19.
Figure 19. Setting
PICO_SDK_PATH
Environment Variable
in the CMake
Extension
Additionally you will need to scroll down to "Cmake: Generator" and enter "NMake Makefiles" into the box.
IMPORTANT
If you do not change the "Cmake: Generator" Visual Studio will default to ninja and the build might fail as GCC
outputs dependency-information in a slightly-incorrect format that
ninja can’t understand.
Now close the Settings page and go to the File menu and click on "Open Folder" and navigate to pico-examples repo and
hit "Okay". You’ll be prompted to configure the project, see
Figure 20. Select "GCC for arm-none-eabi" for your compiler.
Getting started with Raspberry Pi Pico
9.2. Building on MS Windows 43

Table of Contents

Question and Answer IconNeed help?

Do you have a question about the Raspberry Pi RP2040 and is the answer not in the manual?

Raspberry Pi RP2040 Specifications

General IconGeneral
ProcessorDual-core Arm Cortex-M0+
Clock Speed133 MHz
SRAM264 KB
GPIO30
USBUSB 1.1 Host/Device
PWM16 channels
UART2
SPI2
I2C2
Temperature Range-20°C to +85°C
Operating Voltage1.8V to 3.3V
FlashExternal QSPI flash
I/O InterfacesSPI, I2C, UART, PWM
ADC4 × 12-bit ADC channels

Summary

Chapter 1. Quick Pico Setup

Quick Pico Setup

Steps to quickly set up your development environment for Raspberry Pi Pico, including script execution.

Chapter 2. The SDK

Get the SDK and examples

Instructions for downloading and cloning the Raspberry Pi Pico SDK and example repositories.

Install the Toolchain

Steps to install necessary tools like CMake and the GNU Embedded Toolchain for Arm.

Chapter 3. Blinking an LED in C

Build, Load, and Run 'Blink'

Steps to build, load, and run the 'Blink' example program on the Raspberry Pi Pico.

Chapter 4. Saying 'Hello World' in C

Serial Input and Output

Explains how serial input/output works on the Pico via UART or USB CDC.

Build and Run 'Hello World'

Steps to build, flash, and run the 'Hello World' example.

Chapter 5. Flash Programming with SWD

Install OpenOCD

Instructions for installing OpenOCD, a debug translator for SWD.

SWD Port Wiring and Loading

Details on wiring the SWD port and loading programs via OpenOCD.

Chapter 6. Debugging with SWD

Debug Build and GDB Installation

Creating a debug build and installing GNU Debugger (GDB) for interactive debugging.

Chapter 7. Using Visual Studio Code

Chapter 8. Creating Your Own Project

Appendix A: Using Picoprobe

Related product manuals