Appendix A: Using Picoprobe
One Raspberry Pi Pico can be used to reprogram and debug another, using the
picoprobe firmware, which transforms a
Pico into a USB → SWD and UART bridge. This makes it easy to use a Raspberry Pi Pico on non Raspberry Pi platforms
such as Windows, Mac, and Linux computers where you don’t have GPIOs to connect directly to UART or SWD, but you
do have a USB port.
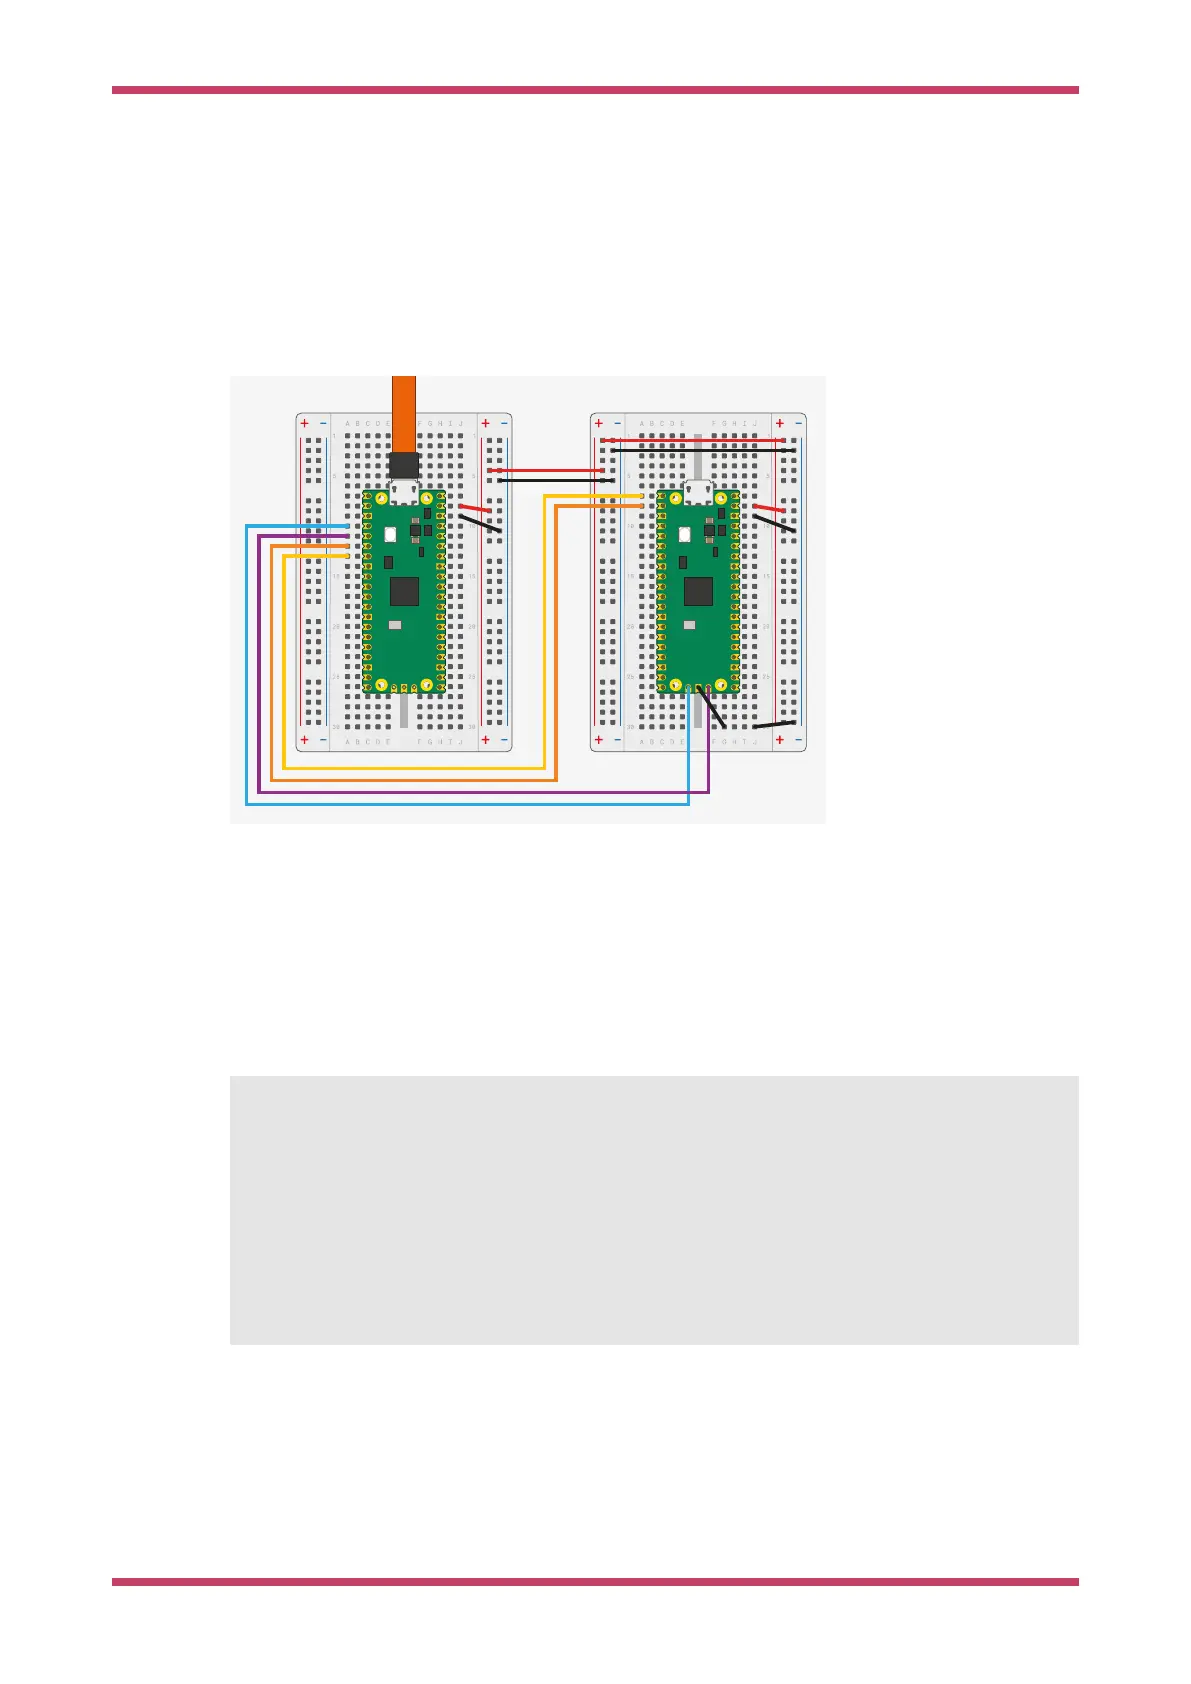
Figure 35. Wiring
between Pico A (left)
and Pico B (right) with
Pico A acting as a
debug probe. At least
the ground and the
two SWD wires must
be connected, for one
Pico to be able to
reprogram and debug
another. This diagram
also shows how the
UART serial port can
be connected, so that
you can see the UART
serial output of the
Pico-under-test, and
how the power supply
can be bridged across,
so that both boards
are powered by one
USB cable. More in
Picoprobe Wiring.
Build OpenOCD
For picoprobe to work, you need to build openocd with the picoprobe driver enabled.
Linux
$ cd ~/pico
$ sudo apt install automake autoconf build-essential texinfo libtool libftdi-dev libusb-1.0-0-
dev
$ git clone https://github.com/raspberrypi/openocd.git --branch picoprobe --depth=1 --no-single
-branch
$ cd openocd
$ ./bootstrap
$ ./configure --enable-picoprobe
①
$ make -j4
$ sudo make install
1.
If you are building on a Raspberry Pi you can also pass
--enable-sysfsgpio --enable-bcm2835gpio to allow bitbanging
SWD via the GPIO pins.
Windows
To make building OpenOCD as easy as possible, we will use MSYS2. To quote their website: "MSYS2 is a collection of
tools and libraries providing you with an easy-to-use environment for building, installing and running native Windows
Getting started with Raspberry Pi Pico
Build OpenOCD 57