Chapter 3. Blinking an LED in C
When you’re writing software for hardware, turning an LED on, off, and then on again, is typically the first program that
gets run in a new programming environment. Learning how to blink an LED gets you half way to anywhere. We’re going
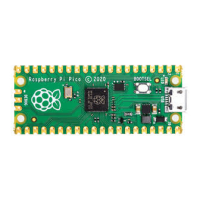
to go ahead and blink the on-board LED on the Raspberry Pi Pico which is connected to pin 25 of the RP2040.
Pico Examples:
https://github.com/raspberrypi/pico-examples/tree/master/blink/blink.c Lines 9 - 23
Ê9 int main() {
10
#ifndef PICO_DEFAULT_LED_PIN
11 #warning blink example requires a board with a regular LED
12 #else
13 const uint LED_PIN = PICO_DEFAULT_LED_PIN;
14 gpio_init(LED_PIN);
15 gpio_set_dir(LED_PIN, GPIO_OUT);
16
while (true) {
17 gpio_put(LED_PIN,
1);
18 sleep_ms(
250);
19 gpio_put(LED_PIN,
0);
20 sleep_ms(
250);
21 }
22
#endif
23 }
3.1. Building "Blink"
From the pico directory we created earlier, cd into pico-examples and create a build directory.
$ cd pico-examples
$ mkdir build
$ cd build
Then, assuming you cloned the
pico-sdk and pico-examples repositories into the same directory side-by-side, set the
PICO_SDK_PATH:
$ export PICO_SDK_PATH=../../pico-sdk
TIP
Throughout this book we use the relative path ../../pico-sdk to the checkout of the SDK for the PICO_SDK_PATH.
However depending on the location of your checkout it might make sense to replace this with the absolute path, e.g.
/home/pi/pico/pico-sdk.
Prepare your cmake build directory by running cmake ..
$ cmake ..
Using PICO_SDK_PATH from environment ('../../pico-sdk')
PICO_SDK_PATH is /home/pi/pico/pico-sdk
Ê .
Getting started with Raspberry Pi Pico
3.1. Building "Blink" 8

 Loading...