Figure 31. Configuring
a second CMake
profile in CLion.
10.2.1.1.2. Running a build
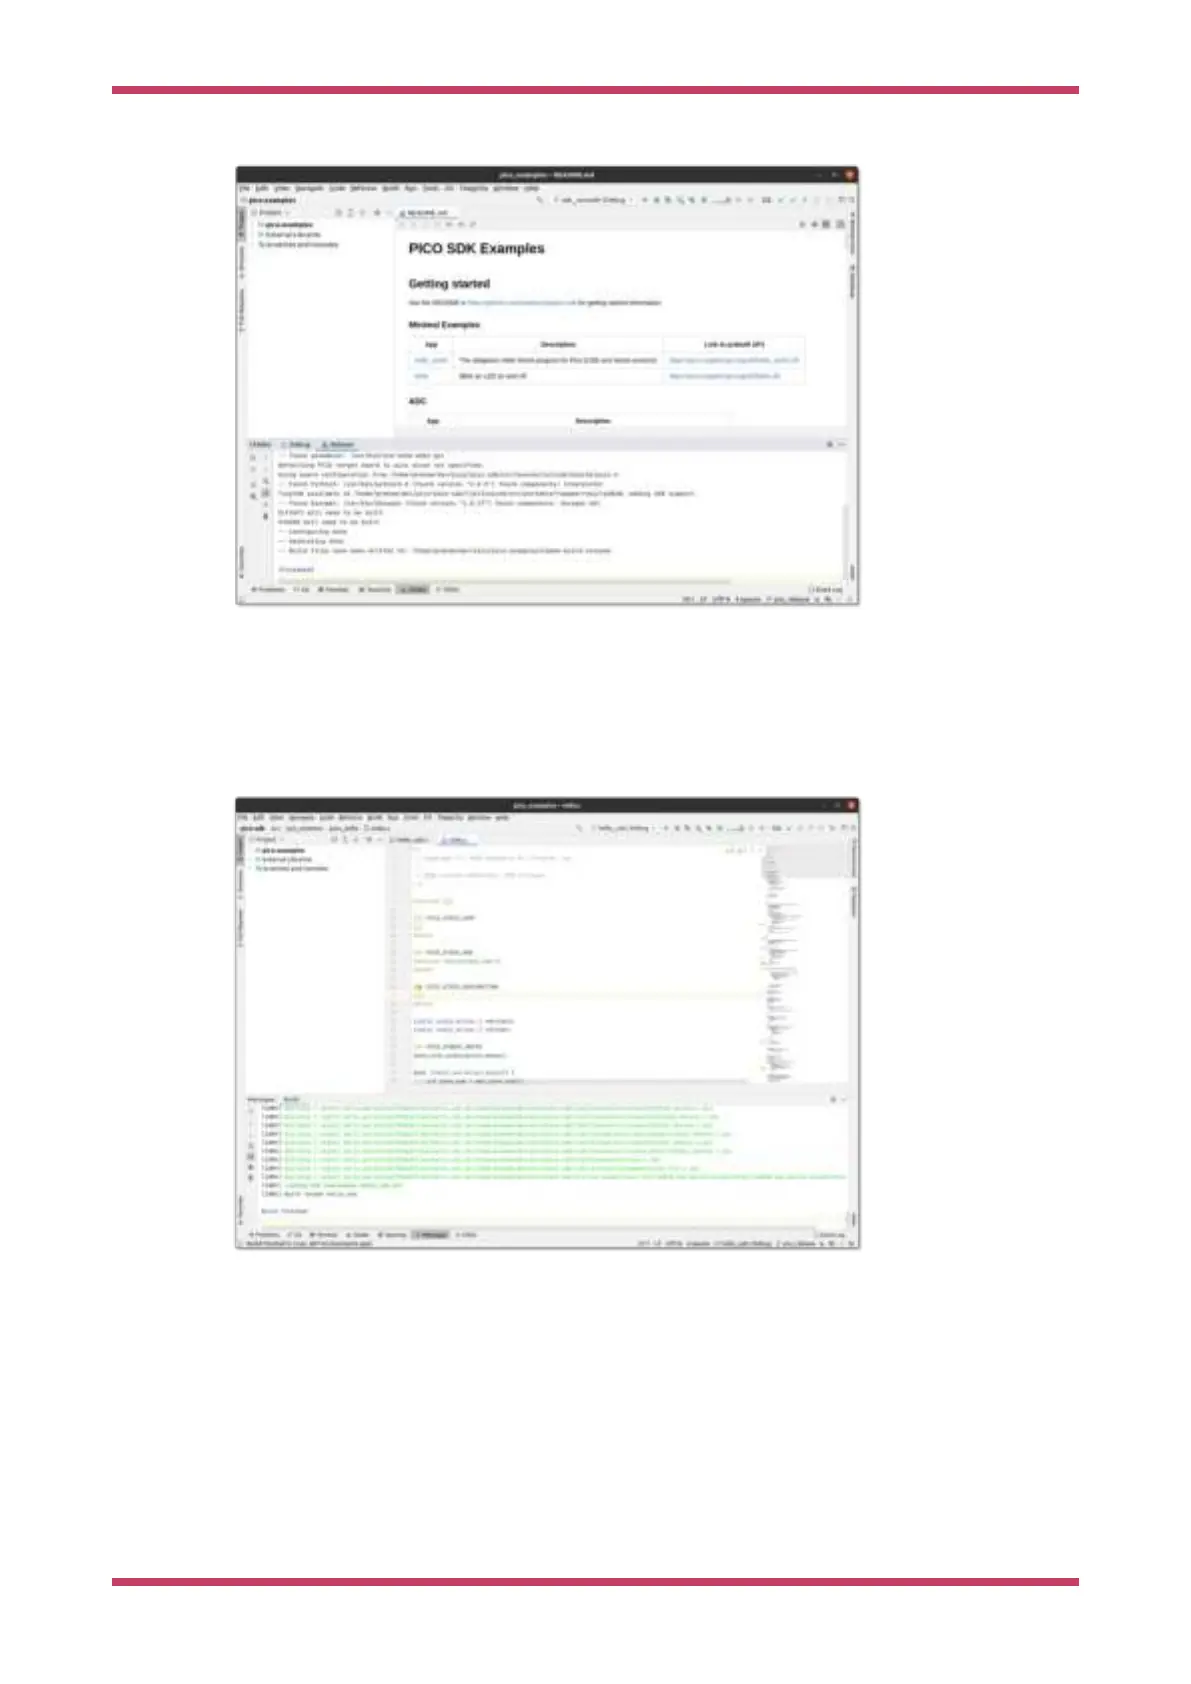
Now we can choose to build one or more targets. For example you can navigate to the drop down selector in the middle
of the toolbar, and select or starting typing
hello_usb; then press the tool icon to its left to build (see Figure 32).
Alternatively you can do a full build of all targets or other types of build from the
Build menu.
Figure 32.
hello_usb
successfully built.
Note that the drop down selector lets you choose both the target you want to build and a CMake profile to use (in this
case one of
Debug or Release)
Another thing you’ll notice
Figure 32 shows is that in the bottom status bar, you can see hello_usb and Debug again.
These are showing you the target and CMake profile being used to control syntax highlighting etc. in the editor (This
was auto selected when you chose
hello_usb before). You can visually see in the stdio.c file that has been opened by the
user, that PICO_STDIO_USB is set, but PICO_STDIO_UART is not (which are part of the configuration of hello_usb). Build
time per binary configuration of libraries is heavily used within the SDK, so this is a very nice feature.
Getting started with Raspberry Pi Pico
10.2. Using CLion 53