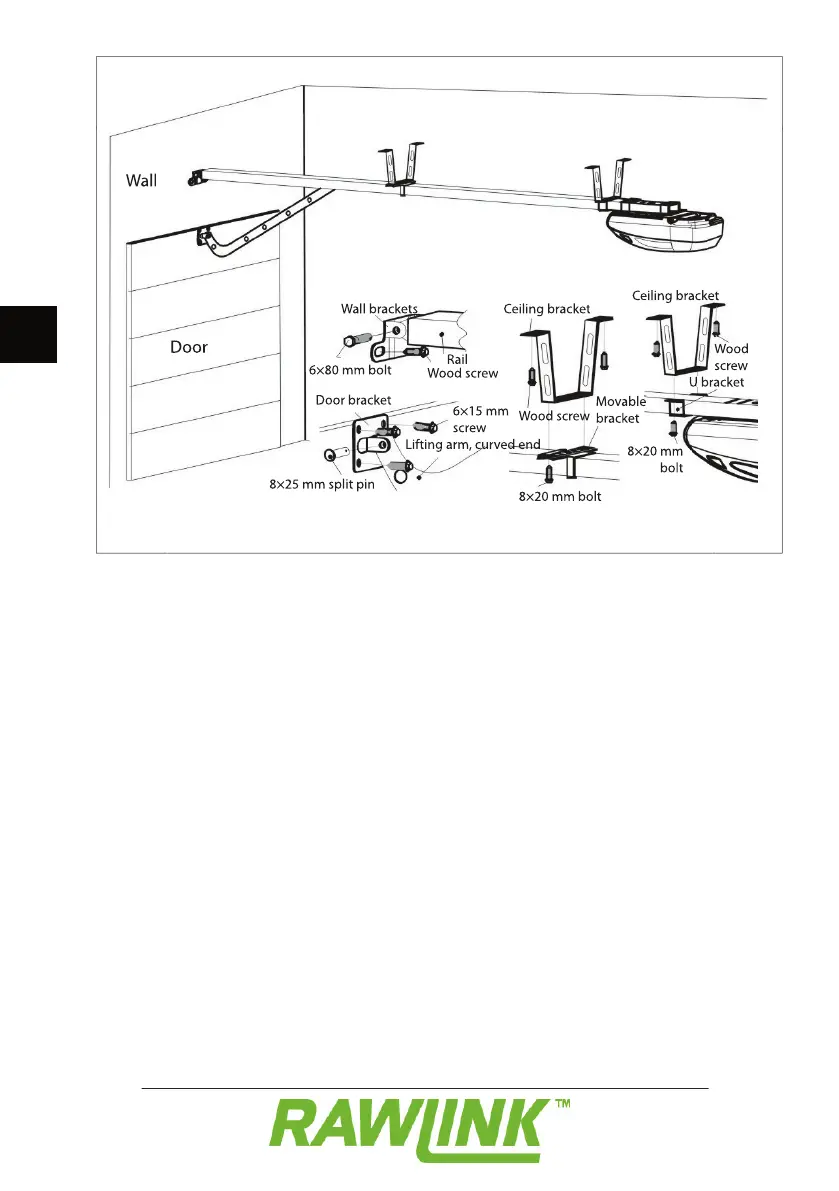
Screw the two ceiling brackets (6) securely
in place in the ceiling using 6×80 mm wood
Fit the rail to the ceiling bracket nearest to
the motor using a U bracket and 8×20 mm
Fit the rail to the ceiling bracket in the
middle of the rail using the movable bracket
and 8×20 mm bolts, washers and nuts.
Fit the wall bracket (3) to the wall using
6×80 mm wood screws. Secure the rail to
the wall bracket using a 6×80 mm bolt and
Fit the door bracket (1) at the top centre of
the door using 6×15 mm screws.
Secure the curved end of the lifting arm
(2) to the door bracket using an 8×25 mm
split pin and a locking split pin, and secure
the other end of the lifting arm to the rider
inside the rail in the same way.
The door opener must be programmed
Connect the door opener to the mains