1.Checktheselectedlocationfortheunit,aclearatarea
withsuitableclearanceforairventilationaroundtheunitis
required.
2.SecuretheBasestationmountingtemplateinthechosen
locationusingadhesivetape.
3.Drills4holesatthemarkedlocationonthetemplate.
4.Removethemountingtemplate.
5.Screwinthesuppliedxingscrewsapproximatelyhalfway
intotheholes.
6.Placetheunitontothexingscrews.
7.Pushtheunitdowntoengagethekeyslotsintheunit.
8.Tightenthescrews.
Note:Drillbit,tapsizeandtighteningtorqueisdependenton
thethicknessandtypeofmaterialtheunitistobemountedon.
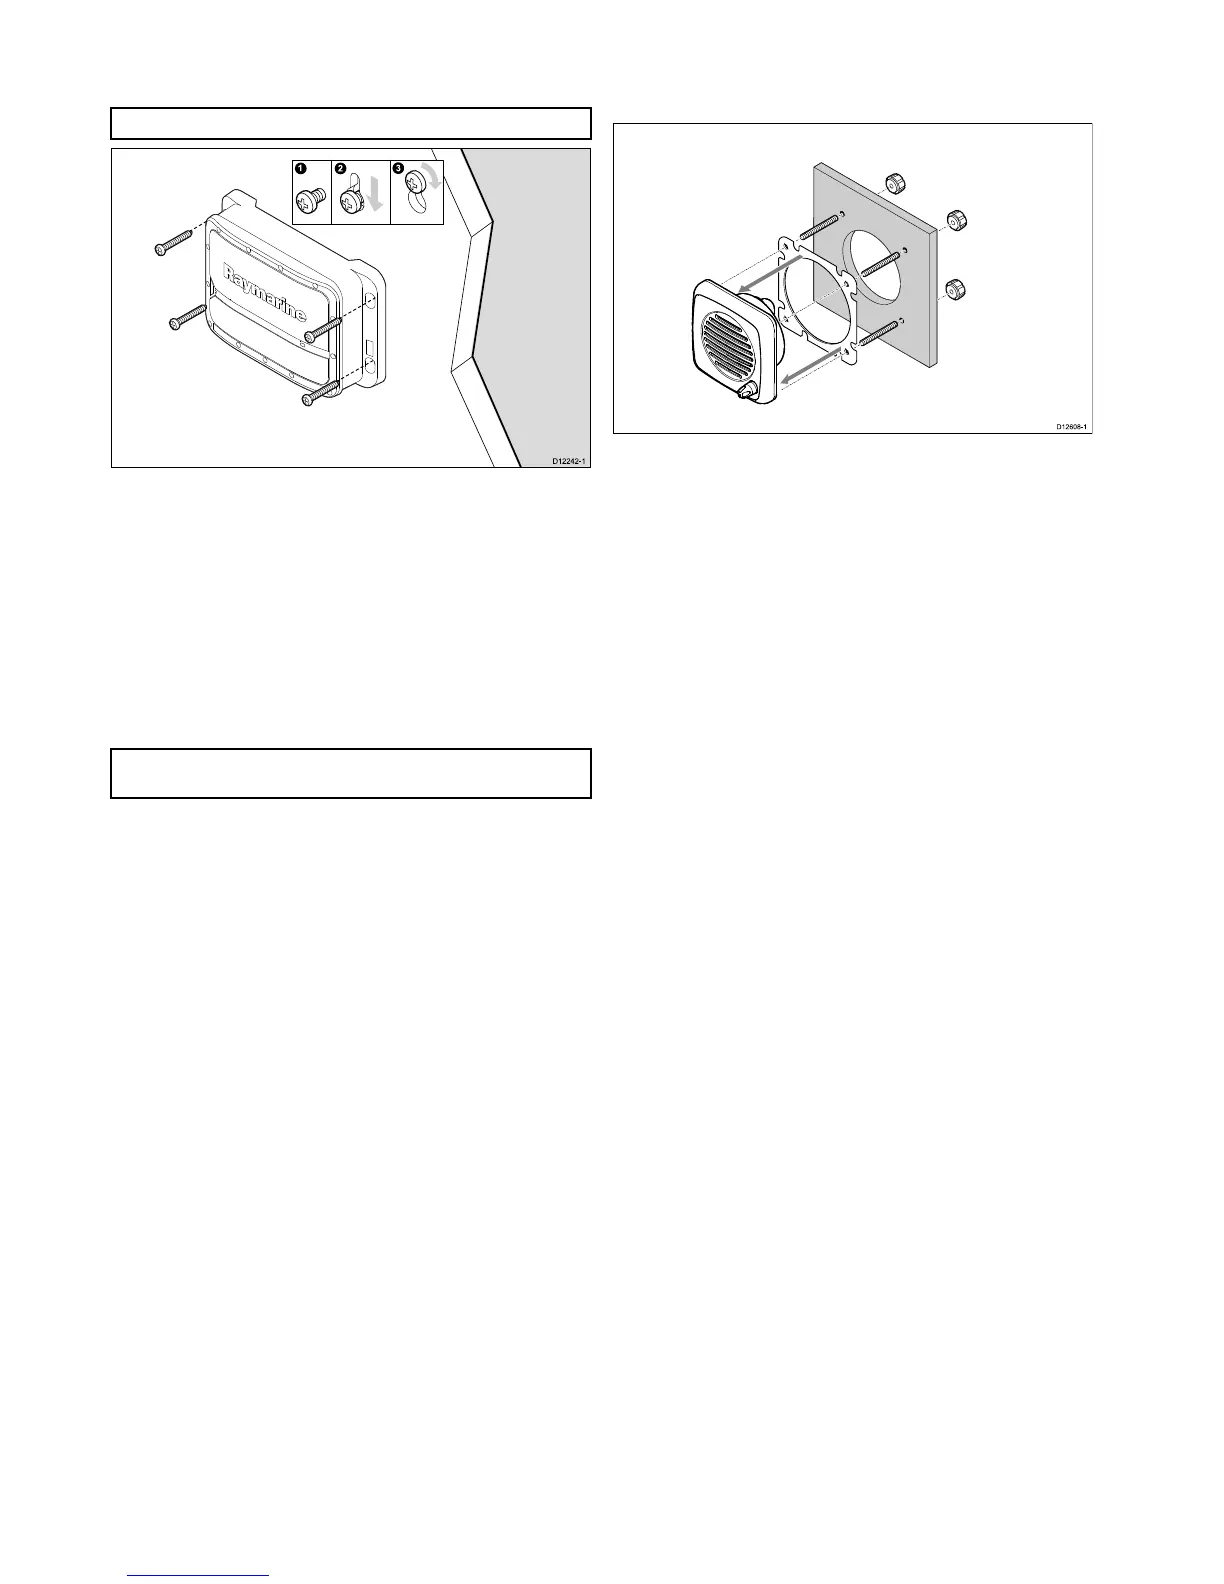
5.4Speakermounting
Inordertomountapassiveoractivespeakerfollowthesteps
below.
Thespeakerisdesignedtobeushmounted.
1.Checktheselectedlocationfortheunit,aclearatareais
required.
2.Cutouttheidentiedshadedarea(s)fromthemounting
template
3.Fixthespeakermountingtemplate(supplied)totheselected
location,usingadhesivetape.
4.Drillouttherequiredmountingholes,asindicatedonthe
mountingtemplate.
5.Ifpossibleuseanappropriatesizeholecuttingsawandcut
outthecenterhole,or
6.Usingasuitableholecuttingsaw,makepilotholesineach
cornerofthecutoutareaandusingajigsawcutalongthe
insideedgeofthecutoutline.
7.Removethemountingtemplate.
8.Ensurethattheunittsintotheremovedareaandthenle
aroundthecutedgesuntilsmooth.
9.Feedthespeakercablethroughthecutoutholeand
connecttheoppositeendofthespeakerwiretotherelevant
connector.
10.Attachthe4xmountingstudstotherearofthespeaker.
11.Holdthespeakerintoplaceandsecurebytighteningthe
providedthumbnutsontothemountingstuds.
28
Ray260

 Loading...