Rotary Drive - Installation Guide 9
• Environment:
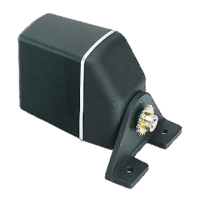
• This drive is not waterproof, so you should mount it in a dry
location, clear of any bilge water.
Mounting bolts
Attach the mounting foot with two stainless steel M12 (
1
/
2
inch) bolts
and lock nuts/lock washers.
Note: Before finally tightening the bolts you must check sprocket
alignment (see page 12) and chain tension (see page 12).
Note: Always mount the drive as securely as possible to make sure it
performs reliably and the chain remains correctly aligned.
Connecting to the steering system
The rotary drive is connected to the steering system by a chain drive
between a sprocket on the drive and a sprocket on the boat’s steering
shaft.
Note: Most steering gear manufacturers supply special autopilot
drive attachments, and many include this as standard. Contact your
steering gear manufacturer for more information.
When you have checked with the steering gear manufacturer about
how and where you can attach the autopilot chain to the boat’s
steering system, you need to:
• determine the sprocket and chain sizes
• attach and align the sprockets and chain
• tension the chain correctly
Determining the sprocket and chain sizes
Chain size
Recommended chain size: standard
3
/
8
inch pitch.
Sprocket sizes
To determine the sprocket sizes required at the steering shaft and
rotary drive:
• count the number of times the steering shaft turns when you move
the rudder from hardover to hardover
 Loading...


