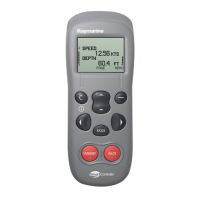
What to do if my Raymarine SmartController Remote Control display is blank?
- RReginald SkinnerAug 20, 2025
If the display is blank, it might be due to no power. Try pressing the C button to power up the SmartController or charge the batteries.

What to do if my Raymarine SmartController Remote Control display is blank?
If the display is blank, it might be due to no power. Try pressing the C button to power up the SmartController or charge the batteries.
What to do if my Raymarine SmartController autopilot is not responding?
If the autopilot is not responding, drive the boat for 30 seconds at above 2.5 knots and retry. Also, check the autopilot connections.
Why does my Raymarine Remote Control show 'NO DATA'?
The 'NO DATA' message appears when the autopilot is in Track mode but not receiving SeaTalk navigation data, or if your GPS signal is weak. This message should clear once the signal improves.
What does 'NO GPS FIX' mean on my Raymarine SmartController?
The 'NO GPS FIX' message indicates that your GPS is receiving a low strength signal. This message will disappear when the signal improves.
What does 'NO GPS COG' mean on my Raymarine Remote Control and how to fix it?
The 'NO GPS COG' message means that the autopilot isn't receiving valid COG data from your GPS system. To resolve this, check the connections and ensure your GPS unit is set up to send out COG data.
Why does my Raymarine SmartController show 'NO PILOT'?
The 'NO PILOT' message indicates that the controller isn't receiving data from the autopilot. Check the connections and make sure the course computer is switched on.
What does 'CURRENT LIMIT' mean on my Raymarine Remote Control?
The 'CURRENT LIMIT' message indicates a serious drive failure, meaning the drive is taking too much current due to a short-circuit or jamming. Inspect the drive unit.
What does 'DRIVE STOPPED' mean on my Raymarine SmartController?
The 'DRIVE STOPPED' message means the autopilot can't turn the rudder, either because the weather load on the helm is too high, or the rudder position sensor has exceeded preset limits or endstops. Check the drive and rudder position sensor.
What does 'MOT POW SWAPPED' mean on my Raymarine SmartController Remote Control?
The 'MOT POW SWAPPED' message indicates that the motor cables are connected to the power terminals, and the power cables are connected to the motor terminals at the course computer. Turn off the power and swap over the connections.
What does 'LRN FAIL 1, 2 or 4' mean on my Raymarine SmartController Remote Control?
The 'LRN FAIL' message means that AutoLearn wasn't completed successfully. Repeat the AutoLearn procedure.
| Brand | Raymarine |
|---|---|
| Model | SmartController |
| Category | Remote Control |
| Language | English |
Explains the on-screen indicators for battery and wireless signal strength.
Instructions on how to charge the SmartController unit.
Details the functions of C, ACTION, UP/DOWN, MODE, PILOT, STANDBY buttons.
Explains NAVIGATE STARBOARD/PORT for steering and Smart Steer.
Steps for powering the SmartController on and off.
How to activate and deactivate the keylock to prevent accidental operation.
Using UP/DOWN keys to move between data pages.
How to access settings via the MENU softkey.
Shows examples of 2 data items and graphical data displays.
How to scroll to "SHOW ALL DATA" and view all SeaTalk data.
Using UP/DOWN keys to scroll through the data list.
Overview of POWER, FISHING, SAIL modes and their sub-modes.
Steps to steer to a heading and activate autopilot.
Using the STANDBY button to revert to manual steering.
How to press MODE repeatedly to reach TRACK mode.
Pressing PILOT to accept new headings at waypoints.
Steps to reach CIRCLE mode and adjust pattern size.
Steps to reach ZIGZAG mode and adjust pattern size.
Steps to reach CLOVERLEAF mode and adjust pattern size.
Note about changing pattern direction in Pilot Setup.
Steps to reach WIND mode and activate autopilot.
Using PORT/STARBOARD keys to adjust the wind angle.
Steps to reach TACK mode and select tack direction.
Pressing PILOT to accept and start the tack.
Using PORT/STARBOARD keys for 1° or 10° course changes.
Using STANDBY to return to manual steering.
Steps to access the "CHANGE PAGES" menu and select a page.
Options to change content, layout, or page visibility.
How to select and accept different layout options for a page.
How to select and change data elements and their types on a page.
How to toggle the visibility setting for data pages.
Steps to access "PILOT SETTINGS" via the MENU.
How to switch between CLOCKWISE and ANTI-CLOCKWISE patterns.
Steps to access "PILOT SETTINGS" and "BOAT TYPE".
How to select POWER, FISHING, or SAIL types.
Steps to access "USER SETTINGS" via the MENU.
How to adjust settings like backlight, contrast, and time.
Steps to access "ALARMS" via the MENU.
How to select specific alarms to be reported by the controller.
How to select the type of alarm to be reported.
Using UP/DOWN keys to adjust local alarm threshold values.
Solutions for blank display and non-responsive autopilot.
Solutions for slow turns or overshooting due to gain settings.
Solutions for position data errors or waypoint advance failures.
Guidelines for routine checks, cable inspection, and display cleaning.
How to access dealer calibration screens via the MAIN MENU.
How to check hardware/software versions and perform a self-test.
Process to register the wireless controller to a basestation for secure operation.
Steps to de-register a handset and handle registration errors.
How to clear all settings by performing a factory reset.
Warnings regarding correct installation and electrical connections.
Importance of calibration and using the device as a navigation aid.
Key responsibilities for safe autopilot operation and crew knowledge.
Guidelines for handling the controller and avoiding extreme temperatures.
Explains RF energy transmission and reception by the controller.
Details FCC compliance and operational conditions.
Specifies the intended use and proper disposal of the product.
Conformance to EMC standards and guidelines for connecting other equipment.
 Loading...