66
FIG.15
9
4
2
3
9
4
2
3
8
8
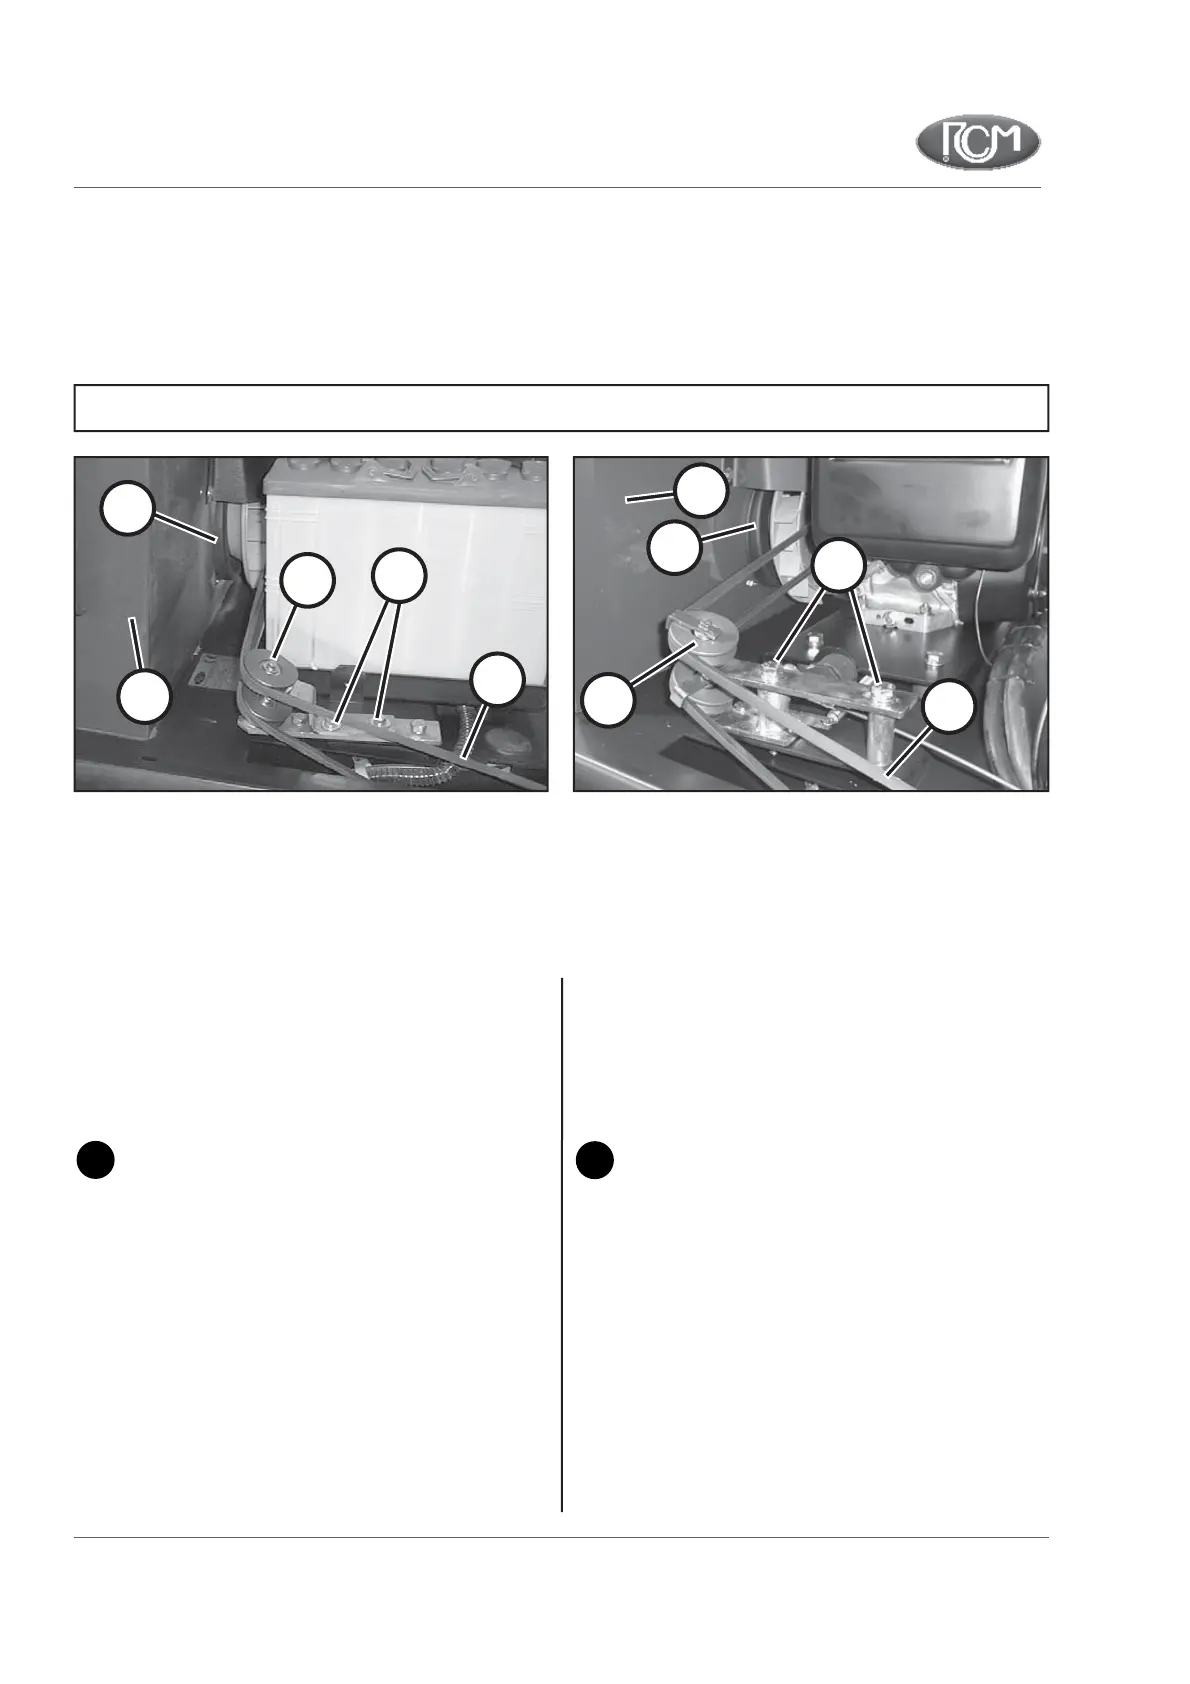
TENSIONE CINGHIA DI RINVIO
VERSIONE A BENZINA
VERSIONE ELETTRICA
Ogni 40 ore di lavoro controllare la cinghia 3 (fig. 11) di comando
della puleggia di rinvio 4 (fig.15). Se la cinghia è lenta, provvedere
alla tensione agendo nel seguente modo:
- allentare le viti 2 (fig.15) del tendicinghia;
- spostare verso la cinghia il tendicinghia fino ad ottenere la
corretta tensione;
- riavvitare le viti 2 (fig.15) del tendicinghia.
Attenzione!
Il tensionamento della cinghia deve essere eseguito
in modo corretto; non deve essere troppo tesa per
non creare carichi eccessivi ai cuscinetti.
Sostituzione cinghia di rinvio
Per la sostituzione di detta cinghia operare nel seguente modo:
- sollevare il cofano motore per accedere all’interno del vano
filtri 8 (fig.15);
- dall’interno del contenitore filtri svitare le viti di fissaggio del
convogliatore 9 di centraggio della ventola;
- allentare il tendicinghia;
- sostituire la cinghia 3;
- ritendere correttamente la cinghia 3 tramite il tendicinghia;
- rimontare il convogliatore di centraggio ventola 9;
- abbassare il cofano motore.
TRANSMISSION BELT TENSION
PETROL SWEEPER
ELECTRIC SWEEPER
Every 40 working hours, check the belt 3 (fig. 11) which drives the
transmission pulley 4 (fig.15). If the belt is slack, tension it procee-
ding as follows:
• Back off the screws 2 (fig.15) of the belt stretcher.
• Move the belt stretcher towards the belt until the correct
tension is obtained.
• Retighten the screws 2 (fig.15) of the belt stretcher .
The belt tension must be set correctly!
It must not be too taut as this will generate
excessive loads on the bearings.
Replacing the transmission belt
To replace this belt, proceed as follows:
• Lift the hood to reach the interior of the filter container 8
(Fig.15)
• From inside the filter container, undo the screws which fix
the fan centring conveyor 9.
• Back off the belt stretcher.
• Replace the belt 3.
• Return the belt 3 to the correct tension using the belt
stretcher.
• Replace the fan centring conveyor 9.
• Low the hood.
TENSADO DE LA CORREA DE TRANSMISSION
VERSIÓN GASOLINA
VERSION ELÉCTRICA
TENSION DE LA COURROIE DE RENVOI
BALAYEUSE À ESSENCE
BALAYEUSE ÈLECTRIQUE
SPANNEN DES UMLENKRIEMENS
TREIBSTOFF VERSION
ELEKTRISCHE VERSION
SPANNING TRANSMISSIERIEM
BENZINE VEEGMACHINE
ELEKTRISCHE VEEGMACHINE
ATOM SA