12
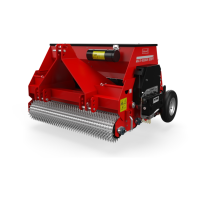
10.0 STARTING/STOPPING PROCEDURE
Before starting the seeding, check the machine for the following points:
* While checking the machine/tractor combination must be fully locked to prevent it from
driving/sliding/sinking away. The tractor engine must be switched off.
Check the seeding elements for damage and repair if necessary.
Check if the passage to the seeding elements is not blocked (e.g. funnels).
Check if the machine is not wet or moist, in particular the seeding device.
Check the seed spreading by rotating the running wheel 1 time
(counterclockwise).
Check if the drive is running smoothly.
Check the tyre pressure.
START SEEDING.
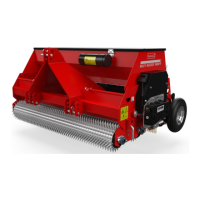
The starting procedure is VERY important. If this procedure is not followed exactly as
described below, serious damage may occur to the machine. The procedure is as follows:
1. Put the seed in the seed tray.
2. Set the required seed quantity using the change wheels (see section 5.0).
3. Drive to the place where you want to start.
4. Start with a driving speed of about 3 km/h (1.9 mph).
5. While driving lower the machine carefully and in a controlled way until the seeding
elements are cutting the ground.
6. If necessary, stop the cutting discs in the ground to adjust the working depth (see
section 4.0).
* While adjusting, the machine/tractor combination must be fully locked to prevent it from
driving/sliding/sinking away. The tractor engine must be switched off.
7. Increase the speed until the correct driving speed has been reached.
STOP SEEDING
1. Decrease the driving speed to about 3 km/h (1.9 mph).
2. While driving, raise the machine out of the ground.
3. Go to the following place and start again as described.
@ It is absolutely imperative that the above procedures are followed. If the machine is placed
in the ground while standing still, it may be seriously damaged.
@ While driving, lower the machine CAREFULLY AND IN A CONTROLLED WAY during
the tilling.
@ NEVER drive backwards when the running wheel is on the ground.