CLAMP
PLATE
STOPPING
POSITION
TO
ADJUST
CLAMP
PLATE
STOPPING
POSITION
TO
END
OF
THROAT
PLATE
1.
Operate
machine
to
a
point
where
the
end
of
the
Mat
at
(A) is
approaching
close
to
the
end
of
^e
Throat
Plate
at
(B).
Then
turn
Drive
Pulley
until
the
clearance
between
points
(A)
and
(B) is
approximately
1/32".
With
the
Clamp
Plate
in
this
position,
tip
machine
back
on Its hinges. Then loosen two Screws (G) and Nut (E).
Back
out
Screw
(D)
to
the
limit
Move
Bumper
(H) in
or
out
until it lightly
contacts
boss (C) of
the
cup
on the
Clamp Plate.
Tighten
Set
Screws
(G) securely.
Adjust
Screw (D)
to
contact
the
Bed Plate at (F)
and
tighten
Nut
(E) securely.
Fig. MC-13A
END
OF
THROAT
PLATE
2. When
Bumper
(H) has
been
adjusted
as
described
above,
the
forward movement
of
the
Clamp Plate is
blocked.
Therefore,
the
feed reversing
and
barring
action
must
be
timed
to
occur
at
this
point
To
make
this
adjustment,
proceed
as follows: With
the
Clamp
Plate still in
the
position
described
in Item 1, loosen
Nut
(I)
and
adjust So-ew (J) against Arm (K) so
that
Pawl
(L) overlaps
the
extension
of
Shifting Lever by approxi
mately
1/64".
Then hold Screw (J) with screwdriver and
tighten
Nut
(1) securely.
UIUIUUUIIUIIULI
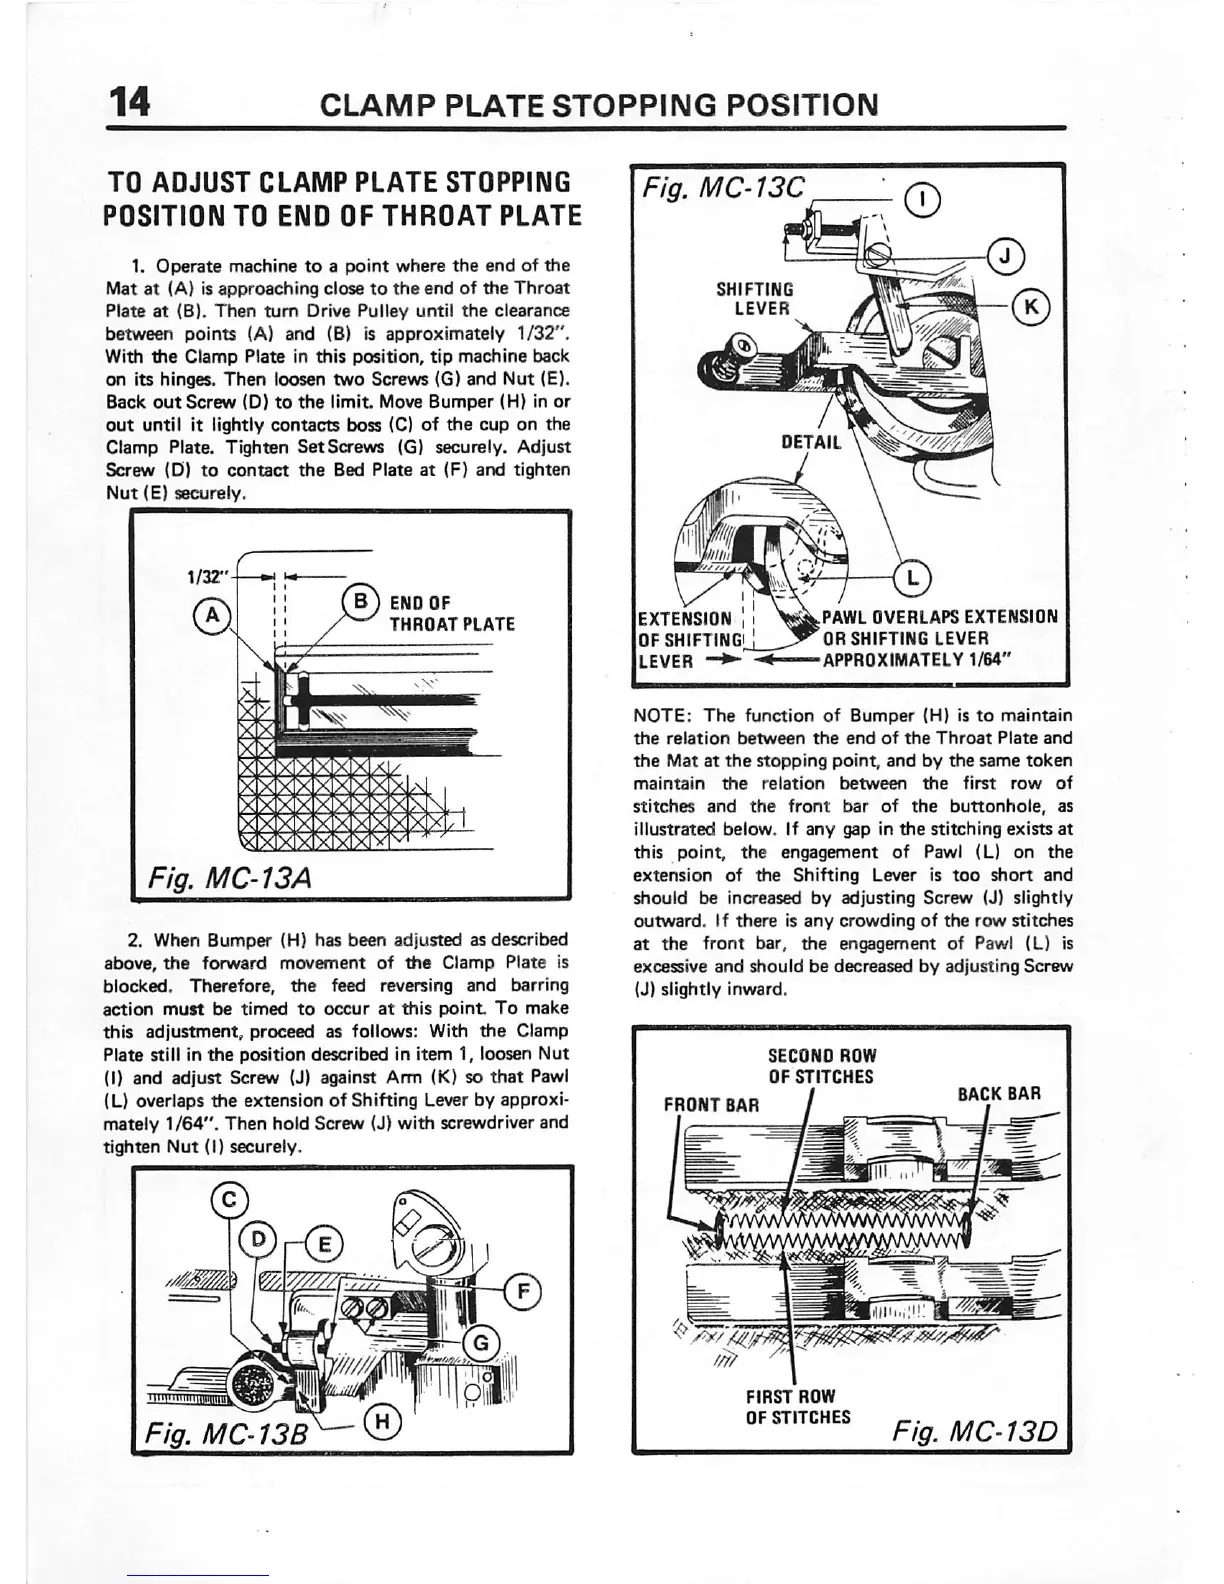
Fig.
MC'
13C
SHIFTING
EXTENSION
OFSHIFTINGj
LEVER
PAWL
OVERLAPS
EXTENSION
OR
SHIFTING
LEVER
APPROXIMATELY
1/64"
NOTE:
The
function
of
Bumper
(H) is
to
maintain
the
relation
between
the
end
of
the
Throat
Plate
and
the
Mat
at
the
stopping
point,
and
by
the
same
token
maintain
the
relation
between
the
first
row
of
stitches
and
the
front
bar
of
the
buttonhole,
as
illustrated
below.
If
any
gap in
the
stitching
exists
at
this
point,
the
engagement
of Pawl (L) on
the
extension
of
^e
Shifting
Lever
is
too
short
and
should
be increased by adjusting
Screw
(J) slightly
outward.
If
there
Is
any
crowding
of
the
row
stitches
at
the
front
bar,
^e
engagement of Pawl (L) is
excessive
and
should
be
decreased
by
adjusting
Screw
(J)
slightly
inward.
FRONT
BAR
SECOND
ROW
OF
STITCHES
/
FIRST
ROW
OF
STITCHES
BACK BAR
Fig.
MC-13D
 Loading...