EasyManua.ls Logo

Reece Series S2 - Page 94

Default Icon
125 pages
Print Icon
To Next Page IconTo Next Page
To Previous Page IconTo Previous Page
Loading...
OPERATING
INSTRUCTIONS
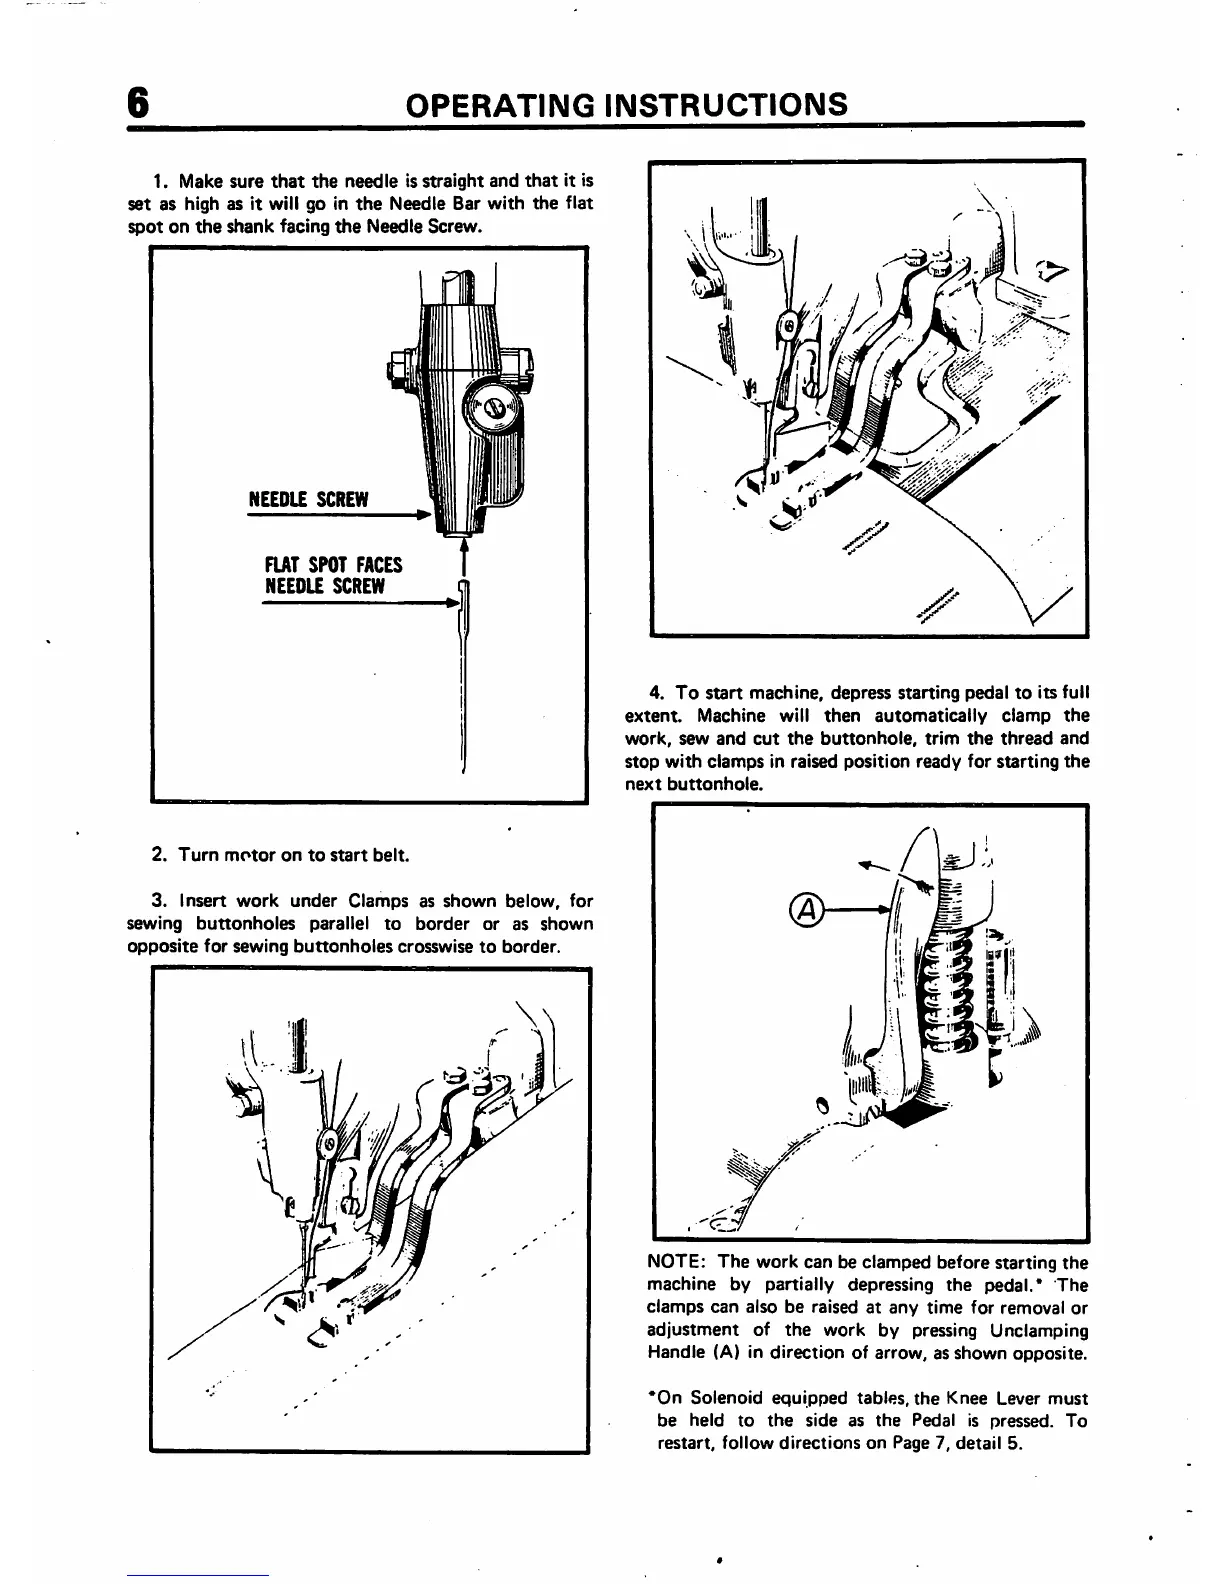
1. Make
sure
that
the
needle
is
straight
and
that
it is
set
as high as it will go in
the
Needle Bar
with
the
flat
spot
on
the
shank
facing
the
Needle
Screw.
NEEDLE
SCREW
FIAT SPOT
FACES
NEEDLE
SCREW
2.
Turn
motor
on
to
start
belt.
3.
Insert
work
under
Clamps
as
shown
below,
for
sewing
buttonholes
parallel
to
border
or
as
shown
opposite
for
sewing
buttonholes
crosswise
to
border.
i.
4.
To
start
machine,
depress
starting
pedal
to
its
full
extent.
Machine
will
then
automatically
clamp
the
work,
sew
and
cut
the
buttonhole,
trim
the
thread
and
stop
with
clamps
in raised
position
ready
for
starting
the
next
buttonhole.
NOTE: The work can be clamped before starting the
machine
by
partially
depressing
the
pedal.*
The
clamps
can also be raised at
any
time for removal or
adjustment
of
the
work by pressing Unclamping
Handle (A) in
direction
of arrow, as
shown
opposite.
*0n
Solenoid
equipped
tables,
the
Knee
Lever
must
be
held
to
the
side
as
the
Pedal
is
pressed.
To
restart,
follow
directions
on
Page 7,
detail
5.
From the library of: Superior Sewing Machine & Supply LLC