15
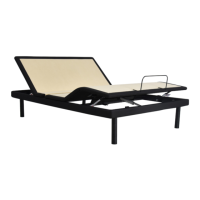
headboard bracket installation guide (optional)
Connect your headboard to the attachment plate using the
remaining long screws or hardware that came with your
headboard. The heads of the bolts will face outward. Use hex
key to tighten bolts.
STEP 1
STEP 2
STEP 3
a.) Align the hole in the bracket to the brass sleeve into
which the leg threads. Hold the bracket in place and
screw the leg into the base until it is snug. DO NOT
OVERTIGHTEN. Too much force may cause the leg to
spin freely.
b.) Align the tab with the hole in the frame (located towards
the foot of the base) and use a short bolt, washer and
wingnut to secure the bracket. Make sure the bolt is tight.
a.) Measure the distance between the mounting holes on the
headboard and install the T-Bracket to accommodate the
headboard.
b.) To install the T-Bracket, slide the T-Bracket through the
end of the headboard bracket. Align the flat side of the
T-Bracket plate to the mounting holes on the headboard.
Headboard Brackets are included for setup with your furniture.
A hex key is included with the accessory kit to complete installation.
c.) Secure T-Bracket in place by inserting two short screws
through top of bracket. Use hex key to tighten screws.