Do you have a question about the Reflexion Arc and is the answer not in the manual?
Read all instructions before using your Reflexion® Arc adjustable base.
Plug bed base into a surge protector for optimal safety and operation.
Do not tamper with control box, motors, or remote to avoid voiding warranty.
The Reflexion® Arc adjustable bases are designed solely for in-home use.
Do not allow children and small pets to play on or under the bed.
Free-release head and foot motors lower mattress with gravity, minimizing pinch points.
Lists input voltage, output voltage, and wattage for the adjustable base.
Lift motors: 2 min operation per 18 min period. Massage motors: 30 min max continuous.
Recommended weight limits for the Reflexion® Arc are: Twin Long / Full / Queen / 850 pounds.
Instructions for cleaning and maintaining the fabric of the bed base.
Information regarding compliance with FCC Rules for digital devices.
Lists all electronics and components attached to or under the base for installation.
Lists components required for headboard bracket installation.
Lists optional parts not included with the base, such as surge protectors and batteries.
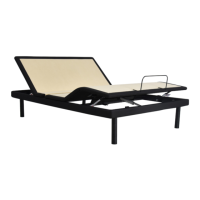
Diagram illustrating the location of key components like head/foot motors, USB ports, and control box.
Schematic illustrating the connections between the remote, control box, motors, and other components.
Prepare the base box, remove from packaging, and install the legs.
Connect the power cord to the power supply and position it for use.
Details for split unit installation and attaching the battery backup strap.
Flip base, install remote batteries, test functions, and install retainer bar.
Details on the remote control and its pairing to the adjustable base.
Explains the Head Zone, Foot Zone, and All Off massage controls on the remote.
Explains base adjustment controls and preset positions like Zero-G and Flat.
Instructions for operating underbed lighting and reprogramming preset positions.
Steps to re-pair the remote control to the adjustable base if it becomes unpaired.
Instructions to enable and disable the Child Lock feature on the remote control.
Explains the USB ports and how to use the slider to toggle between Type-A and Type-C.
Details the standard USB port and the smaller USB port for charging devices.
Instructions for connecting the battery backup strap to batteries and the control box.
Note to detach the battery backup strap after the emergency is over to prevent battery drain.
Explains that connecting straps are provided to secure bases together in a split setup.
Steps for attaching the connecting straps to the legs to secure two bases together.
Explains how the Sync Cord connects two control boxes for synchronized operation.
Steps to connect the Sync Cord between control boxes for base synchronization.
Notes on how to re-sync mechanical positions if bases become mismatched.
States that headboard brackets are included and require a hex key for installation.
Steps for attaching brackets to the base, installing T-brackets, and connecting the headboard.
Steps to check wired connections, control box light, reset components, and test outlets.
Check remote batteries, Child Lock status, and remote-to-base pairing.
Details Sealy's warranty for Reflexion® Arc, covering parts and labor for specific periods.
Covers 3 years full parts/labor, 2 years parts only, and 25 years for the frame.
Excludes damage from misuse, wear, unauthorized repair, or exceeding weight restrictions.
Addresses proof of purchase, unauthorized third-party sales, and transit damage.
Provides instructions for issues, serial number reference, and customer service contact number.
| Brand | Reflexion |
|---|---|
| Model | Arc |
| Category | Indoor Furnishing |
| Language | English |