6
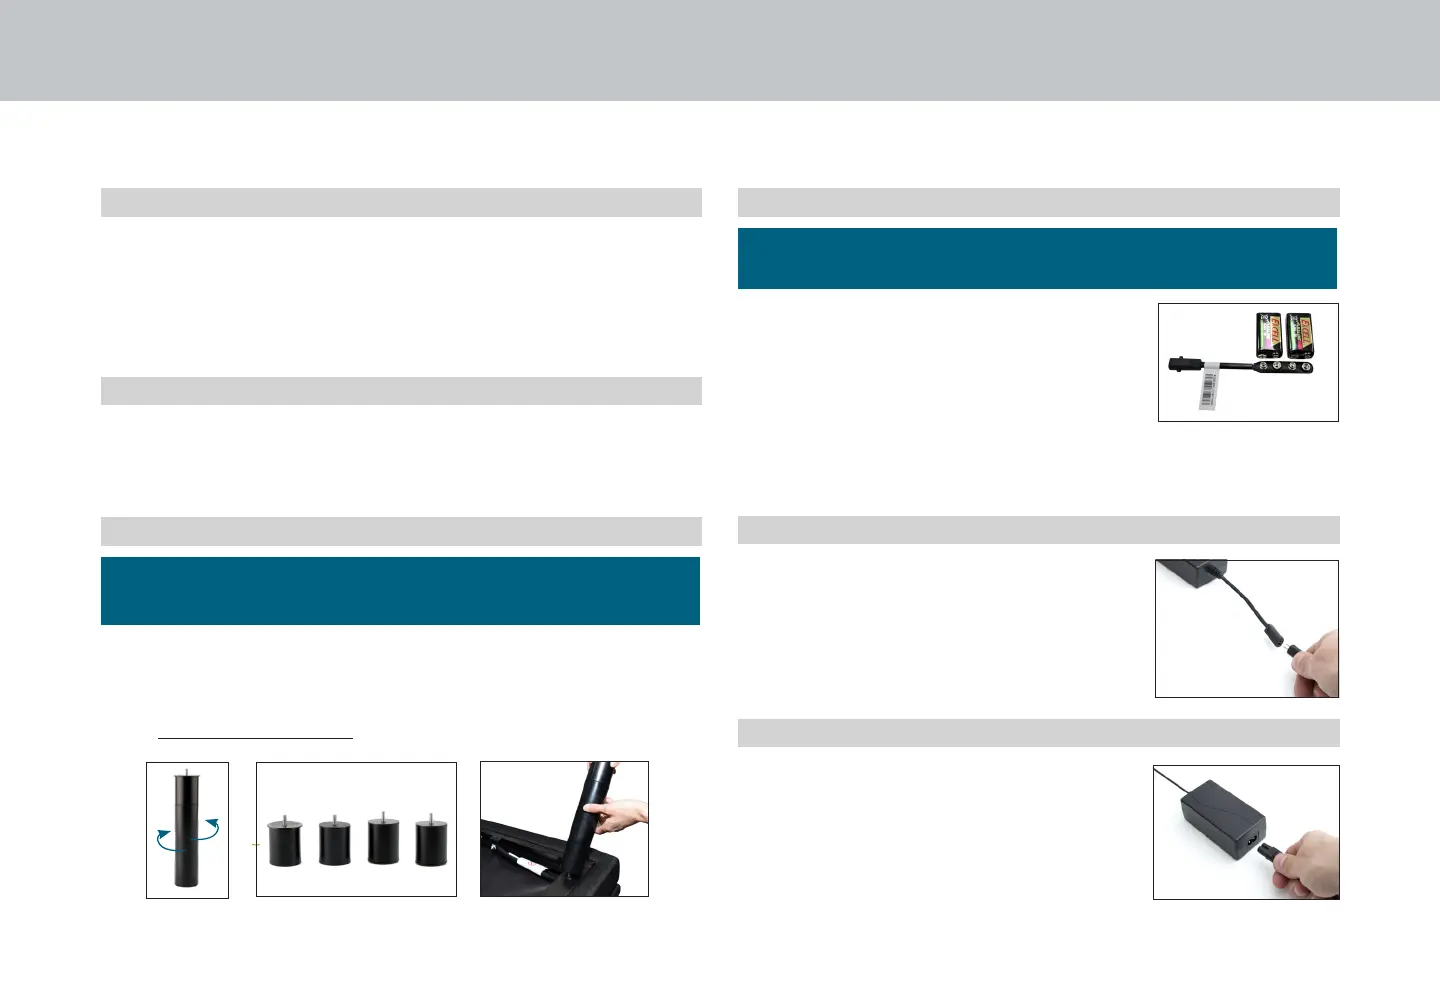
Legs are shipped fully assembled. Alternative heights in 3"
increments can be achieved by removing leg segments.
To install the legs, thread the leg into frame, and tighten by
hand. Do not over tighten.
installation guide
Always use two people when setting up the base.
STEP 3
STEP 4
STEP 5
STEP 6
Uncoil input power cord (connected
to control box's power port) and plug
into power supply.
If installing a split unit, see page 13-14.
To install headboard brackets,
see instructions on page 15.
Uncoil the power cord and connect to
the power supply. Place power supply
on the ground and extend from the
base. Ensure that the power supply and
all attached cords are directed toward
the desired surge protector.
For customer service call: 1-800-268-4414
It is recommended to leave the
battery backup strap attached to the
power supply for use when needed in
an emergency power outage.
Two 9V batteries (not included) will
be required for its use. 9V batteries
should be removed from strap when
not in use.
STEP 1
STEP 2
Place the bed base box in a desired location with the
bottom of the box facing up.
Remove the binding straps and packing materials, making
sure not to puncture the box with any sharp objects.
Remove the bed base from the box keeping the bottom of
the base facing upwards.