LRI4E / HRI4E Direct Vent Gas Insert | 49
|
49
maintenance
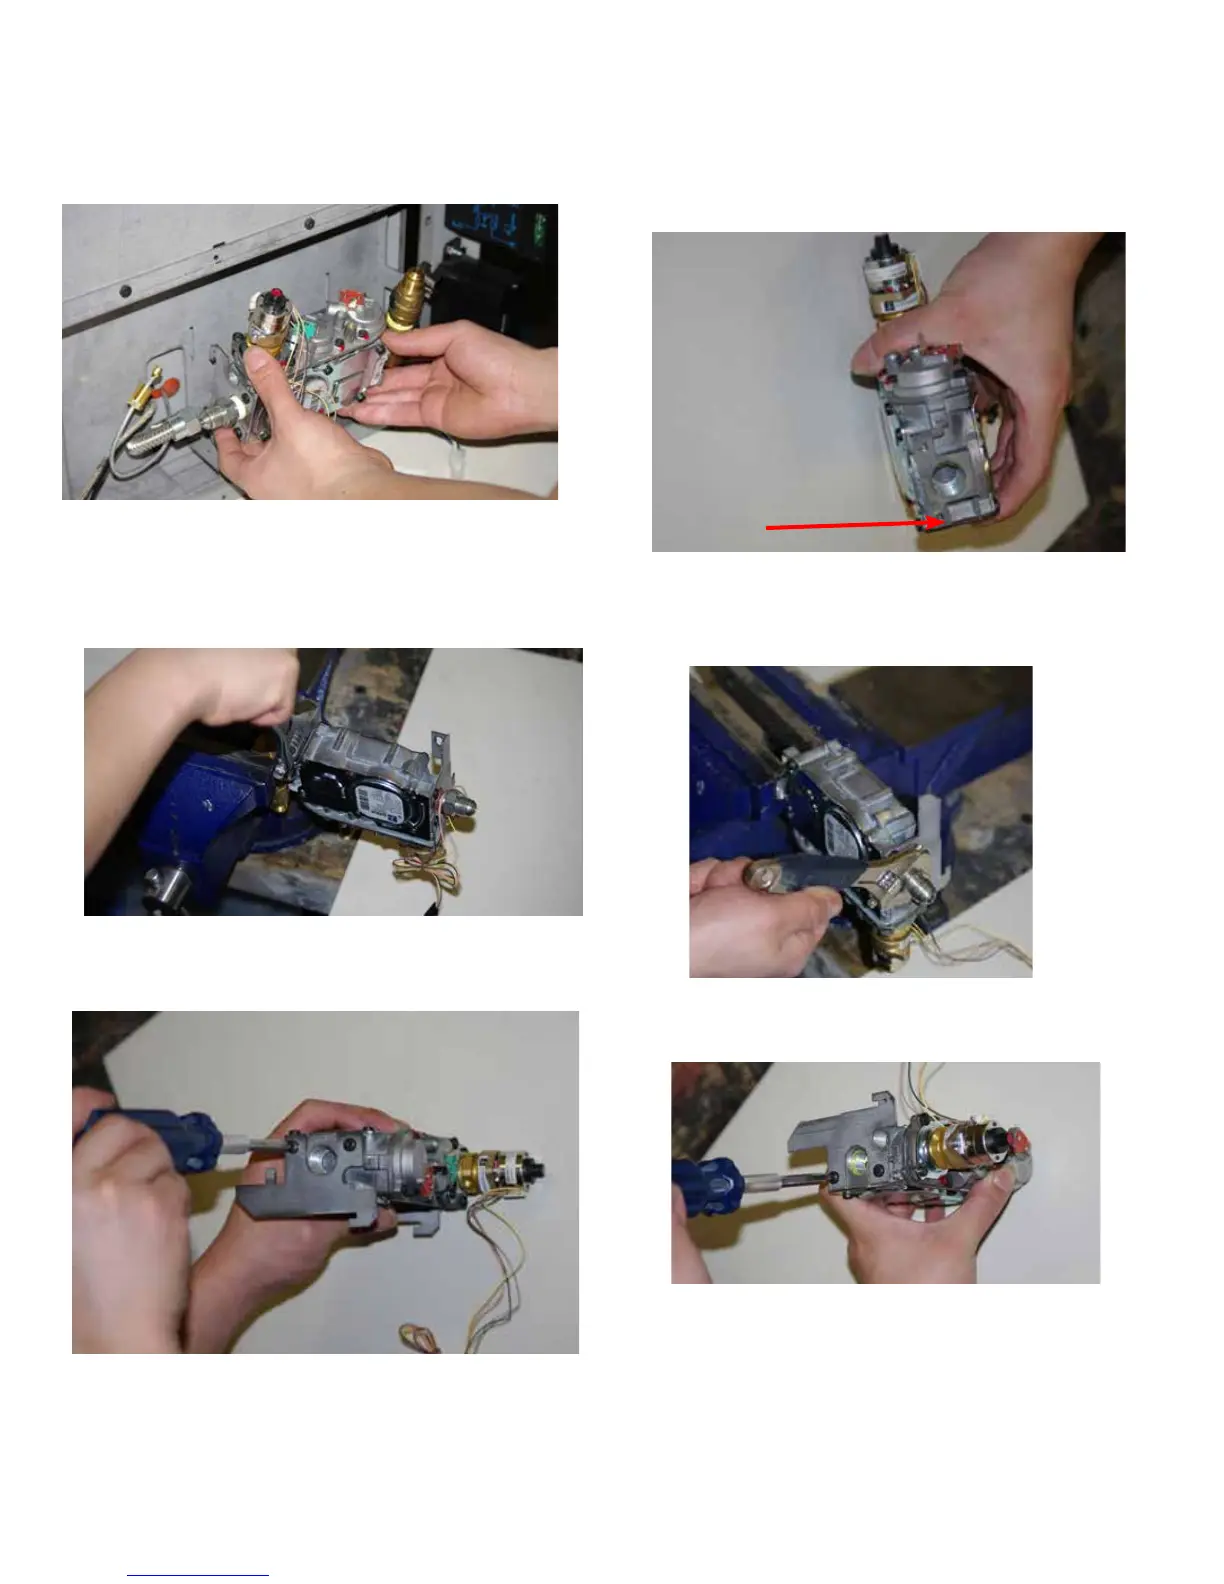
8) Remove the Gas Valve by lifting upwards and outwards.
9) Secure the Valve Assembly by the 90 Elbow Fitting in a sturdy table vice.
Using a crescent wrench, loosen the valve from the Elbow tting.
** Do not place the valve in the vice by any other method than what is
shown. Holding the Valve in the vice will damage the Gas Valve and may
cause malfunction. **
10) Remove the 2 screws that hold the Right Side Valve Mounting Bracket
onto the Valve.
11) There is a provision in the Valve body casting that is designed to be
used as a gripping point for assembly with other components. This is
the portion of the valve that can be placed in a machine vice.
12) Place the Gas Valve into the machine vice using the provision as
described above. Do not over tighten the vice. Remove the Flare Fitting
from the gas outlet side of the valve.
13) Remove the 2 screws that secure the left side valve mounting bracket
from the gas valve.
14) Replace the gas valve with the new unit and re-assemble by reversing
disassembly steps 2-13.
15) Reconnect the gas and electrical supply to the unit. Once the unit has
be re-red, use a soapy water mixture to check all ttings and gas sup-
ply lines for gas leaks.