Doc ID: 191-7913A
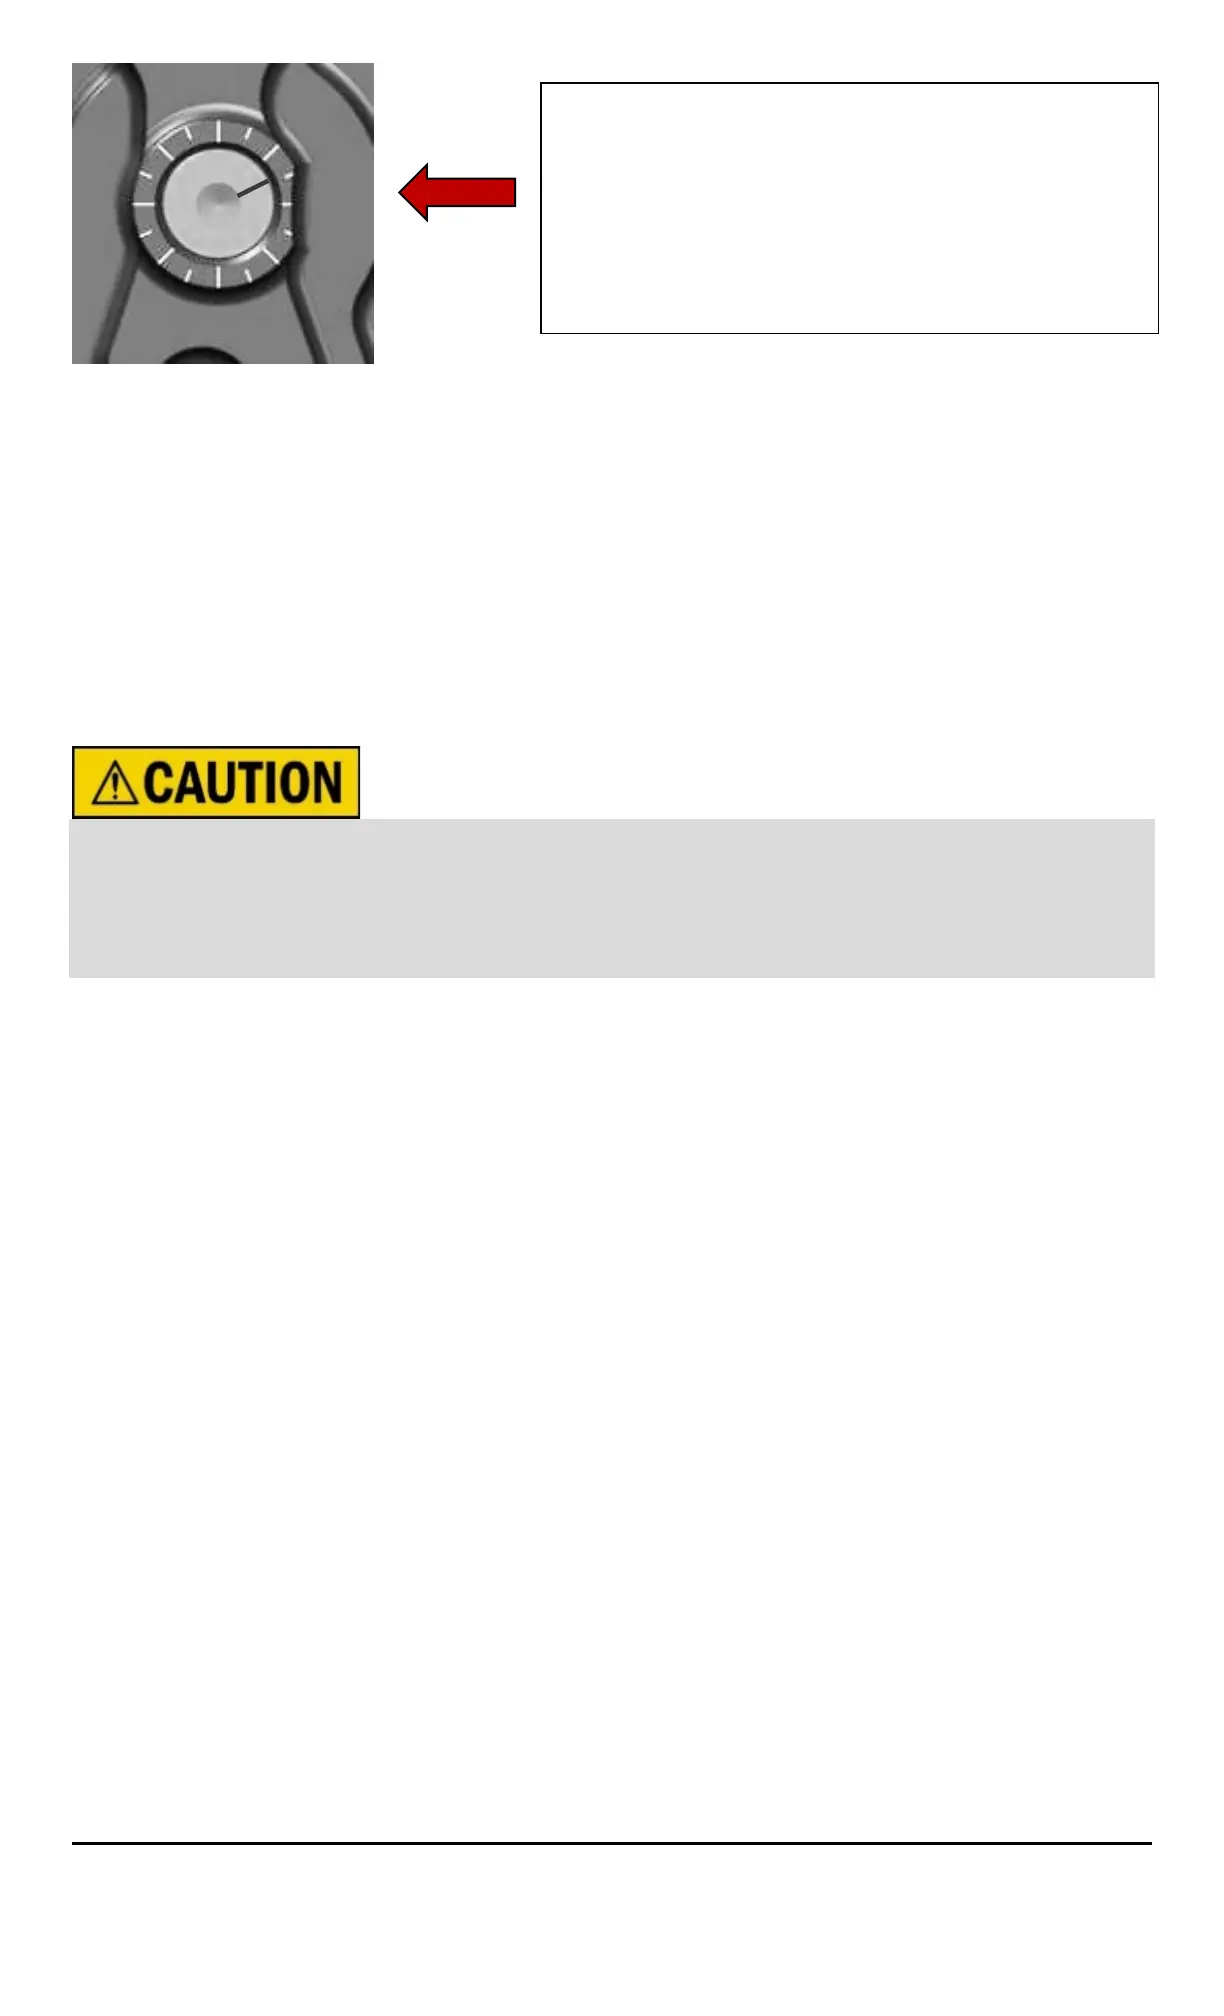
d) Use a 4 mm hex key to turn the adjuster screw
clockwise 1 full turn + 2 tick marks from your starting
point. This may NOT be your final setting, but it is a
beginning adjustment for finding the correct setting.
e) Continue with Step 2 to check for Free Play Gain.
Do not ride your bike without the adjusting the installed
gap. You will not be able to disengage the clutch until
you set the installed gap.
Step 2: Learn how to check Free Play Gain
The proper installed gap is verified by checking Free Play
Gain.
Correct Free Play Gain = Correct installed gap
If you are familiar with checking Free Play Gain, check for
Free Play Gain then skip to the “Adjust the Installed Gap”
section.
If Free Play Gain is new to you, follow the instructions below
to help you learn this important step. You can also view the
video entitled “How to Check Free Play Gain” on our website
at www.rekluse.com/support/videos.
Optimal Free Play Gain yields 1/8”-1/4” (3 mm-6 mm) of
clutch lever movement, measured at the ball end of the
Use the tick marks on the
cylinder and the etch mark on
the screw to remember the
starting point for adjusting the