Renesas RA Family EK-RA6M4 – Quick Start Guide
R20QS0016EG0101 Rev.1.01 Page 10 of 32
Nov.17.20
4.2 Running the Quick Start Example Project
To run the Quick Start example project, use the following instructions:
1. On power up or RESET, the three user LEDs will take on the following states:
LED1 Blue - Blinking at 1 Hz frequency and at 10% intensity
LED2 Green – Steady, full intensity
LED3 Red – Off
Note: The debug LED (LED5) will blink or light up orange; this can be ignored for now.
2. Press the user button (S1) on the EK-RA6M4 board to change the intensity of the user LED1. With every
press of the user button (S1), the intensity will switch from 10% to 50% to 90% and cycle back.
3. Press the user button (S2) on the EK-RA6M4 board to change the blinking frequency of the user LED1
(blue). With every press of the first user button (S2), the frequency will switch from 1 Hz to 5 Hz to 10 Hz
and cycle back.
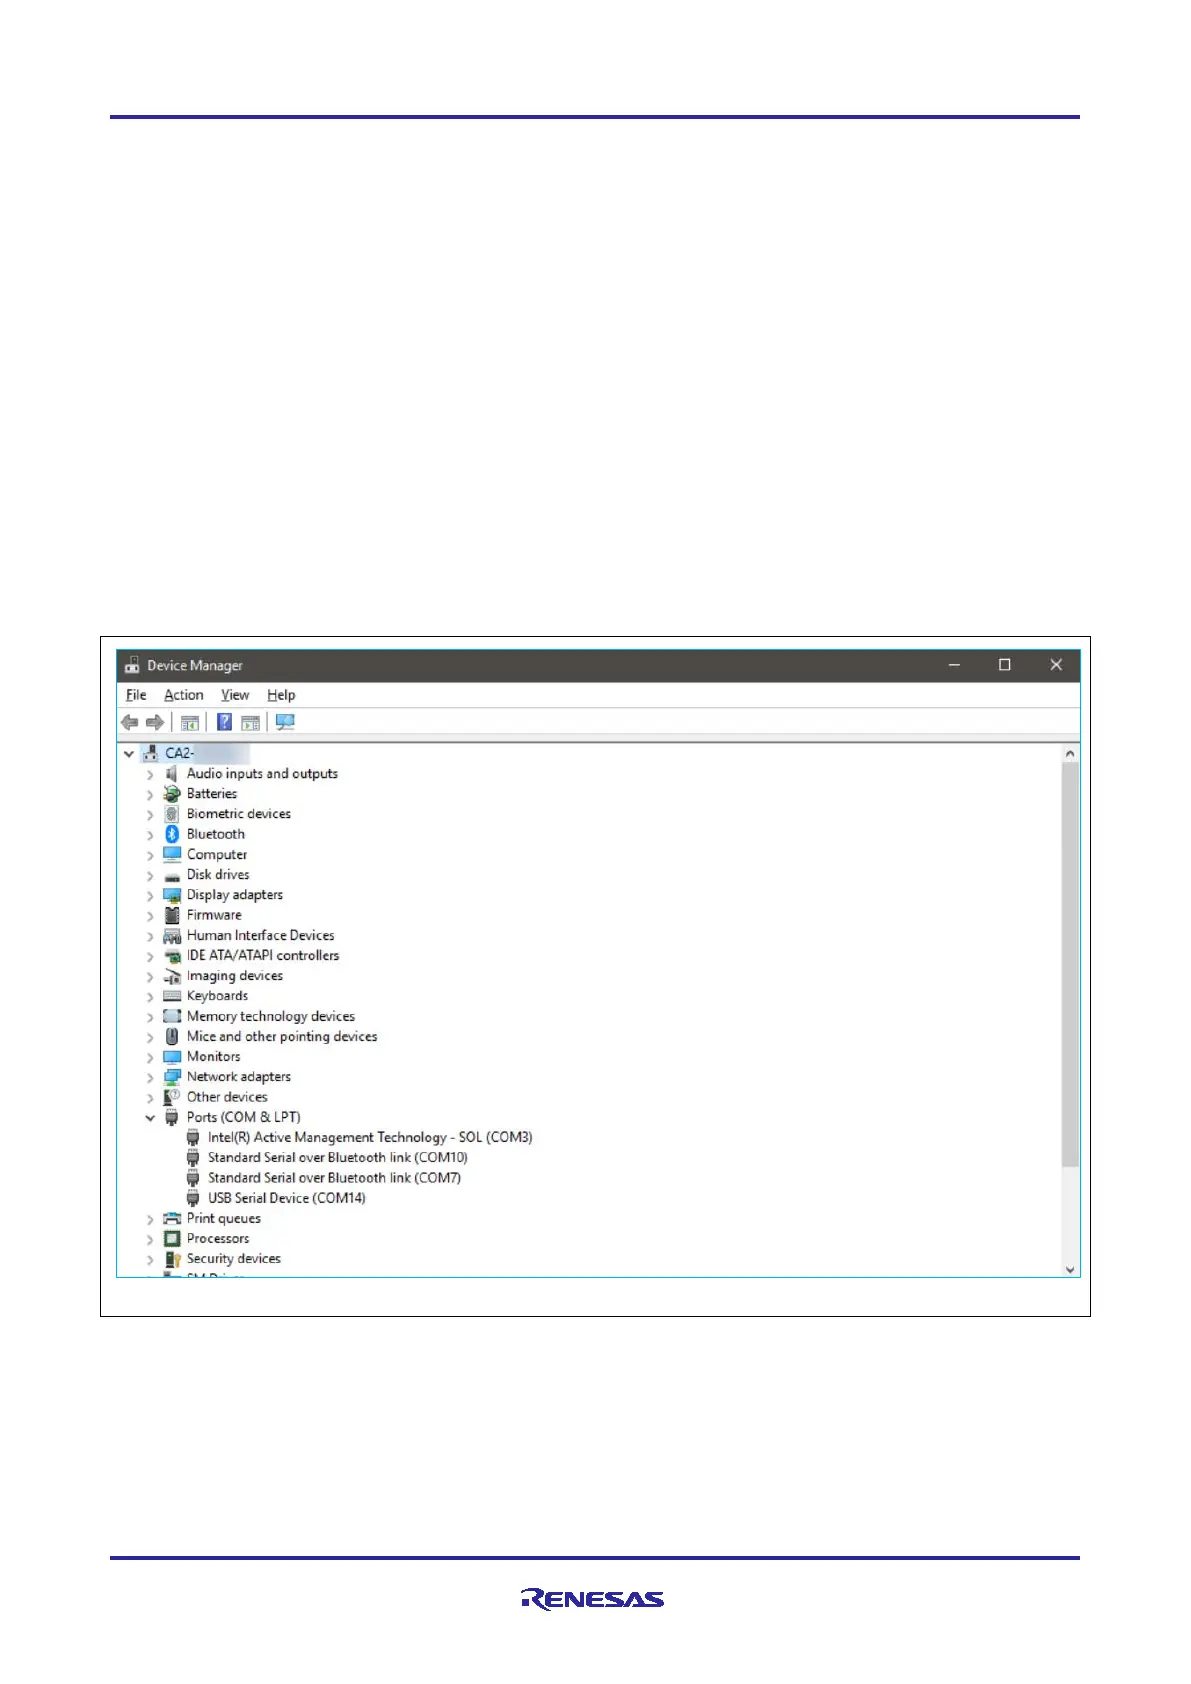
4. On the host PC, open Windows Device Manager. Expand Ports (COM & LPT), locate USB Serial
Device (COMxx) and note down the COM port number for reference in the next step.
Note: USB Serial Device drivers are required to communicate between the EK-RA6M4 board and the
terminal application on the host PC.
-
Figure 4. USB Serial Device in Windows Device Manager

 Loading...


